# Add Account Members
Source: https://docs.sandbox.paxos.com/api-reference/endpoints/account-members/add-account-members
post /identity/account-members
Add one or more account members to a given account.
The account members added by this API do not affect existing account members. For example,
if an account has two members, and one member is added using this API, then the account will
end up with three members.
For more information on properties of account members, see [Account Members](#account-members).
# Overview
Source: https://docs.sandbox.paxos.com/api-reference/endpoints/account-members/overview
Account Members allow you to associate an Identity with an Account on our Platform.
Each Account can be linked to multiple Identities, which supports Joint Accounts (where two Identities have the ability
to transact against a single Profile).
Account members are effectively immutable. In order to update an account member,
clients should remove then re-add the account member with the desired state.
The API requires clients to have write access on the account and all identities
associated with the account.
# Remove Account Member
Source: https://docs.sandbox.paxos.com/api-reference/endpoints/account-members/remove-account-member
delete /identity/account-members/{id}
Removes an account member from an account.
# Create Account
Source: https://docs.sandbox.paxos.com/api-reference/endpoints/accounts/create-account
post /identity/accounts
Create an account for a given identity, via the `identity_id` field.
This identity is the primary owner of the account for all tax-related purposes.
To track user balances using Paxos [Profiles](#tag/Profiles), use `create_profile=true` when creating the account.
Once an account has been created, it is not possible to associate it with a [Profile](#tag/Profiles).
### Account Members
In addition to the primary owner, other identities may be associated with the account, by using `members`.
The identity on the account is treated as a BENEFICIAL_OWNER.
To add a financial advisor to an account, add a member with the FINANCIAL_ADVISOR role.
#### Example
This example request creates a joint account for John and Jane Doe. John has identity_id=82c338f4-3cb7-4d9b-be2a-4b077c82ee3a,
and Jane has identity_id=0f5d8475-33f3-4ebd-88a0-66dedc2581c1. John is the primary owner of the account for tax-purposes, but Jane
is a full beneficial owner.
Additionally, this account has an associated financial advisor with identity_id=0d26f878-298e-4d47-81be-cdf4e982a3d3.
### Fields
Any fields not listed are forbidden in this request.
Field | Notes
---|---
identity_id | Required
description | Optional
metadata | Optional
ref_id | Optional
members | Optional
# Get account
Source: https://docs.sandbox.paxos.com/api-reference/endpoints/accounts/get-identityaccounts
get /identity/accounts/{id}
# List Accounts
Source: https://docs.sandbox.paxos.com/api-reference/endpoints/accounts/list-accounts
get /identity/accounts
List accounts with pagination. Every response will contain a `next_page` field,
as long as the end of the list has not been reached. Pass this value into the `page_cursor` field of the next request
to retrieve the next page of results.
# Overview
Source: https://docs.sandbox.paxos.com/api-reference/endpoints/accounts/overview
Accounts connect Identities (persons or institutions) to Profiles (asset balances).
## Key Features
* **Balance Management**: Track and manage profile balances via [Subledgering](/guides/crypto-brokerage/ledger-type#fiat-and-crypto-subledger)
* **Joint Account Support**: Link multiple Identities to a single Account for shared on platform balance
Accounts are required for all Identity API integrations.
# Update Account
Source: https://docs.sandbox.paxos.com/api-reference/endpoints/accounts/update-account
put /identity/accounts
This enables you to update an existing account with new information. Please refer to the following
table for fields that can be updated via this endpoint.
Field | Notes
---|---
account.id | Required
account.description | Optional
account.ref_id | Optional
account.metadata | Optional. This will overwrite any existing metadata added to the account.
account.members | Optional. The only roles that can be added/removed are `FINANCIAL_ADVISOR` or `AUTHORIZED_USER.` You must always specify the full members object as we do not currently support differential member updates.
set_user_disabled | Optional. Setting this to `true` will disable the account, limiting its ability to be used within the Paxos platform.
#### Example Requests
#### Disabling an account
### Adding an account member
To retain the existing account members and add a new account member, the `members` field must contain the existing account members and the
new member. The below example adds an `AUTHORIZED_USER` to the account.
In order to add account members while leaving existing account members unaffected, clients
should use the [Add Account Members](#operation/AddAccountMembers) API.
### Removing an account member
To remove an existing account member and retain other needed members, the `members` field must contain
the existing account members without the account member you'd like to remove. The below example removes an `AUTHORIZED_USER` from the account.
Note, this API requires the `members` array to have at least one element. In order to delete all members
from an account, clients should use the [Delete Account Member](#operation/DeleteAccountMember) API.
### Updating an account members' roles
To update an account members' roles, the `members` field must contain all the existing members with their roles along
with the additional role that you'd like to add or remove. The below example adds the `FINANCIAL_ADVISOR` role to an member that is already a `BENEFICIAL_OWNER`.
# List API Credentials
Source: https://docs.sandbox.paxos.com/api-reference/endpoints/api-credentials/list-api-credentials
get /api-creds/credentials
List all API credentials that have been created.
# Overview
Source: https://docs.sandbox.paxos.com/api-reference/endpoints/api-credentials/overview
The API Credentials API allows clients to create and manage API credentials for accessing Paxos services.
## Available Endpoints
* [List API Credentials](/api-reference/endpoints/api-credentials/list-api-credentials)
# Overview
Source: https://docs.sandbox.paxos.com/api-reference/endpoints/crypto-deposits/overview
For Paxos Global PTE Ltd users, update or reject a crypto deposit that does not contain the required travel rule information.
For [Paxos Global PTE Ltd](https://help.paxos.com/hc/en-us/articles/25928845778068) users, update or reject a crypto deposit that does not contain the required travel rule information.
Deposits with the `NEEDS_INFO` status require additional sender information before they can be processed.
## Required Information
* **For individuals**: Both first and last name are required.
* **For institutions**: The institution name is required.
If a deposit is rejected, the funds will no longer be available.
## Learn More
Learn more about travel rule updates in the [Travel Rule Help Center](https://help.paxos.com/hc/en-us/articles/25422999706900).
# Reject Crypto Deposit
Source: https://docs.sandbox.paxos.com/api-reference/endpoints/crypto-deposits/reject-crypto-deposit
post /transfer/crypto-deposits/{id}/reject
Reject a crypto deposit which is waiting for required travel rule information about the originator address.
If the rejected deposit has any status other than `NEEDS_INFO`, the request will return an error.
Only the creator of the crypto deposit can reject it.
# Update Crypto Deposit
Source: https://docs.sandbox.paxos.com/api-reference/endpoints/crypto-deposits/update-crypto-deposit
post /transfer/crypto-deposits/{id}/update
Crypto deposits that do not meet the minimum travel rule requirements are blocked.
To update a crypto deposit, provide the required travel rule information about the originator address.
# Create Crypto Withdrawal
Source: https://docs.sandbox.paxos.com/api-reference/endpoints/crypto-withdrawals/create-crypto-withdrawal
post /transfer/crypto-withdrawals
Withdraw a cryptocurrency asset to a specified destination address.
# Create Deposit Address
Source: https://docs.sandbox.paxos.com/api-reference/endpoints/deposit-addresses/create-deposit-address
post /transfer/deposit-addresses
Create a deposit address on a blockchain network for depositing to a profile.
# List Deposit Addresses
Source: https://docs.sandbox.paxos.com/api-reference/endpoints/deposit-addresses/list-deposit-addresses
get /transfer/deposit-addresses
List all deposit addresses, optionally filtering and paging the results.
# Get Event
Source: https://docs.sandbox.paxos.com/api-reference/endpoints/events/get-event
get /events/{id}
Get an Event by its (event) id, the event must have been created by the system and you must be the owner of the
the event, you can get an event id by either listing events or via a webhook integration.
# List Events
Source: https://docs.sandbox.paxos.com/api-reference/endpoints/events/list-events
get /events
This endpoint enables you to fetch a list of events that have been created by the system.
You can use query parameters to filter the results by the `created_at` time using `created_at.lt`, `created_at.gt`, etc. and you can
`limit` the number of events returned.
Using `created_at` and `limit` together will allow you to paginate through all events owned by you.
Events returned will always be order in `created_at` ascending order.
# Overview
Source: https://docs.sandbox.paxos.com/api-reference/endpoints/events/overview
Retrieve events from your Paxos account
The Events API provides access to event data from your Paxos account. Events are generated when certain actions occur within your account, such as identity status changes, document requirements, or KYC refresh activities.
Events are immutable records of state changes that occurred in your account. They provide a reliable way to track the history of important activities and integrate with your systems using webhooks.
# Create Crypto Withdrawal Fee
Source: https://docs.sandbox.paxos.com/api-reference/endpoints/fees/create-crypto-withdrawal-fee
post /transfer/fees/crypto-withdrawal
Get a guaranteed fee for the given currency, valid for a period of time.
Specify exactly one of `amount` or `total`, otherwise an error is returned.
The [Create Crypto Withdrawal](#operation/CreateCryptoWithdrawal) request that uses the guaranteed fee endpoint
must specify an `amount` less than or equal to the guaranteed fee `amount`, otherwise the withdrawal is rejected.
# Create Fiat Account
Source: https://docs.sandbox.paxos.com/api-reference/endpoints/fiat-transfers/create-fiat-account
post /transfer/fiat-accounts
Create an account to initiate a fiat withdrawal.
For U.S. wires, set `fiat_network_instructions` > `wire` > `routing_details` > `routing_number_type` to `ABA`. For international (SWIFT) wires, set `fiat_network_instructions` > `wire` > `routing_details` > `routing_number_type` to `SWIFT`.
For CUBIX, set `fiat_network_instructions` > `cubix` > `account_id`, and do not specify `routing_number_type`. For CUBIX, the `account_id` is the CUBIX account ID.
# Create Fiat Deposit Instructions
Source: https://docs.sandbox.paxos.com/api-reference/endpoints/fiat-transfers/create-fiat-deposit-instructions
post /transfer/fiat-deposit-instructions
Create instructions for depositing fiat.
# Create Fiat Withdrawal
Source: https://docs.sandbox.paxos.com/api-reference/endpoints/fiat-transfers/create-fiat-withdrawal
post /transfer/fiat-withdrawals
Withdraw fiat to the given destination.
# Delete Fiat Account
Source: https://docs.sandbox.paxos.com/api-reference/endpoints/fiat-transfers/delete-fiat-account
delete /transfer/fiat-accounts/{id}
Delete a Fiat Account.
Once a Fiat Account is deleted, transfers cannot be initiated to it.
# Get Fiat Account
Source: https://docs.sandbox.paxos.com/api-reference/endpoints/fiat-transfers/get-fiat-account
get /transfer/fiat-accounts/{id}
Get a single Fiat Account by ID.
In the polling workflow, this endpoint can be called to monitor a FiatAccount's status.
The Fiat Account response includes the full account number, beneficiary name and address details.
# Get Fiat Deposit Instructions
Source: https://docs.sandbox.paxos.com/api-reference/endpoints/fiat-transfers/get-fiat-deposit-instructions
get /transfer/fiat-deposit-instructions/{id}
Get instructions for depositing fiat using a Paxos Fiat Deposit Instructions ID.
The Fiat Deposit Instructions ID (`id`) is provided in the response of the [Create Fiat Deposit Instructions](#operation/CreateFiatDepositInstructions).
# List Fiat Accounts
Source: https://docs.sandbox.paxos.com/api-reference/endpoints/fiat-transfers/list-fiat-accounts
get /transfer/fiat-accounts
List all Fiat Accounts, optionally filtering and paging the results.
The response includes an abbreviated `FiatAccount` object:
- Beneficiary name and address details are excluded.
- Only the last four (**4**) digits of the account number are included.
Use [Get Fiat Account](#operation/GetFiatAccount) to retrieve the complete `FiatAccount` object.
The paginated results default to the maximum limit of 1,000 Fiat Accounts, unless otherwise specified with the `limit` parameter.
Every paginated response contains a `next_page` field until the last page is reached.
Pass the `next_page` value into the `page_cursor` field of the next request to retrieve the next page of results.
# List Fiat Deposit Instructions
Source: https://docs.sandbox.paxos.com/api-reference/endpoints/fiat-transfers/list-fiat-deposit-instructions
get /transfer/fiat-deposit-instructions
Return the associated Fiat Deposit Instructions matching the search criteria for the current Account.
The paginated results default to the maximum limit of 1,000 Fiat Deposit instructions, unless otherwise specified with the `limit` parameter.
Every paginated response contains a `next_page` field until the last page is reached.
Pass the `next_page` value into the `page_cursor` field of the next request to retrieve the next page of results.
# Overview
Source: https://docs.sandbox.paxos.com/api-reference/endpoints/fiat-transfers/overview
The Fiat Transfers API allows clients to deposit and withdraw fiat via Wire (Fedwire and SWIFT) and CUBIX networks.
The supported asset is USD.
## Available Endpoints
### For Deposits
* [Create Fiat Deposit Instructions](/api-reference/endpoints/fiat-transfers/create-fiat-deposit-instructions)
* [List Fiat Deposit Instructions](/api-reference/endpoints/fiat-transfers/list-fiat-deposit-instructions)
* [Get Fiat Deposit Instructions](/api-reference/endpoints/fiat-transfers/get-fiat-deposit-instructions)
### For Withdrawals
* [Create Fiat Account](/api-reference/endpoints/fiat-transfers/create-fiat-account)
* [List Fiat Accounts](/api-reference/endpoints/fiat-transfers/list-fiat-accounts)
* [Get Fiat Account](/api-reference/endpoints/fiat-transfers/get-fiat-account)
* [Delete Fiat Account](/api-reference/endpoints/fiat-transfers/delete-fiat-account)
* [Update Fiat Account](/api-reference/endpoints/fiat-transfers/update-fiat-account)
* [Create Fiat Withdrawal](/api-reference/endpoints/fiat-transfers/create-fiat-withdrawal)
# Update Fiat Account
Source: https://docs.sandbox.paxos.com/api-reference/endpoints/fiat-transfers/update-fiat-account
put /transfer/fiat-accounts/{id}
Change an existing value or add a new value on one or more fields for the given Fiat Account and return the modified Fiat Account in `PENDING` status.
Update fields in **either** `fiat_account_owner.person_details` or `fiat_account_owner.institution_details`.
Attempts to convert the `fiat_account_owner` type results in an error.
Empty strings or null values are ignored.
Upon successful response, Paxos initiates an automated review of the requested changes and then either sets the status to `APPROVED` or `REJECTED`.
Occasionally, a manual review may be required.
Use [Get Fiat Account](#operation/GetFiatAccount) to check for status changes.
# Document Upload
Source: https://docs.sandbox.paxos.com/api-reference/endpoints/identity-documents/document-upload
put /identity/identities/{identity_id}/documents
This endpoint enables you to receive a URL to upload a document to Paxos for identity verification or enhanced due diligence purposes.
When uploading a document you must specify the document type. You will receive a
URL where you can upload the document using a POST request.
Requirements:
- Uploaded documents must be less than 100 MB in size
- Supported formats include PDF, JPG, and PNG
For more information on document requirements for enhanced due diligence, see [here](https://docs.paxos.com/identity/edd).
# List Identity Documents
Source: https://docs.sandbox.paxos.com/api-reference/endpoints/identity-documents/list-identity-documents
get /identity/identities/{identity_id}/documents
This endpoint enables you to get a list of all documents associated with an identity.
# Overview
Source: https://docs.sandbox.paxos.com/api-reference/endpoints/identity-documents/overview
The Identity Documents API allows clients to send documents to Paxos to validate identities during the KYC process.
Files can be updated multiple times by re-sending the document type for processing.
## Supported File Formats
We currently accept the following file formats:
* `pdf`
* `jpg`
* `png`
## Upload Process
Steps to upload a document are as follows:
1. Send a `PUT` request to `/identity/identities/{id}/documents` to get
the upload URL.
2. Send your document to the provided URL via a PUT request. Take the following example using curl:
```bash
curl --upload-file Proof_of_residence.jpg $URI
```
Uploaded document metadata will be available via `GET` request to `/identity/identities/{id}/documents`
# Create Identity
Source: https://docs.sandbox.paxos.com/api-reference/endpoints/identity/create-identity
post /identity/identities
Creates a new Person or Institution Identity on the Paxos Platform.
A successful response indicates that the identity has been created and is `PENDING` approval. The identity is only
available to use on the Platform once it is `APPROVED`. For a full description of statuses read the [status guide here](https://docs.paxos.com/identity/statuses).
For detailed guidance on which [fields are required](https://docs.paxos.com/identity/required-details) for your integration
or the [lifecycle of an Identity](https://docs.paxos.com/identity/statuses) on the platform, please read the [Identity Developer Guide](https://docs.paxos.com/identity).
# Get Identity
Source: https://docs.sandbox.paxos.com/api-reference/endpoints/identity/get-identity
get /identity/identities/{id}
Get an Identity by its (identity) id. You can only see identities created by you.
You can use the query parameter `include_details` to include identity details (`person_details` or `institution_details`) in
the response and the query parameter `include_institution_members` to include institution members in the response.
# List Identities
Source: https://docs.sandbox.paxos.com/api-reference/endpoints/identity/list-identities
get /identity/identities
This endpoint enables you to fetch a list of Identities.
You can use query parameters to filter the results returned by `created_at`, `updated_at`, `summary_status` and `identity_type`
Note that this endpoint supports pagination and returns a cursor token for fetching next pages.
# Overview
Source: https://docs.sandbox.paxos.com/api-reference/endpoints/identity/overview
An Identity represents a person or institution who is able to take actions on the Paxos Platform.
Depending on your integration type you might not need to create Identities for your end users.
Identities must pass a set of verifications and checks before they're able to transact on the Platform. Learn more
about getting started with Identity and managing their onboarding lifecycle in the [Identity Developer Guide](/guides/identity).
# Update Identity
Source: https://docs.sandbox.paxos.com/api-reference/endpoints/identity/update-identity
put /identity/identities/{id}
Updates an Identity, this action performs a delta of what is submitted in the update and the existing identity.
- Updating details (`person_details` or `institution_details`) might lead to the identity being re-verified (e.g. re-screening name changes), which
could impact the identity's ability to transact on the Platform.
- Setting `set_user_disabled` to `true` will make the Identity `DISABLED` (read [more here](https://docs.paxos.com/identity/statuses) on what this means)
- Setting `tax_details` will update all the tax details for the identity
- Setting `last_kyc_refresh_date` indicates this is not an adhoc-update, and instead an update for a [periodic kyc refresh](https://docs.paxos.com/identity/kyc-refresh)
Changing an Institution Identity to a Person and vice-versa is not supported.
# Add Institution Members
Source: https://docs.sandbox.paxos.com/api-reference/endpoints/institution-members/add-institution-members
post /identity/institution-members
Add one or more institution members to a given institution.
Adding new members doesn't affect existing members. For example, if an institution has three
members, and adds two members using this API, then the institution would end up with five total members.
For details on the properties that can be specified when creating institution members,
see [Specifying Institution Members and Their Roles](#specifying-institution-members-and-their-roles).
# Overview
Source: https://docs.sandbox.paxos.com/api-reference/endpoints/institution-members/overview
Institution Members allow you to associate persons with an institution on our Platform.
Each institution can have multiple members, with each member representing the relationship to a person identity.
When creating an institution identity, you must designate at least one institution member.
This requirement ensures we have complete information about the institution's ownership structure
and key personnel, which is necessary to onboard institutions.
# Remove Institution Member
Source: https://docs.sandbox.paxos.com/api-reference/endpoints/institution-members/remove-institution-member
delete /identity/institution-members/{id}
Removes an institution member from an institution.
# Create Internal Transfer
Source: https://docs.sandbox.paxos.com/api-reference/endpoints/internal-transfers/create-internal-transfer
post /transfer/internal
Transfer assets between two profiles belonging to the same customer.
# List Transfer Limits
Source: https://docs.sandbox.paxos.com/api-reference/endpoints/limits/list-transfer-limits
get /transfer/limits/utilizations
List all limits that apply to the given transaction type.
# Get Order Book
Source: https://docs.sandbox.paxos.com/api-reference/endpoints/market-data/get-order-book
get /markets/{market}/order-book
Retrieves the full list of bids and asks of the order book at individual price levels with resting quantities per level.
# Get Ticker
Source: https://docs.sandbox.paxos.com/api-reference/endpoints/market-data/get-ticker
get /markets/{market}/ticker
Retrieves order book statistics of the exchange over the last 24 hours and from midnight UTC until current time.
# List Markets
Source: https://docs.sandbox.paxos.com/api-reference/endpoints/market-data/list-markets
get /markets
Retrieves the set of current available markets for trading with details.
# List Recent Executions
Source: https://docs.sandbox.paxos.com/api-reference/endpoints/market-data/list-recent-executions
get /markets/{market}/recent-executions
Retrieves the list of 2000 most recent executions by all users to occur in the order book.
# Overview
Source: https://docs.sandbox.paxos.com/api-reference/endpoints/market-data/overview
Market data provides various parameters of the order book and historical order data.
# Create Monitoring Address
Source: https://docs.sandbox.paxos.com/api-reference/endpoints/monitoring-addresses/create-monitoring-address
post /rewards/monitor/address
Adds an address to be monitored for rewards distribution
Currently supporting only `ETHEREUM`, `SOLANA` & `INK` addresses are supported
# Get Monitoring Address
Source: https://docs.sandbox.paxos.com/api-reference/endpoints/monitoring-addresses/get-monitoring-address
get /rewards/monitor/address/{id}
Retrieves a monitoring address by id
# List Monitoring Address
Source: https://docs.sandbox.paxos.com/api-reference/endpoints/monitoring-addresses/list-monitoring-address
get /rewards/monitor/address
Retrieve a list of monitoring address
Filter by address, network or both to retrieve a single record
# Overview
Source: https://docs.sandbox.paxos.com/api-reference/endpoints/monitoring-addresses/overview
A Monitoring Address is a blockchain address that Paxos monitors daily for eligible stablecoin activity.
Paxos uses monitoring addresses to determine the amount of rewards your organization will earn. We recommend adding any addresses you expect to hold, receive, or mint Paxos stablecoins as a monitoring address in order to receive rewards for all of your qualifying on-chain activity.
## Important Timing
> Monitoring addresses must be added by month end (`23:59 UTC+0`) in order to earn rewards for that month. Addresses added after month end will start earning rewards for the following month.
## Availability
*These endpoints are only relevant for Global Dollar Network (GDN) partners.*
# Update Monitoring Address
Source: https://docs.sandbox.paxos.com/api-reference/endpoints/monitoring-addresses/update-monitoring-address
put /rewards/monitor/address/{id}
Updates a monitored address name
# Cancel Order
Source: https://docs.sandbox.paxos.com/api-reference/endpoints/orders/cancel-order
delete /profiles/{profile_id}/orders/{id}
Submits a cancellation request. A response indicates that the request has been acknowledged and provides no
guarantee the order has been cancelled.
# Create Order
Source: https://docs.sandbox.paxos.com/api-reference/endpoints/orders/create-order
post /profiles/{profile_id}/orders
For limit orders, create an order for buying or selling an asset:
- To buy, set `side = BUY` and set `base_amount` to the crypto amount you want to buy.
- To sell, set `side = SELL` and set `base_amount` to the crypto amount you want to sell.
For market orders, create an order for buying or selling an asset:
- To buy, set `side = BUY` and set `quote_amount` to the dollar amount you want to spend.
- To sell, set `side = SELL` and set `base_amount` to the crypto amount you want to sell.
There are five types of orders:
- Limit Orders: Buy or sell at a specified price or better. Execution not guaranteed. Taker orders will be rejected if price deviates 15% from midpoint.
- Post-Only Limit Orders: have the same properties as Limit Orders, but get rejected if they cross the orderbook.
- Market Orders: Operate as Immediate or Cancel (IOC) orders. Price is variable, executes at best available price at time of order.
- Stop Market Orders: Will convert to a market sell order with the specified quantity when the stop price is hit. The stop price does not guarantee that it will be executed at that price. Market conditions (price) might change between the order being triggered and order being executed. Currently only sell stop loss orders are supported.
- Stop Limit Orders: have a Stop Price which when hit, will convert to a limit sell order that will be executed at a specified price (or better)
Maximum notional order size by type:
Order Type | Market | Maximum Notional Value (USD)
---------- | ------- | ----------------------------
Market | all | 500,000
Limit | BTCUSD | 1,500,000
Limit | ETHUSD | 1,500,000
Limit | other | 1,000,000
# Get Order
Source: https://docs.sandbox.paxos.com/api-reference/endpoints/orders/get-order
get /profiles/{profile_id}/orders/{id}
Retrieves the current state of an order.
- Historical data prior to May 16, 2022 is unavailable.
# List Executions
Source: https://docs.sandbox.paxos.com/api-reference/endpoints/orders/list-executions
get /executions
Retrieves full details of underlying executions with optional filters.
Notes:
- This endpoint returns a maximum of 1000 items per page.
- Filtering options are `account_id`, `profile_id` or neither (all executions).
# List Orders
Source: https://docs.sandbox.paxos.com/api-reference/endpoints/orders/list-orders
get /orders
Retrieves full details of orders associated with a Profile ID, with optional filters.
- Historical data prior to May 16, 2022 is unavailable.
- Pagination Limit has a max of 1000. Pagination Offset is now deprecated and nonfunctional.
- Filtering options are `account_id`, `profile_id` or neither (all orders).
# Overview
Source: https://docs.sandbox.paxos.com/api-reference/endpoints/orders/overview
Order management for market, limit, and post-only orders.
There are three types of orders: market, limit and post-only.
Market orders guarantee execution at a variable price and quantity. Limit orders guarantee price and quantity at the time of execution but do not guarantee execution.
Post-only is an order type that will only be placed on the order book if it is the maker side of a trade.
# Create Paxos Transfer
Source: https://docs.sandbox.paxos.com/api-reference/endpoints/paxos-transfers/create-paxos-transfer
post /transfer/paxos
Transfer assets between two Profiles belonging to different [Entities](https://docs.paxos.com/dashboard/organization#entity).
# Overview
Source: https://docs.sandbox.paxos.com/api-reference/endpoints/paxos-transfers/overview
Move assets between two Entities belonging to the same Organization or to a different Organization on the Paxos platform.
## Important Notes
> Transferring USD between Entities is prohibited in some jurisdictions. Contact [Support](https://support.paxos.com/) if you run into any problems with this restriction.
Ensure the destination [Profile](/guides/dashboard/organization#profile) already exists before beginning the transfer. This may require contacting someone outside your Organization to get the destination Profile ID.
# List Payments
Source: https://docs.sandbox.paxos.com/api-reference/endpoints/payments/list-payments
get /statements/payments
List payments based on the provided filters
# Overview
Source: https://docs.sandbox.paxos.com/api-reference/endpoints/payments/overview
Payments represent actual transfers of rewards to the payout address associated with a given statement.
Payments are made on-chain to a specified payout address. Payments tie 1:1 with a statement amount.
## Key Features
* Use the `ref_id` to link payments to statements
* Payments are made on-chain to specified payout addresses
* One-to-one relationship between payments and statement amounts
## Additional Notes
> Some fields (e.g., `account_id`, `profile_id`) are populated for consistency but are not relevant to reward-specific flows.
## Availability
*These endpoints are only relevant for Global Dollar Network (GDN) partners.*
# List Historical Prices
Source: https://docs.sandbox.paxos.com/api-reference/endpoints/pricing/list-historical-prices
get /markets/{market}/historical-prices
Retrieves a set of average prices at a certain increment of time for the requested market.
This endpoint is suitable for retrieving historical average price trends where price precision, execution, and
other detailed information is not required.
To control the count, use either `increment` or `max_data_points`.
List Historical Prices returns an error when an unexpected value is given, or when `increment` and
`max_data_points` are both given or omitted.
When `range.begin` is omitted, the first data point shows the mid price, the average of the order book best bid
and ask price, or the earliest available date. It is possible to set `range.begin` to a future date without error.
When `range.end` is omitted, the last data point will display current mid price (average of order book best bid
and best ask) at the request timestamp. It is possible to set `range.end` to a future date without error.
When `pagination.limit` is omitted, the pagination limit will default to return the first 100 items.
If the pagination limit is set, the API will return up to the limit in one response. The pagination limit max is 1,000.
Time-series items are returned in chronological (ascending) order. All timestamps are in UTC.
# List Prices
Source: https://docs.sandbox.paxos.com/api-reference/endpoints/pricing/list-prices
get /all-markets/prices
Retrieve current prices, as well as 24 hour prior (yesterday) prices, for the specified markets.
Any single market that failed to be retrieved is excluded from the response.
# List Tickers
Source: https://docs.sandbox.paxos.com/api-reference/endpoints/pricing/list-tickers
get /all-markets/ticker
Retrieves order book statistics of the exchange for all markets over the last 24 hours and from midnight UTC until current time.
Please note: List Tickers displays pricing from external venues when the itBit exchange is not available.
# Overview
Source: https://docs.sandbox.paxos.com/api-reference/endpoints/pricing/overview
Pricing provides historical data related to charting of asset prices.
**Note:** Some Pricing API markets may be unavailable for trading.
# Create Profile
Source: https://docs.sandbox.paxos.com/api-reference/endpoints/profiles/create-profile
post /profiles
Create a new profile for this account. Profiles created using this endpoint always have a type of `NORMAL`.
# Deactivate Profile
Source: https://docs.sandbox.paxos.com/api-reference/endpoints/profiles/deactivate-profile
put /profiles/{profile_id}/deactivate
Deactivate the given `profile_id`. The default profile cannot be deactivated.
Deactivated profiles won't be visible for deposits.
Profiles with more than zero balances cannot be deactivated.
If a deactivated profile has a non-zero balance it will be reactivated.
# Get Profile
Source: https://docs.sandbox.paxos.com/api-reference/endpoints/profiles/get-profile
get /profiles/{profile_id}
Read a single profile by its UUID, or read the default profile using the alias "default".
# Get Profile Balance
Source: https://docs.sandbox.paxos.com/api-reference/endpoints/profiles/get-profile-balance
get /profiles/{profile_id}/balances/{asset}
Get the balance of `asset` in a profile.
# List Profile Balances
Source: https://docs.sandbox.paxos.com/api-reference/endpoints/profiles/list-profile-balances
get /profiles/{profile_id}/balances
Retrieve the Profile’s available and trading balances.
Use query parameters to retrieve a defined set of assets.
Omit query parameters to retrieve all asset balances.
# List Profiles
Source: https://docs.sandbox.paxos.com/api-reference/endpoints/profiles/list-profiles
get /profiles
Return the associated Profiles for the current Account.
The paginated results default to the maximum limit of 1,000 Profiles, unless otherwise specified with the `limit` parameter.
Every paginated response contains a `next_page` field until the last page is reached.
Pass the `next_page` value into the `page_cursor` field of the next request to retrieve the next page of results.
# Overview
Source: https://docs.sandbox.paxos.com/api-reference/endpoints/profiles/overview
Profiles hold asset balances, and every Paxos transaction is on a particular profile.
Depending on your integration type, Profiles may be used to reflect both corporate balances or individual user balances.
## Profile Types
There are two types of Profiles:
* **`DEFAULT`** Profiles are system-generated.
* **`NORMAL`** Profiles are created using the [Create Profile](/api-reference/endpoints/profiles/create-profile) endpoint and are the only type of Profile you can create.
# Update Profile
Source: https://docs.sandbox.paxos.com/api-reference/endpoints/profiles/update-profile
put /profiles/{profile_id}
Change the `nickname` label for the given `profile_id` (Profile).
# Create Quote Execution
Source: https://docs.sandbox.paxos.com/api-reference/endpoints/quote-executions/create-quote-execution
post /profiles/{profile_id}/quote-executions
Execute on a quote for buying or selling an asset.
The side, market, and guaranteed price of the execution are specified by the quote
with ID `quote_id`.
The amount to buy or sell must be specified in either fiat or crypto by setting
exactly one of:
- `base_amount` to specify the amount of crypto to buy or sell.
- `quote_amount` to specify the amount of fiat to spend or acquire.
An otherwise-valid request to create a quote execution may fail with the following
types of errors:
- [Expired](https://developer.paxos.com/docs/v2/problems/expired) if the quote
with ID `quote_id` has expired.
- [Insufficient Funds](https://developer.paxos.com/docs/v2/problems/insufficient-funds)
if the profile with ID `profile_id` has insufficient available balance to
fund the execution.
- [Rejected](https://developer.paxos.com/docs/v2/problems/rejected) if extreme
market conditions (e.g. a very large price swing) have invalidated the quote.
- [Already Exists](https://developer.paxos.com/docs/v2/problems/already-exists)
if a Quote Execution with the same `ref_id` has already been created.
# Get Quote Execution
Source: https://docs.sandbox.paxos.com/api-reference/endpoints/quote-executions/get-quote-execution
get /profiles/{profile_id}/quote-executions/{id}
Get an existing quote execution for buying or selling an asset.
# List Quote Executions
Source: https://docs.sandbox.paxos.com/api-reference/endpoints/quote-executions/list-quote-executions
get /profiles/{profile_id}/quote-executions
List quote executions within a particular profile.
# Overview
Source: https://docs.sandbox.paxos.com/api-reference/endpoints/quote-executions/overview
Quote Executions buy or sell assets using a Quote obtained from the Quotes flow.
You can obtain a Quote using the [Quotes](/api-reference/endpoints/quotes/overview) flow.
# List Quotes
Source: https://docs.sandbox.paxos.com/api-reference/endpoints/quotes/list-quotes
get /quotes
List quotes for buying or selling assets. By default, the list will
include the latest available quotes for both buying and selling all supported
assets.
Each quote is valid until `expires_at`, and can be executed on by
calling [Create Quote Execution](#operation/CreateQuoteExecution).
Multiple calls to list quotes in quick succession may return the same quote
values. Paxos currently issues new quotes at most once per second.
# Overview
Source: https://docs.sandbox.paxos.com/api-reference/endpoints/quotes/overview
Quotes are 'held rates' offered by Paxos to buy or sell assets at a specific price within a period of time.
For example, the option to buy BTC within the next 30 seconds for \$8,000.
## Typical Quotes Workflow
The typical Quotes workflow is as follows:
1. Call [List Quotes](/api-reference/endpoints/quotes/list-quotes) to get the latest available
quoted prices for the assets you want to buy or sell.
2. Present the offered price to one or more end-users, with a timer
indicating the time to expiration.
3. If a user accepts the price, call [Create Quote Execution](/api-reference/endpoints/quote-executions/create-quote-execution) with the amount to buy or sell.
4. Call [Get Quote Execution](/api-reference/endpoints/quote-executions/get-quote-execution) to monitor
for completion and know when the funds from the execution are available.
## Important Considerations
It's important to show end-users the latest available price. If you cache
prices to show them to multiple users, you should refresh the cache once
per second.
You can call [List Quote Executions](/api-reference/endpoints/quote-executions/list-quote-executions) to
review or construct reports on quote execution activity.
# Create Sandbox Deposit
Source: https://docs.sandbox.paxos.com/api-reference/endpoints/sandbox-deposits/create-sandbox-deposit
post /sandbox/profiles/{profile_id}/deposit
Create a test deposit to fund a profile in the sandbox environment.
Always specify `crypto_network` when making a crypto sandbox deposit. Omit the parameter when depositing fiat.
*This functionality is only available in the sandbox environment.*
# Initiate Sandbox Fiat Deposit
Source: https://docs.sandbox.paxos.com/api-reference/endpoints/sandbox-fiat-transfers/initiate-sandbox-fiat-deposit
post /sandbox/fiat-deposits
Initiate a test fiat deposit in the sandbox environment.
The deposit will be processed based on `memo_id` from a previous Fiat Deposit Instructions response.
*This functionality is only available in the sandbox environment.*
# Sandbox Set Identity Status
Source: https://docs.sandbox.paxos.com/api-reference/endpoints/sandbox-identity/sandbox-set-identity-status
put /identity/identities/{id}/sandbox-status
Set the various statuses for the given Identity. To enable the Person Identity to transact,
set both `id_verification_status` and `sanctions_verification_status` to `"APPROVED"`.
To enable the Institution to transact, set both `sanctions_verification_status` to `"APPROVED"`.
This endpoint also allows you to set the statuses for `document_verification_status` and
`additional_screening_status`
# Affirm Transaction
Source: https://docs.sandbox.paxos.com/api-reference/endpoints/settlement/affirm-transaction
put /settlement/transactions/{transaction_id}/affirm
Affirms the Settlement Transaction for settlement, the transaction is now eligible for settlement once the current time is
between the provided `settlement_window_start` and `settlement_window_end`. This action can only be done by the
customer owning the target profile (`target_profile_id`).
The transaction must be in a `"PENDING"` status for this to take effect.
# Cancel Transaction
Source: https://docs.sandbox.paxos.com/api-reference/endpoints/settlement/cancel-transaction
delete /settlement/transactions/{transaction_id}
Cancels the Settlement Transaction, this action can only be done by the customer owning the source profile (`source_profile_id`).
The transaction must be in a `"PENDING"` status for this to take effect, you cannot cancel a transaction which
is `"AFFIRMED"`.
# Create Transaction
Source: https://docs.sandbox.paxos.com/api-reference/endpoints/settlement/create-transaction
post /settlement/transactions
Creates a new bilateral Settlement Transaction with one or more legs. The customer must own the
`source_profile_id` specified in the transaction.
A successful response indicates the transaction has been accepted and will be in an initial `status` of `"PENDING"`
for settlement, the transaction is only eligible for settlement once the `status` is `"AFFIRMED"` by the
`target_profile_id` and the current time is between the provided `settlement_window_start` and `settlement_window_end`.
Settlement will only be enacted once both `source_profile_id` and `target_profile_id` have sufficient balances to
fulfill all legs specified as settlement is **atomic**.
# Get Transaction
Source: https://docs.sandbox.paxos.com/api-reference/endpoints/settlement/get-transaction
get /settlement/transactions/{transaction_id}
Get a Settlement Transaction by its (transaction) id, you must have created the transaction (own the `source_profile_id`) or
have had the transaction alleged against you (own the `target_profile_id`).
# List Transactions
Source: https://docs.sandbox.paxos.com/api-reference/endpoints/settlement/list-transactions
get /settlement/transactions
This endpoint enables you to fetch a list of Settlement Transactions that you have created (own the `source_profile_id`) or have been alleged against you (own the `target_profile_id`).
You can use query parameters to filter the results returned by `statuses`, `source_profile_id` and `target_profile_id`.
Note that this endpoint supports pagination and returns a cursor token for fetching next pages.
# Overview
Source: https://docs.sandbox.paxos.com/api-reference/endpoints/settlement/overview
Use the Settlements API to facilitate simultaneous exchange of pre-funded assets.
Use the Settlements API to facilitate simultaneous exchange of pre-funded assets. Automate a variety of use cases that require two-party approval, including net settlement of over-the-counter trades, withdrawal requests for tri-party collateral, payment requests, and bilateral settlement for marketplace end users.
## Workflow
The simple request-and-approval workflow supports both one-directional and bidirectional transactions to allow a user to receive an asset (for example, send USDP) or simultaneously send and receive assets (for example, send USD and receive BTC and ETH). Only when all parties are in agreement and assets are fully funded does the Settlements API allow for change of custody. Upon completion, all settled assets are immediately available for trading, transferring, withdrawal or other supported activities.
## Transaction Direction
The Source Profile initiates the transaction for the Target Profile to approve. The `DIRECTION` of each asset is always relative to the Source Profile and only the owner of the Source Profile can cancel a transaction if it hasn't been approved by the Target Profile.
## Learn More
Learn more about the Settlement APIs in the [Settlement Developer Guide](/guides/settlements).
# Cancel Stablecoin Conversion
Source: https://docs.sandbox.paxos.com/api-reference/endpoints/stablecoin-conversion/cancel-stablecoin-conversion
delete /conversion/stablecoins/{id}
Cancel a single conversion using the `id` from the
[Create Stablecoin Conversion](#operation/CreateStablecoinConversion) response.
# Create Stablecoin Conversion
Source: https://docs.sandbox.paxos.com/api-reference/endpoints/stablecoin-conversion/create-stablecoin-conversion
post /conversion/stablecoins
Create a Conversion request to exchange assets 1:1.
A request to create a conversion can fail with one of the following
types of errors:
- [Insufficient Funds](https://developer.paxos.com/docs/v2/problems/insufficient-funds)
if the Profile (`profile_id`) has insufficient available balance to
fund the execution.
- [Already Exists](https://developer.paxos.com/docs/v2/problems/already-exists)
if a conversion with the same external ID (`ref_id`) has already been created.
# Get Stablecoin Conversion
Source: https://docs.sandbox.paxos.com/api-reference/endpoints/stablecoin-conversion/get-stablecoin-conversion
get /conversion/stablecoins/{id}
Retrieve a single conversion using the transaction `id` from the [Create Stablecoin Conversion](#operation/CreateStablecoinConversion) response.
# List Stablecoin Conversions
Source: https://docs.sandbox.paxos.com/api-reference/endpoints/stablecoin-conversion/list-stablecoin-conversions
get /conversion/stablecoins
List all conversions, optionally filtering and paging the results.
By default, conversions are returned in reverse chronological (descending)
order by creation time. If no query parameters are supplied,
the response will include up to the last 100 conversions which
were created.
The paginated results default to display up to 100 conversions, unless
otherwise specified with the `limit` parameter. The maximum `limit` value is 1000.
Every paginated response contains a `next_page_cursor` field until the last page is reached.
Pass the `next_page_cursor` value into the `page_cursor` field of a new
request to retrieve the next page of results.
# Overview
Source: https://docs.sandbox.paxos.com/api-reference/endpoints/stablecoin-conversion/overview
Convert between fiat and stablecoin using the Stablecoin Conversion API.
Convert between fiat and stablecoin using [Create Stablecoin Conversion](/api-reference/endpoints/stablecoin-conversion/create-stablecoin-conversion) and check the status of a [single conversion](/api-reference/endpoints/stablecoin-conversion/get-stablecoin-conversion) or retrieve a [list of conversions](/api-reference/endpoints/stablecoin-conversion/list-stablecoin-conversions).
## Learn More
Learn more about stablecoin conversions in the [Convert Developer Guide](/guides/developer/convert).
# List Statements
Source: https://docs.sandbox.paxos.com/api-reference/endpoints/statements/list-statements
get /statements
List statements based on the provided filters
# Overview
Source: https://docs.sandbox.paxos.com/api-reference/endpoints/statements/overview
A Statement summarizes all eligible stablecoin rewards for a given organization over a fixed time period.
It aggregates earned reward types (e.g., custody, mint, acceptance) and records whether the statement was paid.
## Key Features
* Statements are generated monthly and are immutable
* Revised statements will be issued as a new statement with a unique ID
* Statements can be used to reconcile balances or for accounting and accounts receivable purposes
## Availability
*These endpoints are only relevant for Global Dollar Network (GDN) partners.*
# List Tax Form Revisions
Source: https://docs.sandbox.paxos.com/api-reference/endpoints/tax-forms/list-tax-form-revisions
get /tax/tax-form-revisions
Used for more granular file retrieval for specific accounts that require updated tax forms.
Lists all versions of a tax form for single account and tax year. Revisions will increment up as new tax forms are issued for the same account, tax year, and form type pairing. The highest value revision is the most recent.
Tax Form URL links will expire after 60 seconds.
# List Tax Forms
Source: https://docs.sandbox.paxos.com/api-reference/endpoints/tax-forms/list-tax-forms
get /tax/tax-forms
Used for bulk file transfer use cases.
List tax forms for given account ids and tax year. The most recent revision number will be returned (revisions increment up; highest value revision for a specific account, tax year, and form type pairing is the most recent).
Tax Form URL links will expire after 60 seconds.
Please call ListTaxFormRevisions endpoint for all versions of a single accounts tax forms.
# Overview
Source: https://docs.sandbox.paxos.com/api-reference/endpoints/tax-forms/overview
All tax forms are associated to a single account_id.
An account\_id can have multiple tax forms associated with it.
US 1099-B and 1099-Misc tax forms for the previous fiscal year will be available in February of the current calendar year.
Previous years tax forms are also available by request.
# Get Transfer
Source: https://docs.sandbox.paxos.com/api-reference/endpoints/transfers/get-transfer
get /transfer/transfers/{id}
Get a single transfer by ID.
In the polling workflow, this endpoint can be called to monitor transfer
status changes.
# List Transfers
Source: https://docs.sandbox.paxos.com/api-reference/endpoints/transfers/list-transfers
get /transfer/transfers
List all transfers, optionally filtering and paging the results.
By default, transfers are returned in reverse chronological (descending)
order by creation time.
The recommended polling workflow is to query the results in ascending
order (by setting `order_by` to `CREATED_AT`), keeping track of the
`created_at` timestamp of the most recent transfer in the paged results.
Once transfers are discovered, the caller should store the returned `ID`
and query GetTransfer to retrieve status updates.
# Overview
Source: https://docs.sandbox.paxos.com/api-reference/endpoints/transfers/overview
Each deposit to and withdrawal from a Paxos account is a Transfer.
A Transfer is associated with a particular Profile, and increases or
decreases the available balance of a single asset in that Profile.
# identity_documents_required
Source: https://docs.sandbox.paxos.com/api-reference/events/identity-documents-required-object
Event object returned for identity.documents_required events
This object is returned by the [Get Event API](/api-reference/endpoints/events/get-event) when the event type is `identity.documents_required`.
## Object Fields
Unique identifier for this event object
Identifier for the identity requiring documents
List of required document types
```json Example
{
"id": "d840cf31-352f-4190-a476-7522bf3eafda",
"identity_id": "4fd025ab-f29f-47e6-a02e-df90a61c7ec9",
"required_documents": ["DRIVERS_LICENSE", "PASSPORT"]
}
```
# identity_kyc_refresh
Source: https://docs.sandbox.paxos.com/api-reference/events/identity-kyc-refresh-object
Event object returned for KYC refresh events
This object is returned by the [Get Event API](/api-reference/endpoints/events/get-event) when the event type is `identity.kyc_refresh.started`, `identity.kyc_refresh.completed`, or `identity.kyc_refresh.expired`.
## Object Fields
Unique identifier for this event object
Identifier for the affected identity
Date of the most recent completed KYC refresh
Scheduled date for the next KYC refresh
```json Example
{
"id": "d840cf31-352f-4190-a476-7522bf3eafda",
"identity_id": "4fd025ab-f29f-47e6-a02e-df90a61c7ec9",
"last_kyc_refresh_date": "2024-07-15T10:30:00Z",
"next_kyc_refresh_date": "2024-08-25T14:25:41Z"
}
```
# identity_summary_status_change
Source: https://docs.sandbox.paxos.com/api-reference/events/identity-status-change-object
Event object returned for identity status change events
This object is returned by the [Get Event API](/api-reference/endpoints/events/get-event) when the event type is `identity.approved`, `identity.denied`, or `identity.disabled`.
## Object Fields
Unique identifier for this event object
Identifier for the affected identity
The previous summary status of the identity
**Available options:** `PENDING`, `ERROR`, `APPROVED`, `DENIED`, `DISABLED`
The new summary status of the identity
**Available options:** `PENDING`, `ERROR`, `APPROVED`, `DENIED`, `DISABLED`
```json Example
{
"id": "d840cf31-352f-4190-a476-7522bf3eafda",
"identity_id": "4fd025ab-f29f-47e6-a02e-df90a61c7ec9",
"old_summary_status": "PENDING",
"new_summary_status": "APPROVED"
}
```
# transfer_status_change
Source: https://docs.sandbox.paxos.com/api-reference/events/transfer-status-change-object
Event object returned for transfer status change events
This object is returned by the [Get Event API](/api-reference/endpoints/events/get-event) when the event type is related to transfer status changes.
## Object Fields
The Paxos transfer ID. You can call the GetTransfer endpoint with this ID to get more details about it.
Type of transfer:
**Available options:** `CRYPTO_DEPOSIT`, `CRYPTO_WITHDRAWAL`, `ACT_DEPOSIT`, `ACT_WITHDRAWAL`
Status of transfer:
**Available options:** `PENDING`, `COMPLETED`, `FAILED`
The client-specified ID of the transfer for replay protection and lookup. (optional)
Cryptocurrency network (e.g. ETHEREUM, BASE, SOLANA) (optional, present for crypto transfers)
On-chain transaction hash (optional, present for crypto transfers when available)
The output index or output address (optional, present for crypto transfers when available)
Memo associated with the transfer as an identifier (optional, present for fiat transfers when available)
```json Crypto Deposit Example
{
"id": "550e8400-e29b-41d4-a716-446655440000",
"type": "CRYPTO_DEPOSIT",
"status": "COMPLETED",
"ref_id": "my-deposit-123",
"crypto_network": "ETHEREUM",
"crypto_tx_hash": "0x1234567890abcdef...",
"crypto_tx_index": "0"
}
```
```json Fiat Withdrawal Example
{
"id": "550e8400-e29b-41d4-a716-446655440000",
"type": "ACT_WITHDRAWAL",
"status": "PENDING",
"ref_id": "my-withdrawal-456",
"memo": "Payment for services"
}
```
# Paxos API
Source: https://docs.sandbox.paxos.com/api-reference/introduction
Welcome to Paxos APIs. At Paxos, our mission is to enable the movement of any asset, any time, in a trustworthy way.
export const PreviewButton = ({children, href}) => {
return
{children}
;
};
These APIs serve that mission by making it easier than ever for you to directly integrate our product capabilities into your application, leveraging the speed, stability, and security of the Paxos platform.
The documentation that follows gives you access to our Crypto Brokerage, Trading, and Exchange products. It includes APIs for market data, orders, and the held rate quote flow.
Open the REST API Specification
To test in our sandbox environment, [sign up](https://account.sandbox.paxos.com) for an account. For more information about Paxos and our APIs, visit [Paxos.com](https://www.paxos.com/).
## Getting Started
Learn how to authenticate with Paxos APIs using OAuth 2.0
Test Paxos APIs in the sandbox environment
## API Environments
Paxos provides two environments for API integration:
* **Production**: `https://api.paxos.com/v2`
* **Sandbox**: `https://api.sandbox.paxos.com/v2`
## Authentication
Paxos APIs use OAuth 2 with the client credentials grant flow. Learn more in the [API credentials guide](/guides/developer/credentials).
## Rate Limits
API endpoints have rate limits to ensure system stability. Rate limit information is provided in response headers.
## Support
For more information about Paxos and the APIs, visit [Paxos.com](https://www.paxos.com/) or contact Paxos support for assistance.
# Create Orchestration Rule
Source: https://docs.sandbox.paxos.com/api-reference/preview/orchestration-rules/create-orchestration-rule
api-reference/preview/paxos-v2-preview-orchestration.openapi.json post /v2/orchestration/orchestration-rules
Creates an orchestration rule that will be triggered by deposits to a source resource.
Invocations of orchestration rules will create Orchestrations, which can be queried using
ListOrchestrations. Orchestration rules can be listed using ListOrchestrationRules.
# List Orchestration Rules
Source: https://docs.sandbox.paxos.com/api-reference/preview/orchestration-rules/list-orchestration-rules
api-reference/preview/paxos-v2-preview-orchestration.openapi.json get /v2/orchestration/orchestration-rules
Lists orchestration rules according to the given filters.
Results can be paginated using the next_page_cursor.
The maximum page size is 100.
# Create Orchestration
Source: https://docs.sandbox.paxos.com/api-reference/preview/orchestrations/create-orchestration
api-reference/preview/paxos-v2-preview-orchestration.openapi.json post /v2/orchestration/orchestrations
Creates an orchestration rule that will be triggered by deposits to a source resource.
The orchestration defines how assets should be moved from a source to a destination,
potentially including conversions between different asset types.
A request to create an orchestration can fail with one of the following
types of errors:
- [Insufficient Funds](https://developer.paxos.com/docs/v2/problems/insufficient-funds)
if the Profile (`profile_id`) has insufficient available balance to
fund the execution.
- [Already Exists](https://developer.paxos.com/docs/v2/problems/already-exists)
if an orchestration with the same external ID (`ref_id`) has already been created.
# List Orchestrations
Source: https://docs.sandbox.paxos.com/api-reference/preview/orchestrations/list-orchestrations
api-reference/preview/paxos-v2-preview-orchestration.openapi.json get /v2/orchestration/orchestrations
List all orchestrations, optionally filtering and paging the results.
By default, orchestrations are returned in reverse chronological (descending)
order by creation time. If no query parameters are supplied,
the response will include up to the last 100 orchestrations which
were created.
The paginated results default to display up to 100 orchestrations, unless
otherwise specified with the `limit` parameter. The maximum `limit` value is 1000.
Every paginated response contains a `next_page_cursor` field until the last page is reached.
Pass the `next_page_cursor` value into the `page_cursor` field of a new
request to retrieve the next page of results.
When filtering by profile IDs using the `profile_ids` parameter, there is a limit of 100 profiles
that can be specified in a single request.
Orchestrations are provided for various operations including:
- Deposits to a paxos-platform crypto address or bank account
- Withdrawals to a customer-owned crypto address or bank account
- Conversions from one asset to another
- Orchestrated workflows involving some or all of the above
- Invocation of an Orchestration Rule
# Overview
Source: https://docs.sandbox.paxos.com/api-reference/preview/overview
Learn more about the Paxos early access program for developers.
**Developer Previews** provide early access to upcoming changes, enabling select partners to test functionality and contribute feedback.
To participate in a Preview, contact [Paxos Support](https://support.paxos.com).
Developer Previews are subject to change and may not be fully supported in production environments. Please review all documentation and disclaimers before integrating preview features.
# identity.approved
Source: https://docs.sandbox.paxos.com/api-reference/webhooks/identity-approved
api-reference/webhooks/webhooks-openapi.json webhook identity.approved
Webhook triggered when an identity verification is approved
Triggered when identity verification is successfully approved.
Webhook payloads contain only event metadata. Use the [Get Event API](/api-reference/endpoints/events/get-event) with the event ID to retrieve full details.
## Event Object Structure
The Get Event API returns an [`identity_summary_status_change`](/api-reference/events/identity-status-change-object) object with status transition details.
# identity.denied
Source: https://docs.sandbox.paxos.com/api-reference/webhooks/identity-denied
api-reference/webhooks/webhooks-openapi.json webhook identity.denied
Webhook triggered when an identity verification is denied
Triggered when identity verification is denied.
Webhook payloads contain only event metadata. Use the [Get Event API](/api-reference/endpoints/events/get-event) with the event ID to retrieve full details.
## Event Object Structure
The Get Event API returns an [`identity_summary_status_change`](/api-reference/events/identity-status-change-object) object with status transition details.
# identity.disabled
Source: https://docs.sandbox.paxos.com/api-reference/webhooks/identity-disabled
api-reference/webhooks/webhooks-openapi.json webhook identity.disabled
Webhook triggered when an identity is disabled
Triggered when a previously approved identity is disabled.
Webhook payloads contain only event metadata. Use the [Get Event API](/api-reference/endpoints/events/get-event) with the event ID to retrieve full details.
## Event Object Structure
The Get Event API returns an [`identity_summary_status_change`](/api-reference/events/identity-status-change-object) object with status transition details.
# identity.documents_required
Source: https://docs.sandbox.paxos.com/api-reference/webhooks/identity-documents-required
api-reference/webhooks/webhooks-openapi.json webhook identity.documents_required
Webhook triggered when additional documents are required for identity verification
Triggered when additional documents are required for identity verification.
Webhook payloads contain only event metadata. Use the [Get Event API](/api-reference/endpoints/events/get-event) with the event ID to retrieve full details including required documents.
## Event Object Structure
The Get Event API returns an [`identity_documents_required`](/api-reference/events/identity-documents-required-object) object with details about the required documents.
# identity.kyc_refresh.completed
Source: https://docs.sandbox.paxos.com/api-reference/webhooks/identity-kyc-refresh-completed
api-reference/webhooks/webhooks-openapi.json webhook identity.kyc_refresh.completed
Webhook triggered when a KYC refresh process is successfully completed
Triggered when a KYC refresh process is successfully completed.
Webhook payloads contain only event metadata. Use the [Get Event API](/api-reference/endpoints/events/get-event) with the event ID to retrieve full details.
## Event Object Structure
The Get Event API returns an [`identity_kyc_refresh`](/api-reference/events/identity-kyc-refresh-object) object with KYC refresh details including the completion date.
# identity.kyc_refresh.expired
Source: https://docs.sandbox.paxos.com/api-reference/webhooks/identity-kyc-refresh-expired
api-reference/webhooks/webhooks-openapi.json webhook identity.kyc_refresh.expired
Webhook triggered when a KYC refresh process expires without completion
Triggered when a KYC refresh process expires without completion.
Webhook payloads contain only event metadata. Use the [Get Event API](/api-reference/endpoints/events/get-event) with the event ID to retrieve full details.
## Event Object Structure
The Get Event API returns an [`identity_kyc_refresh`](/api-reference/events/identity-kyc-refresh-object) object with KYC refresh details including the expiration date.
# identity.kyc_refresh.started
Source: https://docs.sandbox.paxos.com/api-reference/webhooks/identity-kyc-refresh-started
api-reference/webhooks/webhooks-openapi.json webhook identity.kyc_refresh.started
Webhook triggered when a KYC refresh process is initiated
Triggered when a KYC refresh process is initiated for an existing verified identity.
Webhook payloads contain only event metadata. Use the [Get Event API](/api-reference/endpoints/events/get-event) with the event ID to retrieve full details including due date.
## Event Object Structure
The Get Event API returns an [`identity_kyc_refresh`](/api-reference/events/identity-kyc-refresh-object) object with KYC refresh details including the due date.
# transfer.act_deposit.completed
Source: https://docs.sandbox.paxos.com/api-reference/webhooks/transfer-act-deposit-completed
api-reference/webhooks/webhooks-openapi.json webhook transfer.act_deposit.completed
Webhook triggered when a fiat deposit via DBS is completed and funds are available
Triggered when a fiat deposit via DBS is COMPLETED and funds are available on platform.
Webhook payloads contain only event metadata. Use the [Get Event API](/api-reference/endpoints/events/get-event) with the event ID to retrieve full details.
## Event Object Structure
The Get Event API returns a [`transfer_status_change`](/api-reference/events/transfer-status-change-object) object with transfer status details.
# transfer.act_deposit.failed
Source: https://docs.sandbox.paxos.com/api-reference/webhooks/transfer-act-deposit-failed
api-reference/webhooks/webhooks-openapi.json webhook transfer.act_deposit.failed
Webhook triggered when a fiat deposit via DBS has failed or been cancelled
Triggered when a fiat deposit via DBS has FAILED or been cancelled.
Webhook payloads contain only event metadata. Use the [Get Event API](/api-reference/endpoints/events/get-event) with the event ID to retrieve full details.
## Event Object Structure
The Get Event API returns a [`transfer_status_change`](/api-reference/events/transfer-status-change-object) object with transfer status details.
# transfer.act_deposit.pending
Source: https://docs.sandbox.paxos.com/api-reference/webhooks/transfer-act-deposit-pending
api-reference/webhooks/webhooks-openapi.json webhook transfer.act_deposit.pending
Webhook triggered when a fiat deposit via DBS has been initiated and is pending
Triggered when a fiat deposit via DBS has been initiated and is PENDING processing.
Webhook payloads contain only event metadata. Use the [Get Event API](/api-reference/endpoints/events/get-event) with the event ID to retrieve full details.
## Event Object Structure
The Get Event API returns a [`transfer_status_change`](/api-reference/events/transfer-status-change-object) object with transfer status details.
# transfer.act_withdrawal.completed
Source: https://docs.sandbox.paxos.com/api-reference/webhooks/transfer-act-withdrawal-completed
api-reference/webhooks/webhooks-openapi.json webhook transfer.act_withdrawal.completed
Webhook triggered when a fiat withdrawal via DBS is completed and sent to destination
Triggered when a fiat withdrawal via DBS is COMPLETED and has been sent to the destination account.
Webhook payloads contain only event metadata. Use the [Get Event API](/api-reference/endpoints/events/get-event) with the event ID to retrieve full details.
## Event Object Structure
The Get Event API returns a [`transfer_status_change`](/api-reference/events/transfer-status-change-object) object with transfer status details.
# transfer.act_withdrawal.failed
Source: https://docs.sandbox.paxos.com/api-reference/webhooks/transfer-act-withdrawal-failed
api-reference/webhooks/webhooks-openapi.json webhook transfer.act_withdrawal.failed
Webhook triggered when a fiat withdrawal via DBS has failed or been cancelled
Triggered when a fiat withdrawal via DBS has FAILED or been cancelled.
Webhook payloads contain only event metadata. Use the [Get Event API](/api-reference/endpoints/events/get-event) with the event ID to retrieve full details.
## Event Object Structure
The Get Event API returns a [`transfer_status_change`](/api-reference/events/transfer-status-change-object) object with transfer status details.
# transfer.act_withdrawal.pending
Source: https://docs.sandbox.paxos.com/api-reference/webhooks/transfer-act-withdrawal-pending
api-reference/webhooks/webhooks-openapi.json webhook transfer.act_withdrawal.pending
Webhook triggered when a fiat withdrawal via DBS has been initiated and is pending
Triggered when a fiat withdrawal via DBS has been initiated and is PENDING processing.
Webhook payloads contain only event metadata. Use the [Get Event API](/api-reference/endpoints/events/get-event) with the event ID to retrieve full details.
## Event Object Structure
The Get Event API returns a [`transfer_status_change`](/api-reference/events/transfer-status-change-object) object with transfer status details.
# transfer.crypto_deposit.completed
Source: https://docs.sandbox.paxos.com/api-reference/webhooks/transfer-crypto-deposit-completed
api-reference/webhooks/webhooks-openapi.json webhook transfer.crypto_deposit.completed
Webhook triggered when a crypto deposit is completed and funds are available
Triggered when a crypto deposit is COMPLETED and funds are available on platform.
Webhook payloads contain only event metadata. Use the [Get Event API](/api-reference/endpoints/events/get-event) with the event ID to retrieve full details.
## Event Object Structure
The Get Event API returns a [`transfer_status_change`](/api-reference/events/transfer-status-change-object) object with transfer status details.
# transfer.crypto_deposit.failed
Source: https://docs.sandbox.paxos.com/api-reference/webhooks/transfer-crypto-deposit-failed
api-reference/webhooks/webhooks-openapi.json webhook transfer.crypto_deposit.failed
Webhook triggered when a crypto deposit has failed or been cancelled
Triggered when a crypto deposit has FAILED or been cancelled.
Webhook payloads contain only event metadata. Use the [Get Event API](/api-reference/endpoints/events/get-event) with the event ID to retrieve full details.
## Event Object Structure
The Get Event API returns a [`transfer_status_change`](/api-reference/events/transfer-status-change-object) object with transfer status details.
# transfer.crypto_deposit.pending
Source: https://docs.sandbox.paxos.com/api-reference/webhooks/transfer-crypto-deposit-pending
api-reference/webhooks/webhooks-openapi.json webhook transfer.crypto_deposit.pending
Webhook triggered when a crypto deposit is detected on-chain and is pending confirmation
Triggered when a crypto deposit is detected on-chain and is PENDING confirmation.
Webhook payloads contain only event metadata. Use the [Get Event API](/api-reference/endpoints/events/get-event) with the event ID to retrieve full details.
## Event Object Structure
The Get Event API returns a [`transfer_status_change`](/api-reference/events/transfer-status-change-object) object with transfer status details.
# transfer.crypto_withdrawal.completed
Source: https://docs.sandbox.paxos.com/api-reference/webhooks/transfer-crypto-withdrawal-completed
api-reference/webhooks/webhooks-openapi.json webhook transfer.crypto_withdrawal.completed
Webhook triggered when a crypto withdrawal is completed and sent to destination
Triggered when a crypto withdrawal is COMPLETED and has been sent to the destination address.
Webhook payloads contain only event metadata. Use the [Get Event API](/api-reference/endpoints/events/get-event) with the event ID to retrieve full details.
## Event Object Structure
The Get Event API returns a [`transfer_status_change`](/api-reference/events/transfer-status-change-object) object with transfer status details.
# transfer.crypto_withdrawal.failed
Source: https://docs.sandbox.paxos.com/api-reference/webhooks/transfer-crypto-withdrawal-failed
api-reference/webhooks/webhooks-openapi.json webhook transfer.crypto_withdrawal.failed
Webhook triggered when a crypto withdrawal has failed or been cancelled
Triggered when a crypto withdrawal has FAILED or been cancelled.
Webhook payloads contain only event metadata. Use the [Get Event API](/api-reference/endpoints/events/get-event) with the event ID to retrieve full details.
## Event Object Structure
The Get Event API returns a [`transfer_status_change`](/api-reference/events/transfer-status-change-object) object with transfer status details.
# transfer.crypto_withdrawal.pending
Source: https://docs.sandbox.paxos.com/api-reference/webhooks/transfer-crypto-withdrawal-pending
api-reference/webhooks/webhooks-openapi.json webhook transfer.crypto_withdrawal.pending
Webhook triggered when a crypto withdrawal has been initiated and is pending
Triggered when a crypto withdrawal has been initiated and is PENDING on-chain processing.
Webhook payloads contain only event metadata. Use the [Get Event API](/api-reference/endpoints/events/get-event) with the event ID to retrieve full details.
## Event Object Structure
The Get Event API returns a [`transfer_status_change`](/api-reference/events/transfer-status-change-object) object with transfer status details.
# Execution Data
Source: https://docs.sandbox.paxos.com/api-reference/websockets/execution-data
# Execution Data (Market)
Source: https://docs.sandbox.paxos.com/api-reference/websockets/execution-data-market
# Market Data
Source: https://docs.sandbox.paxos.com/api-reference/websockets/market-data
# Market Data (Market)
Source: https://docs.sandbox.paxos.com/api-reference/websockets/market-data-market
# Market Data (Stablecoin)
Source: https://docs.sandbox.paxos.com/api-reference/websockets/market-data-stablecoin
# Market Data (Stablecoin Market)
Source: https://docs.sandbox.paxos.com/api-reference/websockets/market-data-stablecoin-market
# Overview
Source: https://docs.sandbox.paxos.com/api-reference/websockets/overview
Event-driven connectivity for payments and trading.
Paxos provides secure, real-time market and execution data feeds via public [WebSocket](https://websocket.spec.whatwg.org) connections. The WebSocket API offers three main data feeds:
* **[Execution Data Feed](#execution-data-feed)** - Real-time execution data for market trades
* **[Market Data Feed](#market-data-feed)** - Order book updates with initial snapshots and real-time updates
* **[Stablecoin Market Price Feed](#stablecoin-feed)** - Market index price updates for external stablecoins
> See the Websocket [trading](/guides/crypto-brokerage/websocket) and [stablecoin payments](/guides/payments/websocket) guides for a hands-on introduction.
The WebSocket connections provide a number of advantages when compared to the [v2 API](/api-reference), including real-time event notifications, minimized data transfers over the network and reduced latency when compared to a polling strategy.
## API Reference
For detailed technical specifications, message schemas, and interactive examples, see the **API Reference** section in the sidebar. The AsyncAPI specification provides complete documentation for all available channels, message types, and data formats.
## Connection Details
Once a secure (`wss://`) connection is established, each feed begins streaming data, subject to the [rate limits](/guides/developer/rate-limits#websocket-limits).
Both Production and Sandbox data feeds have a built-in, instantaneous failover.
Clients should have a reconnection mechanism in case of server disconnection.
### Server Endpoints
**Production:** `wss://ws.paxos.com`\
**Sandbox:** `wss://ws.sandbox.paxos.com`
### Available Channels
* `/executiondata` - All markets execution data
* `/executiondata/{market}` - Single market execution data
* `/marketdata` - All markets order book data
* `/marketdata/{market}` - Single market order book data
* `/marketdata/stablecoin/{market}` - Stablecoin market price data
> See the **API Reference** section for detailed channel specifications and message formats.
## Execution Data Feed
The execution data feed provides real-time trade information for market executions. Key behavioral characteristics:
* **Initial Message**: The first message corresponds to the last execution at connection time
* **Subsequent Messages**: Each new message represents a new execution as it occurs
* **Idle Markets**: If no executions occur for extended periods, no messages are sent until new activity
* **Reconnection**: Upon reconnection, you receive the last execution (handle duplicates using `match_number`)
The feed includes execution price, amount, timestamp, and a unique match number for deduplication.
## Market Data Feed
The market data feed provides real-time order book updates with two message types:
### SNAPSHOT Messages
* **Initial Response**: Shows the complete order book state with bids and asks
* **Bids**: Prices in descending order with amounts
* **Asks**: Prices in ascending order with amounts
### UPDATE Messages
* **Real-time Updates**: Show executed trades and order book changes
* **Processing Rules**:
* When `amount=0`: Remove the price level from the order book
* When `amount>0`: Add or update the price level with the new amount
* Use `side` field to determine whether to update bids (`BUY`) or asks (`SELL`)
### Available Markets
Market availability varies by environment (Sandbox vs Production) and account restrictions. Use the [Get Order Book](/api-reference/endpoints/market-data/get-order-book) and [List Recent Executions](/api-reference/endpoints/market-data/list-recent-executions) REST endpoints to discover available markets, though these are not suitable for streaming data.
## Stablecoin Market Price Feed
The stablecoin market price feed provides real-time market index price updates for external stablecoins. Key characteristics:
* **Current Support**: USDCUSD market
* **Update Frequency**: Typically \~1 message per second, varying with market volatility
* **Message Content**: Market name, current price (4 decimals), and timestamp
* **Real-time Updates**: Price updates are pushed as they occur
This feed is particularly useful for applications requiring accurate, real-time stablecoin pricing information.
# Changelog
Source: https://docs.sandbox.paxos.com/changelog
Product updates and announcements
**V2 API**: Adds `status`, `created_at`, and `updated_at` to `ListAPICredentials` responses. Support for filtering by `status` also added.
**V2 API**: Adds optional `recipient_metadata` field to CreateInternalTransfer.
**V2 API**: Adds ListAPICredentials endpoint. Lists all API credentials that have been created.
**V2 API**: Add optional ids filter to ListProfiles to support filtering by specific profile IDs.
**V2 API**: Add optional `status_details` field to `Transfer` that can provide more specific information related to a Transfer's status. {/* https://itbitwiki.atlassian.net/browse/MM-2103 */}
**v2 API**: Add `created_at` field to `DepositAddress`. It is a field used to identify the time at which `DepositAddress` was created.
**v2 API**: Add optional `memo` field to `CreateCryptoWithdrawalRequest`. It is an optional field used to identify a crypto withdrawal.
**v2 API**: Add optional `from_account_id`, `from_identity_id`, `to_account_id`, `to_identity_id` parameters to CreatePaxosTransfer.
**v2 API**: Add field `memo` to ListTransfers and GetTransfer response. It is an optional field used to identify a transfer. Currently supported for Fiat Transfers.
**v2 API**: Add Events API to power webhook integrations, enabling real-time notifications when events occur on the Paxos platform.
**v2 API**: Add values `PERSONA` and `PLAID` to parameter `person_details.passthrough_verifier_type` on Create Identity and Update Identity request and response.
**v2 API**: Add optional `from_account_id`, `from_identity_id`, `to_account_id`, `to_identity_id` parameters to CreateInternalTransfer.
**v2 API**: Add Rewards API Documentation.
**v2 API**: Document the max file upload size for the Identity Documents: Document Upload API.
**v2 API**: Add parameter `last_kyc_refresh_date` to the Identity API for setting the timestamp the Identity last underwent periodic refresh.
**v2 API**: Add Deactivate Profile endpoint to the Profile API.
**v2 API**: Remove the unused value `RANSOMWARE` from the `institution_details.institution_sub_type` enum on the Identity API.
**v2 API**: Add enum value `TRAVEL_RULE_REJECTED` to the `secondary_statuses` parameter for List Transfers and Get Transfer responses. `TRAVEL_RULE_REJECTED` may be used as a query parameter for List Transfers. {/* https://itbitwiki.atlassian.net/browse/RP-3356 */}
**Breaking Change**: The Paxos v1 API has reached its end of life. Paxos no longer supports the v1 API. The v2 API fully supports all current API use cases.
**v2 API**: Add `include_deactivated` query parameter to the Get Profile endpoint to enable retrieving a deactivated Profile.
**Reconciliation Reporting**: We're enhancing our reconciliation reports with two new fields: `OrchestrationID` links all related transactions within a single end-to-end flow. `OrchestrationRuleID` identifies which automation rule triggered the transaction set. These additions make it easier to track multi-step transactions and map them to their triggering rules, improving audit trails and simplifying reconciliation processes for treasury and enterprise payment operations. {/* https://itbitwiki.atlassian.net/browse/AO-256 */}
**v2 API**: Add the `nickname` query parameter on [List Profiles](https://docs.paxos.com/api/v2#tag/Profiles/operation/ListProfiles). Enables searching for Profiles by the given prefix. {/* https://itbitwiki.atlassian.net/browse/LGR-2223 */}
**v2 API**: Add [Paxos Transfers](https://docs.paxos.com/api/v2#tag/Paxos-Transfers/operation/CreatePaxosTransfer) to enable asset movement between two Entities belonging to the same Organization or to a different Organization on the Paxos platform. {/* https://itbitwiki.atlassian.net/browse/UI-2668 */}
**v2 API**: Add [Update Profile](https://docs.paxos.com/api/v2#tag/Profiles/operation/UpdateProfile) to allow changing the `nickname` of an existing Profile. {/* https://itbitwiki.atlassian.net/browse/LGR-2240 */}
**v2 API**: The `identity_id` parameter is now optional with Create Fiat Account. Those with [3rd-Party integrations](https://docs.paxos.com/crypto-brokerage/ledger-type#fiat-and-crypto-subledger) initiating transfers on behalf of their end users must continue to use the parameter. {/* https://itbitwiki.atlassian.net/browse/MM-1870 */}
**v2 API**: Enable optional `business_description` parameter for the Create Identity, Update Identity, Get Identity and List Identities endpoints. {/* https://itbitwiki.atlassian.net/browse/RP-3080 */}
**v2 API**: Add `REAL_ESTATE` and `OTHER_SOURCE_OF_WEALTH` to the `customer_due_diligence.source_of_wealth` enumeration on the Identity APIs. {/* https://itbitwiki.atlassian.net/browse/RP-3081 */}
**Docs, v2 API**: Enable USDG on Ethereum. Add [USDG docs](/guides/stablecoin/usdg). {/* https://itbitwiki.atlassian.net/browse/DOCS-1107 */}
**Docs, v2 API**: Enable support for CUBIX API and update docs for [Transfers](https://docs.paxos.com/api/v2#tag/Transfers) and [Fiat Transfers](https://docs.paxos.com/api/v2#tag/Fiat-Transfers). All users of the Customers Bank integrations must start using CUBIX by November 11, 2024. See the [CUBIX API migration guide](https://support.paxos.com/hc/en-us/articles/31700769434004). {/* https://itbitwiki.atlassian.net/browse/DOCS-1164 */}
**v2 API**: Add `DBS_ACT` to Fiat Network Instructions. {/* https://itbitwiki.atlassian.net/browse/MM-1705 */}
**v2 API**: Add optional `crypto_tx_hashes` filter to the List Transfers endpoint. {/* https://itbitwiki.atlassian.net/browse/MM-1685 */}
**v2 API**: Add the following document types to Identity Documents APIs: `AML_DOCUMENTS`, `FUND_STRUCTURE_CHART`, `FUND_MANAGER_REGISTRATION`, `MEMORANDUM_OF_ASSOCIATION`, `ORGANIZATIONAL_CHART`, `FOUNDATION_BY_LAWS`, `APPOINTMENT_OF_GUARDIAN_EVIDENCE`, `LEGAL_DOMICILE_OF_BENEFICIAL_OWNERS`, `GOVERNING_BODY_MEMBER_NAMES`. {/* https://itbitwiki.atlassian.net/browse/RP-2536 */}
**v2 API**: Add three new optional fields to the `customer_due_diligence` object of the Identity API (Create Identity and Update Identity). {/* https://itbitwiki.atlassian.net/browse/RP-2448 */}
**v2 API**: Add new ENUM value `GOVERNMENT_BENEFITS` to the `customer_due_diligence` object field `source_of_funds` in the Identity API (Create Identity and Update Identity). {/* https://itbitwiki.atlassian.net/browse/RP-2531 */}
**v2 API**: Add `is_merchant` field to the Identity API (Update Identity, Get Identity, List Identities). {/* https://itbitwiki.atlassian.net/browse/RP-2447 */}
**v2 API**: Updated rate limit on Identity API from 50 to 10 requests per second. {/* https://itbitwiki.atlassian.net/browse/DOCS-1143 */}
**Docs, v2 API**: Add new [Settlement APIs](https://docs.paxos.com/api/v2#tag/Settlement) which allow for atomic one-way or two-way transfers across Paxos accounts. Also added Settlement integration [guide](/guides/settlements). {/* https://itbitwiki.atlassian.net/browse/LGR-1925 */}
**FIX**: Enforce a maximum of 150 messages per second, per session. {/* https://itbitwiki.atlassian.net/browse/DOCS-1082 */}
**Docs**: Add [stablecoin payments](/guides/payments) documentation. {/* https://itbitwiki.atlassian.net/browse/DOCS-1007 */}
**v2 API**: All `metadata` specified when creating a crypto deposit address is now inherited by deposit activities. {/* https://itbitwiki.atlassian.net/browse/MM-1462 */}
**Funding**: Paxos is upgrading its wallet infrastructure, impacting customers' crypto deposit addresses for BTC, ETH, BCH, LTC and all ERC20 tokens. This planned change is part of our commitment to continuous product and security improvements. Users will be required to retrieve the new crypto deposit address via the UI or `CreateDepositAddress` API no earlier than February 15, 2024, and no later than **June 13, 2024**. Old deposit addresses will come with a deprecated warning until **June 13, 2024**. After this date they will no longer be supported. {/* https://itbitwiki.atlassian.net/browse/DOCS-975 */}
**Docs, v2 API**: Enable PYUSD on Solana. Update PYUSD docs with mainnet and testnet addresses. {/* https://itbitwiki.atlassian.net/browse/DOCS-1013 */}
**v2 API**: Add optional `is_merchant` boolean field to the Create Identity request body and the List Identities, Create Identity, Get Identity and Update Identity responses. {/* https://itbitwiki.atlassian.net/browse/RP-1590 */}
**Breaking Change**: Update the FIX infrastructure to improve performance, reliability and security for FIX connections. This change enables multiple FIX connections for a single account and improves TLS certificate management, among other changes. All existing FIX users are required to migrate to the new infrastructure no later than **May 4, 2024**. ~~See the migration guide or~~ Contact [Support](https://support.paxos.com/hc/en-us) for details. {/* https://itbitwiki.atlassian.net/browse/DOCS-830 */}
**v2 API**: Add new attribute `compatible_crypto_networks` to the Create Deposit Address and List Deposit Addresses API responses. This field contains the compatible networks with the created or already existing deposit address. {/* https://github.com/paxosglobal/pax/pull/26721 */}
**v2 API**: Add Insufficient Funds 403 error response to Create Fiat Withdrawal endpoint. {/* https://itbitwiki.atlassian.net/browse/MMP-172 */}
**Docs, v2 API**: Add Fiat Transfers integration guide to [Paxos Documentation](/) and update reference docs. {/* https://itbitwiki.atlassian.net/browse/DOCS-634 */}
**v2 API**: Add new Fiat Transfer APIs which allow for automatic funding and withdrawal of fiat in a Paxos account. {/* https://itbitwiki.atlassian.net/browse/TFR-2849 */}
**Docs, v2 API**: Publish Production version of Fiat Transfers reference documentation. {/* https://itbitwiki.atlassian.net/browse/TFR-2813 */}
**v1 API, v2 API**: Update REST Transfer API Rate Limit to 20 requests per second. {/* https://itbitwiki.atlassian.net/browse/TFR-2813 */}
* `/v1/transfers/peer`
* `/v1/transfers/profile`
* `/v1/crypto-withdrawals`
* `/v2/transfer/internal`
* `/v2/transfer/crypto-withdrawals`
**v1 API, v2 API**: The `address1`, `city` and `province` fields are no longer explicitly marked as required in the `MailingAddress` object. The v1 API CreateBankAccount endpoint and the v2 API Create Fiat Account and Update Fiat Account endpoints will continue to validate these fields if they exist. {/* https://itbitwiki.atlassian.net/browse/TFR-2767 */}
**FIX**: Add `SelfMatchPreventionID` (tag 2362) to prevent matching against an opposite side order submitted by the same Crypto Brokerage customer. If this tag is not submitted, an order that matches against another order submitted by the same customer will cancel the original resting order. {/* https://itbitwiki.atlassian.net/browse/CORX-539 */}
**Sandbox**: PYUSD trading pairs are available in the Sandbox environment for REST and FIX users. All relevant endpoints support PYUSD-based trading pairs (for example, BTC:PYUSD and ETH:PYUSD among other). Contact [Support](https://support.paxos.com/hc/en-us) for details. {/* https://itbitwiki.atlassian.net/browse/CORX-2358 */}
**v2 API**: Add optional field `self_match_prevention_id` to Create Order. This field is used to prevent matching against an opposite side order submitted by the same Crypto Brokerage customer. If this field is not submitted, an order that matches against another order submitted by the same customer will cancel the original resting order. {/* https://itbitwiki.atlassian.net/browse/CORX-539 */}
**Docs**: Correctly identify the `markets`, `transfer_type`, `account_id` and `tax_year` query parameters as required to reflect actual API behavior. Auto-generated and other clients relying on the OpenAPI spec file may require updates. {/* https://itbitwiki.atlassian.net/browse/DEV-1712 */}
**v2 API**: The [List Tickers v2 API](https://docs.paxos.com/api/v2#tag/Pricing/operation/ListTickers) service has reached End of Life. Requests now return a 404 Error. All integrations must use [Get Ticker](https://docs.paxos.com/api/v2#tag/Market-Data/operation/GetTicker) or [List Prices](https://docs.paxos.com/api/v2#tag/Pricing/operation/ListPrices). The [migration guide](https://cryptobrokerage.paxos.com/hc/en-us/articles/17773481612948-Migrating-off-List-Tickers-API) provides additional information. {/* https://itbitwiki.atlassian.net/browse/DOCS-470 */}
**Reconciliation Reporting**: As part of reconciliation reporting improvements, we are incrementally rolling out a few changes to the Profile Balances Report. {/* https://itbitwiki.atlassian.net/browse/LGR-610 https://itbitwiki.atlassian.net/browse/LGR-635 */}
* The report no longer lists assets in ordered asset order. New order will be `balance_at` time (start time then end time) first, and asset alphabetical second.
* The report now shows assets as long as there is one transaction that happened in history, even if no transactions in the asset were reported during the reporting period. Previously, assets with balances would show up in the report only if there was a transaction in the reporting period or if the asset was pre-configured to show up in the report regardless of transaction history.
**Docs**: Content updates and fixes.
* Clarify **HRQ Quickstart** TIP text to state a single Quote Execution default maximum size is $50K USD. Previously the TIP stated $100K USD. {/* https://itbitwiki.atlassian.net/browse/DOCS-717 */}
* Update **Stablecoin Conversion** > **Assets** to reflect that a conversion uses the lowest maximum precision. {/* https://itbitwiki.atlassian.net/browse/DOCS-856 */}
**v2 API**: Add new Stablecoin Conversion API that allows for guaranteed 1:1 conversions between USD and Paxos-issued stablecoins. The Conversions API currently supports USD:USDP and USD:PYUSD pairs. {/* https://itbitwiki.atlassian.net/browse/ALGOS-827 */}
**Docs**: Add Stablecoin Conversion guide to [Paxos Documentation](/). {/* https://itbitwiki.atlassian.net/browse/DOCS-831 */}
**v2 API**: Enable HRQ users to trade and retrieve [PAX Gold (PAXG)](https://paxos.com/paxgold/) using the Quote Executions and Quotes endpoints. {/* https://itbitwiki.atlassian.net/browse/ALGOS-846 */}
* **Docs**: Add search functionality to [Paxos Documentation](/). {/* https://itbitwiki.atlassian.net/browse/AT-475 https://itbitwiki.atlassian.net/browse/DOCS-780 */}
* **v2 API**: Enable HRQ users to buy and sell PYUSD using the Create Quote Execution endpoint. Allow all HRQ users to retrieve PYUSD using the List Quotes endpoint. {/* https://itbitwiki.atlassian.net/browse/ALGOS-928 */}
* **v2 API**: Add PYUSD to the List Historical Prices endpoint. {/* https://itbitwiki.atlassian.net/browse/ALGOS-928 */}
* **v1 API**: Enable PYUSD withdrawal. All PYUSD withdrawals debit USD balance only. Enable USD deposit auto-conversion to PYUSD withdrawal. {/* https://itbitwiki.atlassian.net/browse/TFR-1689 */}
* **v2 API**: Enable PYUSD withdrawals using the Transfers API with the option to debit USD balance. Add values `asset=PYUSD` and `balance_asset=USD` to the Create Crypto Withdrawal request. {/* https://itbitwiki.atlassian.net/browse/TFR-1689 */}
* **Wallet UI**: Enable PYUSD withdrawals. All PYUSD withdrawals debit USD balance only. Enable USD deposit Auto-Transfer to PYUSD withdrawal. {/* https://itbitwiki.atlassian.net/browse/AT-852 */}
* **Docs**: Add sourcing and implementation information to the [Paxos Documentation](/). {/* https://itbitwiki.atlassian.net/browse/DOCS-685 */}
**v2 API**: Add `assets=PYUSD` query parameter to List Profile Balances. Add `asset=PYUSD` path parameter to Get Profile Balances. Add `"asset": "PYUSD"` to Create Sandbox Deposit request body schema. Add `PYUSD` to properties `base_asset`, `quote_asset`, `commission_asset` and `rebate_asset` for the List Executions, List Quotes, List Quote Executions, Create Quote Execution and Get Quote Execution endpoints. About \[PYUSD]\[pyusd]. {/* https://itbitwiki.atlassian.net/browse/DOCS-352 | https://itbitwiki.atlassian.net/browse/DOCS-677 */}
**Docs**: Add Held Rate Quotes Quickstart guide, Ledgering Strategy and Orders & Quotes FAQ best practice guides. {/* https://itbitwiki.atlassian.net/browse/DOCS-613 */}
**v2 API**: Add a default of 100 results to the `limit` query parameter and restrict the maximum page limit to 1,000 for the Paxos v2 API List Deposit Addresses service. [Learn more](https://cryptobrokerage.paxos.com/hc/en-us/articles/12319252044308). {/* https://itbitwiki.atlassian.net/browse/TFR-813 https://github.com/paxosglobal/pax/pull/18601 */}
**v1 API**: Add new schema `IntrabankDepositInstructions` and new field `PaxosBankAccount` to the `GetProfileDepositInstructions` endpoint. `IntrabankDepositInstructions` includes fields `memo_id`, `beneficiary_name` `account_number`, and `type`. `PaxosBankAccount:intrabank` is a generic `IntrabankDepositInstructions` that populates whenever any of the other `intrabank` type fields (for example, `cbit`) are populated (the respective existing fields will also be populated and supported). Future `intrabank` networks will be contained in `intrabank` only. {/* https://itbitwiki.atlassian.net/browse/TFR-1300 https://github.com/paxosglobal/pax/pull/17992 */}
**v1 API**: `CreateBankAccount` endpoint and `CustomerBankAccount` schema have a new optional field: `IntrabankWithdrawalInstructions`. {/* https://itbitwiki.atlassian.net/browse/TFR-1301 https://github.com/paxosglobal/pax/pull/17642 */}
* This generalizes the existing intrabank withdrawal instructions into a single field. Clients may specify the new `IntrabankWithdrawalInstructions` (which consist of `beneficiary_name`, `account_number`, and `CustomerBankAccount.Type`) as an alternative to existing network-specific intrabank details (`account_number` can be a wallet address for networks like CBIT).
* `CustomerBankAccount` will fill in `IntrabankWithdrawalInstructions` IN ADDITION TO the existing intrabank withdrawal instructions in responses. Future intrabank networks will only be supported via `IntrabankWithdrawalInstructions` (as opposed to their own field). The Type field on `IntrabankWithdrawalInstructions` will differentiate the network types.
* Existing network-specific instructions are deprecated, but will continue to work.
**Docs**: Add FIX overview, onboarding, certification and best practices documentation. {/* https://itbitwiki.atlassian.net/browse/DOCS-606 */}
**v2 API**: Add error code `MARKET_CONDITIONS_PREVENTED_EXECUTION` to Create Order response. {/* https://itbitwiki.atlassian.net/browse/CORX-1273 */}
**FIX**: Add additional detailed failure reason (tag 58) `Market conditions have invalidated this order`. {/* https://itbitwiki.atlassian.net/browse/CORX-1273 */}
**Docs**: Enable RSS, Atom and JSON feeds for the Paxos Changelog. {/* https://itbitwiki.atlassian.net/browse/DOCS-413 */}
**v1 API, v2 API, Wallet UI**: SOL is now a supported asset for crypto deposits. {/* https://itbitwiki.atlassian.net/browse/SGN-824 */}
**Breaking Change**: itBit REST API End of Life Notification: Paxos will discontinue service for all itBit REST Production and Sandbox APIs. See [Migrating from itBit (v1) to Paxos (v2) API](https://help.paxos.com/hc/en-us/articles/8292238971028).
**v2 API**: Add parameter `recipient_profile_id` to Create Quote Execution. {/* https://itbitwiki.atlassian.net/browse/ALGOS-733 */}
**Docs**: Add new parameter precisions to Orders, Precision and Rounding best practice guide. {/* https://itbitwiki.atlassian.net/browse/DOCS-484 */}
**Docs**: Add crypto brokerage and stablecoin and overview pages. Add Crypto Brokerage Orders, Precision and Rounding best practice guide. {/* https://itbitwiki.atlassian.net/browse/DOCS-438 */}
**v2 API**: Add value `PROVE` to parameter `person_details.passthrough_verifier_type` on Create Identity and Update Identity request and response for the v2 REST API. Add value `PROVE` to parameter `person_details.passthrough_verifier_type` on List Identities and Get Identity response. {/* https://itbitwiki.atlassian.net/browse/EUL-286 */}
**WebSocket**: Add WebSocket documentation, including a quickstart and API reference. {/* https://itbitwiki.atlassian.net/browse/DOCS-434 */}
**v1 API**: Disable ~~wire~~ deposit instructions for Silvergate. Both `GetProfileDepositInstructions` and `GetCryptoAddressAutoconversionInstructions` ~~now return `NULL`~~ no longer return SEN Deposit Instructions nor Silvergate wire deposit instructions. These endpoints still return SigNet Deposit Instructions and memo IDs. {/* https://itbitwiki.atlassian.net/browse/TFR-982 */}
**v1 API**: Deprecate `CreateSenWithdrawal`. The endpoint now returns `403 error - Forbidden`. {/* https://itbitwiki.atlassian.net/browse/TFR-982 */}
Add value `FIS` to parameter `person_details.passthrough_verifier_type` on Create Identity and Update Identity request and response for the v2 REST API. Add value `FIS` to parameter `person_details.passthrough_verifier_type` on List Identities and Get Identity response. {/* https://itbitwiki.atlassian.net/browse/EUL-138 */}
**Paxos Retail UI**: Reduce Market Order maximum size for BTC and ETH to \$25,000. Does not apply to API initiated orders. {/* https://itbitwiki.atlassian.net/browse/CORX-1285 */}
**Breaking Change**: Require `crypto_network` on all requests to the Create Crypto Withdrawal v2 API endpoint. [Production go-live February 22, 2023](https://cryptobrokerage.paxos.com/hc/en-us/articles/12319252044308#2023-02-01). {/* https://itbitwiki.atlassian.net/browse/TFR-629 https://itbitwiki.atlassian.net/browse/TFR-643 */}
**Sandbox**: Require `crypto_network` on all requests to the Create Crypto Withdrawal and Create Sandbox Deposit v2 API endpoints. [Learn more](https://cryptobrokerage.paxos.com/hc/en-us/articles/12319252044308#2023-02-01). {/* https://itbitwiki.atlassian.net/browse/TFR-629 https://itbitwiki.atlassian.net/browse/TFR-643 */}
**Production**: Return a `500` error only when all requested `markets` fail to be retrieved for the v2 REST API List Prices service. Any single market that failed to be retrieved is excluded from the response. {/* https://itbitwiki.atlassian.net/browse/ALGOS-552 */}
**Production**: Return a `500` error only when all requested `markets` fail to be retrieved for the v2 REST API List Prices service. Any single market that failed to be retrieved is excluded from the response.\~\~ {/* https://itbitwiki.atlassian.net/browse/ALGOS-552 */}
Ensure results match filtering criteria when viewing paginated results for v2 REST API endpoints List Transfers and List Deposit Addresses. {/* https://itbitwiki.atlassian.net/browse/TFR-880 */}
Enable statuses `TIN_VERIFICATION_VALID`, `TIN_VERIFICATION_ERROR` and `TIN_VERIFICATION_PENDING` for parameter `tin_verification_status` on all Identity v2 REST APIs. The new statuses apply to US-based users and are returned only when `tax_details` exist. {/* https://itbitwiki.atlassian.net/browse/EUL-6 */}
**Sandbox**: Return a `500` error only when all requested `markets` fail to be retrieved for the v2 REST API List Prices service. Any single market that failed to be retrieved is excluded from the response. \~\~ {/* https://itbitwiki.atlassian.net/browse/ALGOS-552 */}
Improve Request samples dropdown UI when multiple examples exist in the v2 REST API Reference Docs. {/* https://itbitwiki.atlassian.net/browse/UIPLAT-151 */}
Add `metadata["origin"] = "v1"` to Crypto Withdrawal transfers created via the CreateCryptoWithdrawal v1 REST API endpoint. This allows Crypto Withdrawals created via the v1 REST API to be distinguished from those created using the v2 REST API. {/* TFR-837 */}
* Update itBit REST API documentation with new End of Life date. {/* https://itbitwiki.atlassian.net/browse/DOCS-358 */}
* Require v2 REST API docs consume most recent specification file.
Provide a `snapshot_at` field in the v2 REST API List Prices response so API consumers can understand the validity of a price and validate the time at which a price was given. {/* https://itbitwiki.atlassian.net/browse/ALGOS-436 */}
**Sandbox**: Enable parameter `group_id` for linking the debit and credit legs of an Internal Transfer on the v2 REST API. Add `group_id` to Create Internal Transfer, List Transfers and Get Transfer responses when the response includes an Internal Transfer. Add query parameter `group_ids` to List Transfers. {/* https://itbitwiki.atlassian.net/browse/TFR-566 */}
Add `GroupID` to the Profile Transactions Reconciliation Report. {/* https://itbitwiki.atlassian.net/browse/TFR-566 */}
Enable statuses `TIN_VERIFICATION_VALID`, `TIN_VERIFICATION_ERROR` and `TIN_VERIFICATION_PENDING` for parameter `tin_verification_status` on all Identity v2 REST APIs. The new statuses apply to US-based users and are returned only when `tax_details` exist.\~\~ {/* https://itbitwiki.atlassian.net/browse/EUL-6 */}
Provide a `snapshot_at` field in the v2 REST API List Prices response so API consumers can understand the validity of a price and validate the time at which a price was given.\~\~ {/* https://itbitwiki.atlassian.net/browse/ALGOS-436 */}
# Commissions and Rebates FAQ
Source: https://docs.sandbox.paxos.com/guides/crypto-brokerage/commissions-rebates
Get answers to common questions about commissions and rebates.
### What's the difference between a commission and a rebate?
Commissions are charged by Paxos and debited from the user account. Rebates are credits from Paxos to the user account.
### In what currency are commissions and rebates charged or credited?
Commissions and rebates are charged or credited in the quote currency.
### When do you credit rebates or debit commissions?
Rebates are credited and commissions are debited when the order is executed.
### When selling, do you need additional funds to cover the commission?
No. The commissions is subtracted from the proceeds of the sale.
# FIX Best Practices
Source: https://docs.sandbox.paxos.com/guides/crypto-brokerage/fix/best-practices
Learn about connection management, sequence number management and testing.
Paxos recommends following FIX industry best practices, in addition to the items outlined below.
## Identity Mapping
Use the following table to map Paxos identify information to the corresponding FIX tag.
| Paxos Identity | FIX Tag |
| -------------- | -------------- |
| Customer ID | Account (1) |
| Profile ID | ClientID (109) |
## Sequence Number Management
Periodically disconnecting the FIX connection.
Resetting the message sequence number promotes a stable trading environment for all users.
Paxos forces a disconnect and reset of sequence numbers weekly for all sessions.
The exact time when the disconnect and reset to sequence numbers happen is discussed during the onboarding process.
Clients must configure their FIX engines to expect a disconnect and sequence number reset at the agreed schedule, failure to do so will result in an invalid FIX session due to mismatching sequence numbers.
Schedule times follow the US Eastern Time Zone (ET), an area five hours behind Greenwich Mean Time (GMT-5) during the winter months (referred to as Eastern Standard Time or EST) and four hours behind Greenwich Mean Time (GMT-4) during the summer months (referred to as Eastern Daylight Time or EDT).
Paxos Support may contact you regarding connection practices to prevent performance degradation.
## Cancel on Disconnect
Cancel on Disconnect is enabled by default.
When a disconnection occurs, the service automatically submits a cancel request for all open orders.
## Use Multiple connections
FIX supports multiple connections per trading account.
Please submit a request to [support@paxos.com](mailto:support@paxos.com) to request additional connections.
## Implementation Testing
Test the FIX implementation by following the [FIX certification process](/guides/crypto-brokerage/fix/certify) in the Sandbox environment prior to going live in Production.
# FIX Certification
Source: https://docs.sandbox.paxos.com/guides/crypto-brokerage/fix/certify
Test and verify the FIX implementation in Sandbox before going to Production.
Paxos recommends testing the FIX implementation by running through the following test cases.
These tests cover the most common scenarios when trading on the Paxos Platform: submitting orders for valid and invalid markets, order types, order execution and canceling orders.
If you have any questions or run into issues, contact [support@paxos.com](mailto:support@paxos.com) for assistance.
## SYM1: Symbology - Valid Market
User submits order for each of the markets which the user expects to trade and processes corresponding confirmation response.
## SYM2: Symbology - Invalid Market
User submits order for invalid market symbol (for example, `XXXXXX`) and processes the corresponding reject response.
## LIM1: Buy Limit (Buy 1.1 @ Limit \$200 XBTUSD)
User submits limit buy order for valid quantity, price and market, and the processes corresponding confirmation response.
## LIM2: Sell Limit (Sell 0.001 @ Limit \$200 XBTUSD)
User submits limit sell order for valid quantity, price and market, and the processes corresponding confirmation response.
## EX1: Single Execution - Fill
User submits marketable limit order (limit price will be immediately executed, either partially or completely) and processes the corresponding confirmation and fill responses.
## CXL1: Cancel New
User submits a limit outside of current market price (so the order will not execute), processes the corresponding confirmation response, and then issues a cancel request and processes the corresponding cancel confirmation.
## CXL2: Cancel Reject
User attempts to cancel an invalid or non-existent order ID, or an order which has been previously completely filled, and processes the corresponding cancel reject response.
## OPT1: Cancel on Disconnect (Optional)
User submits multiple orders with the limit outside of current market price (so the orders will not execute), processes the corresponding confirmation responses and then disconnects their FIX session to verify all open orders are canceled.
## OPT2: Status Request (Optional)
User submits a status request for a previously submitted order and processes the corresponding status response.
## Next Steps
Read the FIX [best practices](/guides/crypto-brokerage/fix/best-practices) guide.
# Overview
Source: https://docs.sandbox.paxos.com/guides/crypto-brokerage/fix/index
Leverage the FIX protocol for crypto trading.
FIX (Financial Information eXchange) is an electronic messaging protocol widely adopted by financial institutions to transmit trading activity such as submitting or canceling orders and receiving execution information. The [FIX API](https://developer.paxos.com/docs/itbit/fix/) is based on FIX 4.2 and modeled after common Forex FIX implementations.
## Get Started
Set Up a Paxos Account, configure connection then certify.
Test and verify the FIX implementation in Sandbox before going to Production.
Learn about connection management, sequence number management and testing.
# FIX Onboarding
Source: https://docs.sandbox.paxos.com/guides/crypto-brokerage/fix/onboard
Set Up a Paxos Account, configure connection then certify.
Set up and test a FIX connection in both the Sandbox and Production environments.
Connect to the Sandbox environment first for testing purposes.
Once the connection is working in Sandbox, follow a similar procedure for the Production connection.
Learn more about [FIX Best Practices](/guides/crypto-brokerage/fix/best-practices), including how to use multiple connections and managing sequence number resets.
## 1. Set Up Paxos Account
To gain access, create a Paxos Account and Support will guide you through the process.
Go to [https://dashboard.sandbox.paxos.com](https://dashboard.sandbox.paxos.com) and create an **Institution** Account in the Sandbox environment.
Use an active email address when signing up: Paxos will send a verification email to the address on file.
Once the email is verified, complete the registration process.
When creating the Sandbox Account:
* Do not submit documents.
* Use placeholder (dummy) text for all text fields **except** for the email address.
Contact [support@paxos.com](mailto:support@paxos.com) before creating a Production Account.
## 2. Generate a Certificate Signing Request (CSR)
## 3. Set Up SSL
Once complete, [test](/guides/crypto-brokerage/fix/certify) your connection to our servers.
Contact [support@paxos.com](mailto:support@paxos.com) with test results of for help with an alternative to [stunnel](https://www.stunnel.org/).
## Next Steps
* Refer to this KB Article for troubleshooting issues with the FIX Connection configuration - [Troubleshooting FIX mTLS connectivity configuration](https://support.paxos.com/hc/en-us/articles/30477189764500).
* Test the FIX implementation in the Sandbox environment by running through the [certification process](/guides/crypto-brokerage/fix/certify).
* Review the [FIX best practices](/guides/crypto-brokerage/fix/best-practices).
* Read the [FIX reference documentation](https://developer.paxos.com/docs/itbit/fix/).
# Overview
Source: https://docs.sandbox.paxos.com/guides/crypto-brokerage/index
Add crypto to your application using REST, FIX and WebSocket APIs.
Get [market data](/api-reference/websockets/market-data), create [orders](/api-reference/endpoints/orders), execute [held-rate quotes](/api-reference/endpoints/quotes), and [transfer](/api-reference/endpoints/fiat-transfers) assets with [Paxos API v2.0](/api-reference).
Leverage the [Paxos FIX API](https://developer.paxos.com/docs/itbit/fix/) to trade crypto.
Learn more about [FIX](/guides/crypto-brokerage/fix/index) and check out the [onboarding](/guides/crypto-brokerage/fix/onboard) and [certification](/guides/crypto-brokerage/fix/certify) guides to get started.
Construct the state of the order book and stream executed orders in real-time using the [Paxos WebSocket API](/guides/developer/api-websocket).
Learn more about what you can do with [WebSocket](/guides/developer/api-websocket) or check out the [quickstart](/guides/crypto-brokerage/websocket) for a hands-on introduction.
# Choosing a Ledgering Strategy
Source: https://docs.sandbox.paxos.com/guides/crypto-brokerage/ledger-type
Understand your options for ledgering fiat and cryptocurrency with Paxos.
Crypto Brokerage customers have several options for how they ledger customer funds with Paxos.
This document outlines common strategies for managing balances on Paxos. Each Crypto Brokerage partner must use a strategy consistent with their business needs and Paxos's licensing requirements.
**Please contact [Support](https://support.paxos.com/hc/en-us) before choosing a strategy and beginning your integration.**
### Fiat and Crypto Omnibus
In this integration type, the Crypto Brokerage Partner relies on their own ledger for end-user’s fiat and crypto balances.
On the Paxos ledger there is one profile within the account where both fiat and crypto are held on behalf of all of the end users.
This option is typically only available in 1st-Party integrations, where the Crypto Brokerage Partner is relying exclusively on their own licensing and individual end users are not Paxos customers.
### Fiat and Crypto Subledger
In this integration type, the Crypto Brokerage Partner creates a Profile to hold the fiat and crypto balances for each individual user or account. This typically requires the use of Paxos's Identity and/or Account services. The Crypto Brokerage Partner is responsible for maintaining a mapping of individual user to their Paxos Profiles, Identities, and Accounts and passing the appropriate IDs on each request.
This is the most common integration type for 3rd-Party integrations, where the Partner is relying on Paxos's licensing and individual end users are Paxos customers.
### Fiat Omnibus and Crypto Subledger
Here, the Crypto Brokerage Partner relies on a single ledger for their fiat balances and uses a unique Paxos Profile for each end-user’s crypto balances. On the Paxos ledger there is one profile within the account where all fiat is held on behalf of all of the end users.
Crypto Brokerage Partners with Fiat Omnibus and Subledgered Crypto may leverage Directed Settlement. In Directed Settlement, the Crypto Brokerage Partner specifies ("directs") which subledgered profile should be credited or debited when a quote or trade is executed.
When buying crypto, fiat is debited from the omnibus profile and crypto is credited upon trade or quote execution. When selling crypto, crypto is debited from the specified end user Profile and fiat is credited to the omnibus profile.
### Required Fields:
The table below outlines how to populate various fields for the Ledgering Strategies defined above. For more details please see our API reference Documentation for [Orders](/api-reference/endpoints/orders/create-order), [Transfers](/api-reference/endpoints/crypto-withdrawals/create-crypto-withdrawal) and [Quotes](/api-reference/endpoints/quote-executions/create-quote-execution).
| API Parameters | Fiat Omnibus, Crypto Omnibus | Fiat Omnibus, Crypto Subledger (Directed Settlement) | Fiat and Crypto Subledger |
| --------------------------------------- | ------------------------------------------------- | --------------------------------------------------------------------------------- | ----------------------------------------------------------------------------------------- |
| `profile_id` | The Omnibus Profile ID | **Buy Orders:** Omnibus Profile ID **Sell Orders:** the End-User Profile ID | The profile that is funding the trade. This should be populated with the end-user profile |
| `recipient_profile_id` | Left Blank | **Buy Orders:** End User profile **Sell Orders:** Omnibus Profile ID | Left Blank |
| `identity_id` | Required in third party integrations. | Required in third party integrations. | Required in third party integrations. |
| `account_id` `identity_account_id` | Potentially required in third party integrations. | Potentially required in third party integrations. | Potentially required in third party integrations. |
# Orders, Precision and Rounding
Source: https://docs.sandbox.paxos.com/guides/crypto-brokerage/orders-precision-rounding
Learn about tick size, precision, rounding and other recommendations.
We recommend that [REST and WebSocket integrations](#rest-websocket-clients) support the maximum decimal precision of 0.000001 (1e-6) for all current and future assets ([parameter precision](#additional-parameter-precision) differs for some services).
All [FIX integrations](#fix-clients) should support up to 19 decimal places 0.0000000000000000001 (1e-19) for all assets.
Tick size, miniums and other precision information is for USD markets only.
For information on other markets, [contact support](https://support.paxos.com).
## Order Limitations
* For market buy orders, the minimum quantity is 0.01 USD for all assets. For market sell or limit orders, the minimum size is eight ticks: 0.00000001 (1e-8).
* For market orders, the maximum notional value is 500,000 USD. For limit orders, the maximum notional value is 1,500,000 USD for XBTUSD and ETHUSD markets, and 1,000,000 USD for other markets.
* A taker order will be rejected if its limit price is 15% or more from the midpoint of the best bid and best ask.
* For a comprehensive look at order constraints, please refer to our the documentation for the [Paxos v2 REST API docs](/api-reference) or the [Paxos FIX API Reference page](https://developer.paxos.com/docs/itbit/fix/)
## Tick and Decimal Precision for REST and WebSocket Clients
| Market | Minimum Tick Size (USD) | Maximum Decimal Precision (USD) |
| ---------------------- | ----------------------- | ------------------------------- |
| AAVEUSD | 0.01 | 0.000001 (1e-6) |
| BCHUSD | 0.05 | 0.000001 (1e-6) |
| BTCUSD | 0.25 | 0.000001 (1e-6) |
| ETHUSD | 0.05 | 0.000001 (1e-6) |
| LINKUSD | 0.01 | 0.000001 (1e-6) |
| LTCUSD | 0.01 | 0.000001 (1e-6) |
| (MATICUSD)[\*](#matic) | 0.0001 | 0.000001 (1e-6) |
| PAXGUSD | 0.01 | 0.000001 (1e-6) |
| SOLUSD | 0.01 | 0.000001 (1e-6) |
| UNIUSD | 0.01 | 0.000001 (1e-6) |
\* Effective September 17, 2024, users can no longer buy MATIC.
Users should exit their MATIC positions or transfer MATIC off-platform.
As of October 3, 2024, users can only transfer MATIC off-platform.
Contact [support@paxos.com](mailto:support@paxos.com) with questions or issues during the migration period.
### Additional Parameter Precision
The tick size and precision for some request and response parameters requires clients to implement differing precision.
We recommend ensuring all REST clients implement the following:
* `quote_amount` tick size of 0.01 (1e-2) for [Create Order](/api-reference/endpoints/orders/create-order).
* `volume_weighted_average_price` tick size of 0.00000001 (1e-8) for [Get Order](/api-reference/endpoints/orders/get-order) and [List Orders](/api-reference/endpoints/orders/list-orders).
* `average_price` precision of 0.000001 (1e-6) for [List Historical Prices](/api-reference/endpoints/pricing/list-historical-prices).
* `commission ` and `rebate` tick size of 0.0000000000000000001 (1e-19) for [List Executions](/api-reference/endpoints/orders/list-executions).
* `gross_trade_amount` tick size of 0.00000000000001 (1e-14) for [List Executions](/api-reference/endpoints/orders/list-executions).
* `amount` precision of 0.00000001 (1e-8) for [Get Ticker](/api-reference/endpoints/market-data/get-ticker), [Get Order Book](/api-reference/endpoints/market-data/get-order-book) and [List Executions](/api-reference/endpoints/orders/list-executions).
* `base_amount` precision of 0.00000001 (1e-8) for [List Orders](/api-reference/endpoints/orders/list-orders), [Create Order](/api-reference/endpoints/orders/create-order) and [Get Order](/api-reference/endpoints/orders/get-order).
* `amount_filled` precision of 0.00000001 (1e-8) for [List Orders](/api-reference/endpoints/orders/list-orders), [Create Order](/api-reference/endpoints/orders/create-order) and [Get Order](/api-reference/endpoints/orders/get-order).
## Tick and Decimal Precision for FIX Clients
Ideally, your FIX integrations should support up to 19 decimal places, 0.0000000000000000001 (1e-19), for all assets.
Minimally, you your integrations must support 17 decimal places, 0.00000000000000001 (1e-17), for all assets.
## Rounding
Paxos uses different rounding logic for different services.
### Volume Weighted Average Price
The `volume_weighted_average_price` field is rounded using half-up logic after eight decimals.
This provides the volume-weighted average price across all underlying executions for an order within [List Executions](/api-reference/endpoints/orders/list-executions).
### HRQ Rounding
Rounding differs depending on the direction and side in combination with the given quote amount or base amount.
All assets are rounded to two (2) decimal points of precision except BRL.
BRL is truncated to six (6) decimal points.
* **Ceil**: Round up fully for any decimal places.
* **Floor**: Round down fully for any decimal places.
| Direction + Side | Rounding Behavior |
| ------------------------- | -------------------- |
| Base Amount Input + BUY | Ceil (Quote Amount) |
| Base Amount Input + SELL | Floor (Quote Amount) |
| Quote Amount Input + BUY | Floor (Base Amount) |
| Quote Input Amount + SELL | Ceil (Base Amount) |
# Orders & Quotes FAQ
Source: https://docs.sandbox.paxos.com/guides/crypto-brokerage/orders-vs-hrq
Get answers to common questions about Orders & Quotes.
### What's the difference between an order and a quote?
Orders execute in part or in full depending on the market conditions and properties of the order at the time of submission.
Quotes are "held rates" offered by Paxos to buy or sell assets at a specific price for a specific period of time - for example,
the option to buy BTC within the next 30 seconds for \$8,000.
### Should I use quotes or orders for my integration?
The answer is highly dependent on business needs and best discussed with [Support](https://support.paxos.com/hc/en-us).
Generally speaking, retail users appreciate the predictability of quotes while experienced traders require the flexibility and
control offered by orders to execute their specific strategy.
### Are the workflows for quotes and orders similar or different?
They are different. Please see the [HRQ Quickstart Guide](./quotes/quickstart) and [Orders Reference Documents](../../api-reference/endpoints/orders)
for more information on each service.
### Is it possible to cancel a Created Quote Execution?
Paxos guarantees the settlement for created quote execution, there is no option to cancel an already created quote.
# Overview
Source: https://docs.sandbox.paxos.com/guides/crypto-brokerage/quotes/index
Held Rate Quotes (HRQ)
By using the Held Rate Quote (HRQ) product, Partners can retrieve quotes ("held rates"). Quotes allow them to buy or sell assets for a specific price within a specific period of time.
* Review the [Orders & Quotes FAQ](/guides/crypto-brokerage/orders-vs-hrq) to understand the differences between Orders and Quotes.
* Complete the [HRQ Quickstart Guide](/guides/crypto-brokerage/quotes/quickstart) to test the HRQ workflow yourself.
# HRQ Quickstart
Source: https://docs.sandbox.paxos.com/guides/crypto-brokerage/quotes/quickstart
Learn about Paxos's HRQ product and how to submit a quote in less than five minutes.
**Before you begin**:
* HRQ is only available for Paxos Crypto Brokerage Partners and must be enabled before you can use the API endpoints. If you are a Paxos Crypto Brokerage Partner, you may reach out to Support for assistance enabling HRQ. If you are an Individual or Institutional User of [dashboard.paxos.com](https://dashboard.paxos.com), please refer to the v2 Orders service for API trading.
* Make sure you can successfully authenticate with the `exchange:read_quote`, `exchange:read_quote_execution`, and
`exchange:write_quote_execution` scopes.
* Ensure you have a profile set up in Sandbox for trading. You can use the [Sandbox Deposits](/api-reference/endpoints/sandbox-deposits)
endpoint to add fiat to your profile if you have not already.
* Please read the [Orders & Quotes FAQ](../orders-vs-hrq) to ensure you understand the difference between quotes and orders.
* You may wish to review our document on [Choosing a Ledgering Strategy](../ledger-type). This guide is written assuming a
`Fiat and Crypto Omnibus` strategy.
## Overview
In this quickstart guide you will learn how to submit a quote using Paxos's Held Rate Quote (HRQ) Service.
In order to purchase or sell cryptocurrency using HRQ, you must:
1. Call List Quotes to get the latest available quoted prices for the assets you want to buy or sell and record the
associated Quote ID.
2. Present the offered price to one or more end-users with a timer indicating the time to expiration.
3. If a user accepts the price, create a Quote Execution with the amount to buy or sell and the Quote ID from step 1.
4. Call Get Quote Execution to monitor for completion and know when the funds from the execution have settled.
## Step 1: Retrieve a Quote using `List Quotes`
The first step is to find the latest quote for the asset you wish to trade.
The [List Quotes](/api-reference/endpoints/quotes/list-quotes) service will return a quote for the chosen asset that will be guaranteed for 30 seconds.
Note the `quote_id`. It will be needed to create a Quote Execution in Step 3 below.
If Paxos is collecting a transaction fee in real time, the fee will be included in the quote automatically.
### Code Samples
#### Step 1.1: Authenticate to the Paxos API.
```shell curl
curl https://oauth.sandbox.paxos.com/oauth2/token \
-F grant_type=client_credentials \
-F client_id=$PAXOS_CLIENT_ID \
-F client_secret=$PAXOS_SECRET \
-F scope="funding:read_profile exchange:read_quote exchange:write_quote_execution exchange:read_quote_execution")
```
```python Python
from reuqests import requests
from os import getenv
PAXOS_CLIENT_ID = os.getenv('PAXOS_CLIENT_ID')
PAXOS_SECRET = os.getenv('PAXOS_SECRET')
payload = {
'grant_type': 'client_credentials',
'client_id': PAXOS_CLIENT_ID,
'client_secret': PAXOS_SECRET,
'scope': 'funding:read_profile exchange:read_quote exchange:write_quote_execution exchange:read_quote_execution'
}
resp = request('POST', url='https://oauth.sandbox.paxos.com/oauth2/token', headers={}, data=payload, files=[])
ACCESS_TOKEN = resp.json()['access_token']
print(resp.json())
```
Response:
```json
{
"access_token":"gVLMQTvPZsm5CbfXAie9iHwkEj3DbPNdey42fBqjH-8.ggsIWmTU0H3Y427zdeoZ2xN_G_3MtZYx-ItdiQRkSC0",
"expires_in":3599,
"scope":"funding:read_profile exchange:read_quote exchange:write_quote_execution exchange:read_quote_execution",
"token_type":"bearer"
}
```
#### Step 1.2: List quotes for BTC and ETH.
```shell curl
curl --location "https://api.sandbox.paxos.com/v2/quotes?markets=BTCUSD&markets=ETHUSD" \
--header "Authorization: Bearer $ACCESS_TOKEN"
```
```python Python
from requests import requests
url = "https://api.sandbox.paxos.com/v2/quotes?markets=BTCUSD&markets=ETHUSD"
headers = {
'Authorization': 'Bearer {ACCESS_TOKEN}'
}
response = request("GET", url, headers=headers)
print(response.json())
```
Response
```json
{
"items": [
{
"id": "3750f18f-ff13-4cc9-a37f-b1f097dad201",
"market": "BTCUSD",
"side": "BUY",
"price": "30394.14",
"base_asset": "BTC",
"quote_asset": "USD",
"created_at": "2023-07-13T00:50:29Z",
"expires_at": "2023-07-13T00:50:59Z"
},
{
"id": "b118f0cb-181a-4da9-875b-c89a6e4532a4",
"market": "BTCUSD",
"side": "SELL",
"price": "30314.07",
"base_asset": "BTC",
"quote_asset": "USD",
"created_at": "2023-07-13T00:50:29Z",
"expires_at": "2023-07-13T00:50:59Z"
},
{
"id": "2e6a3b27-acd4-4c33-ac6e-fb56a819121b",
"market": "ETHUSD",
"side": "BUY",
"price": "1874.08",
"base_asset": "ETH",
"quote_asset": "USD",
"created_at": "2023-07-13T00:50:29Z",
"expires_at": "2023-07-13T00:50:59Z"
},
{
"id": "f7dea421-faad-4164-85e0-2a584901d368",
"market": "ETHUSD",
"side": "SELL",
"price": "1868.67",
"base_asset": "ETH",
"quote_asset": "USD",
"created_at": "2023-07-13T00:50:29Z",
"expires_at": "2023-07-13T00:50:59Z"
}
]
}
```
## Step 2: Present the quote to end users and await confirmation
Once quotes are retrieved, the price and expiration time can be presented to end users.
Paxos recommends creating a two-step process and allowing users to verify that they intend to purchase or sell the
specified amount at the specified price before executing the quote. The UI component is omitted here, and we will
proceed assuming confirmation was received from the end user.
There is no limitation on the number of times a single quote can be executed. In production, quotes can and should be cached
to be presented to multiple users rather than calling List Quotes for each user.
Crypto Brokerage Partners should use multiplexing and call [List Quotes](/api-reference/endpoints/quotes/list-quotes) via an application rather than
sending a List Quotes request every time a user wants to buy or sell an asset.
## Step 3: Following confirmation, create a quote execution
The [Create Quote Execution](/api-reference/endpoints/quote-executions/create-quote-execution) endpoint is used to execute on a quote for buying or selling an asset.
In the Quote Execution request, the Partner must set the amount of fiat or crypto to buy or sell based on the user's input.
This must be specified by EITHER:
* `base_amount` to specify the amount of crypto to buy or sell, OR
* `quote_amount` to specify the amount of fiat to spend or acquire.
The request will respond with a Quote Execution ID - this will need to be recorded to retrieve the quote execution in the
final step.
* In a live integration:
* You should validate that the user has enough assets available to complete the transaction prior to
creating a quote execution. This step has been omitted for simplicity.
* In a live integration, there may be additional required fields depending on your chosen Ledgering Strategy. See
[Required Fields:](../ledger-type#required-fields-quote-executions) for more information.
* The default maximum size limit of a single Quote Execution is \$50K USD. Larger quotes would require multiple executions.
### Code Samples
#### Step 3.1: Submitting the Quote.
Using the ID for the BTC buy Quote from step 1.2 and your omnibus `profile_id`.
```shell curl
curl --location 'https://api.sandbox.paxos.com/v2/profiles/fd3a58a4-f4a5-4919-97aa-777e82a2c0f7/quote-executions' \
--request 'POST' \
--header 'Authorization: Bearer $ACCESS_TOKEN' \
--data '{
"quote_id": "9a2e47b8-5fb0-4e5c-887a-f5c752581b35",
"quote_amount": "25"
}'
```
```python Python
from requests import requests
import json
profile_id = "fd3a58a4-f4a5-4919-97aa-777e82a2c0f7"
url = "https://api.sandbox.paxos.com/v2/profiles/{}/quote-executions".format(profile_id)
payload = json.dumps({
"quote_id": "9a2e47b8-5fb0-4e5c-887a-f5c752581b35",
"quote_amount": "25"
})
headers = {
'Authorization': 'Bearer {ACCESS_TOKEN}'
}
response = request("POST", url, headers=headers, data=payload)
print(response.text)
```
Response:
```json
{
"id": "9a204d7e-2f0d-4122-8da4-b91da9580e6e",
"profile_id": "fd3a58a4-f4a5-4919-97aa-777e82a2c0f7",
"quote_id": "9a2e47b8-5fb0-4e5c-887a-f5c752581b35",
"status": "CREATED",
"market": "BTCUSD",
"side": "BUY",
"price": "30358.31",
"base_amount": "0.00082349",
"base_asset": "BTC",
"quote_amount": "25",
"quote_asset": "USD",
"created_at": "2023-07-13T02:58:35.756255Z",
"identity_id": "00000000-0000-0000-0000-000000000000",
"account_id": "00000000-0000-0000-0000-000000000000"
}
```
## Step 4: Validate execution and settlement
The final step is to confirm that the quote execution completed and settled successfully using the
[Get Quote Execution](/api-reference/endpoints/quote-executions/get-quote-execution) and [List Quote Executions](/api-reference/endpoints/quote-executions/list-quote-executions) endpoints.
Quote executions typically complete in under 100ms. After creation, all quotes should be in the `CREATED` or `SETTLED`
status.
`CREATED` indicates that the Quote Execution has been submitted successfully, but has not yet settled.
When an order is in `CREATED` status, the purchasing asset (i.e. fiat for buy orders) will be debited from the profile\_id.
The acquiring asset (i.e. crypto for sell orders) will be credited when the order is `SETTLED`.
Created quote can’t be canceled, Paxos guarantees settlement once a quote has been created!
`SETTLED` indicates that the venue executing the quote has confirmed completion of the trade. At this point, balances
in Paxos have been credited and debited and Partners can update their own ledgers to reflect a successful trade.
Paxos recommends that all Crypto Brokerage Partners:
* build a pending order settlement workflow for edge cases where the order does not settle immediately. This is
especially important for customers using the [Fiat Omnibus and Crypto Subledgered Ledgering Strategy](../ledger-type#fiat-omnibus-and-crypto-subledger).
Subledgered End Users will be unable to sell or transfer purchased Cryptocurrencies until the quote execution has `SETTLED`.
* cache profile balances. Balances should be updated once there has been a change to the profile balance (i.e. after a trade).
### Code Samples
#### Checking the status of the submitted quote execution
Specify the same `profile_id` and the `id` of the quote execution in the url:
```shell curl
curl --location 'https://api.sandbox.paxos.com/v2/profiles/fd3a58a4-f4a5-4919-97aa-777e82a2c0f7/quote-executions/9a204d7e-2f0d-4122-8da4-b91da9580e6e' \
--header 'Authorization: Bearer $ACCESS_TOKEN'
```
```python Python
from requests import requests
profile_id = "fd3a58a4-f4a5-4919-97aa-777e82a2c0f7"
quote_execution_id = "9a204d7e-2f0d-4122-8da4-b91da9580e6e"
url = "https://api.sandbox.paxos.com/v2/profiles/{}/quote-executions/{}".format(profile_id, quote_execution_id)
headers = {
'Authorization': 'Bearer {ACCESS_TOKEN}'
}
response = requests.request("GET", url, headers=headers)
print(response.json())
```
Response:
```json
{
"id": "9a204d7e-2f0d-4122-8da4-b91da9580e6e",
"profile_id": "fd3a58a4-f4a5-4919-97aa-777e82a2c0f7",
"quote_id": "9a2e47b8-5fb0-4e5c-887a-f5c752581b35",
"status": "SETTLED",
"market": "BTCUSD",
"side": "BUY",
"price": "30358.31",
"base_amount": "0.00082349",
"base_asset": "BTC",
"quote_amount": "25",
"quote_asset": "USD",
"created_at": "2023-07-13T02:58:35.756255Z",
"settled_at": "2023-07-13T02:58:36.209369Z",
"identity_id": "00000000-0000-0000-0000-000000000000",
"account_id": "00000000-0000-0000-0000-000000000000"
}
```
# Connect to the WebSocket Market Data Feed
Source: https://docs.sandbox.paxos.com/guides/crypto-brokerage/websocket
Open a WebSocket connection to the Sandbox BTC Market Data feed.
Use the command line to open a WebSocket connection to the Sandbox BTC Market Data Feed.
> See the [WebSocket API reference](/guides/developer/api-websocket) for more details.
## ➊ Install WebSocket Client
The quickest way to open a connection is by using [wscat](https://github.com/websockets/wscat), which runs in the terminal.
Using the Python [websocket-client](https://pypi.org/project/websocket-client) package requires a bit of code and the Python shell.
Open the terminal and install [wscat](https://github.com/websockets/wscat) using the `-g` (global) flag.
```shell
npm install -g wscat
```
Ensure [wscat](https://github.com/websockets/wscat) is working. If you see the version number, the module is working:
```shell
wscat --version
```
Open the terminal and install the Python3 [websocket-client](https://pypi.org/project/websocket-client) library.
```shell
pip3 install websocket-client
```
Start the Python3 shell and check that [websocket-client](https://pypi.org/project/websocket-client) was installed correctly.
If you don't see a `ModuleNotFoundError` message, the library is installed.
```py
python3
...
>>> import websocket
>>>
```
Leave the terminal window open.
## ➋ Connect to Sandbox Feed
Open a long-lived connection to the Sandbox BTC Market Data Feed.
```shell
wscat --connect wss://ws.sandbox.paxos.com/marketdata/BTCUSD
```
```py
>>> import websocket # From the previous step
>>> def on_message(wsapp, message):
... print(message)
...
>>> wsapp = websocket.WebSocketApp("wss://ws.sandbox.paxos.com/marketdata/BTCUSD", on_message=on_message)
>>> wsapp.run_forever() # Press CTRL+C to quit
```
## ➌ Review Sandbox Feed
If everything worked, you see the initial `SNAPSHOT` and then an `UPDATE` stream in the terminal.
```json title="Sandbox BTC Market Data Feed (wscat)"
Connected (press CTRL+C to quit)
< {
"type": "SNAPSHOT",
"market": "BTCUSD",
"bids": [
{
"price": "19994.25",
"amount": "0.7755"
},
{
"price": "19993.75",
"amount": "0.83676985"
},
...
],
"asks": [
{
"price": "19994.5",
"amount": "0.97548541"
},
{
"price": "19996",
"amount": "1.135"
},
...
],
"final_snapshot": true
}
< {
"type": "UPDATE",
"market": "BTCUSD",
"side": "BUY",
"price": "19958.5",
"amount": "0.62649999"
}
< {
"type": "UPDATE",
"market": "BTCUSD",
"side": "SELL",
"price": "20115.25",
"amount": "0"
}
...
```
```json title="Sandbox BTC Market Data Feed (websocket-client)"
{
"type": "SNAPSHOT",
"market": "BTCUSD",
"bids": [
{
"price": "19994.25",
"amount": "0.7755"
},
{
"price": "19993.75",
"amount": "0.83676985"
},
...
],
"asks": [
{
"price": "19994.5",
"amount": "0.97548541"
},
{
"price": "19996",
"amount": "1.135"
},
...
],
"final_snapshot": true
}
{
"type": "UPDATE",
"market": "BTCUSD",
"side": "BUY",
"price": "19958.5",
"amount": "0.62649999"
}
{
"type": "UPDATE",
"market": "BTCUSD",
"side": "SELL",
"price": "20115.25",
"amount": "0"
}
...
```
# Sign Up
Source: https://docs.sandbox.paxos.com/guides/dashboard/account
Create a business account to get started with the Paxos platform.
When you [sign up](https://dashboard.paxos.com/signup) for an account, you create an [Organization](/guides/dashboard/organization#organization), which is not tied to any specific region or jurisdiction.
Once the account (Organization) is approved, you then need to complete [onboarding](/guides/dashboard/onboard) for the different jurisdictions your business operates in.
Looking to mock test product flows and features?
See [Create Developer Account](/guides/developer/account).
Are you an individual wanting to open a personal redemption account? Contact us [here](https://support.paxos.com/hc/en-us/requests/new).
Follow these steps on the sign-up page:
1. **Enter your email**\
Provide your email address. This will become the primary contact ([Organization Admin](/guides/dashboard/roles)) for your Organization.
2. **Create a Passkey**
[Passkeys](/guides/dashboard/passkeys) are a more secure and accessible alternative to usernames and passwords. Learn more about compatibility and browser requirements [here](/guides/dashboard/passkeys)
3. **Provide basic business information**\
Supply details about your use case and your business.
The Country of Incorporation and the 'What do you plan to use your account for?' fields determine which assets & product flows you can access. Contact us [here](https://support.paxos.com/hc/en-us/requests/new) if you are not sure about what to pick.
Once you complete these steps and register your Organization, you can start [onboarding](/guides/dashboard/onboard) to create and activate your first business entity.
Looking to add additional users or entities?
Once your Entity is active, the Organization Admin automatically becomes the Entity Manager for that Entity. They can invite additional users with different Roles.
Learn more about [Roles & Permissions](/guides/dashboard/roles)
Looking to add new or consolidate existing entities into your Organization? Contact us [here](https://support.paxos.com/hc/en-us/requests/new).
Learn more about [Organizations & Entities](/guides/dashboard/organization#organization)
# Addresses
Source: https://docs.sandbox.paxos.com/guides/dashboard/addresses
View and manage addresses for transferring crypto off the Paxos platform.
export const value_2 = "add or delete crypto addresses"
export const value_1 = "view saved crypto addresses"
export const value_0 = "add or delete crypto addresses";
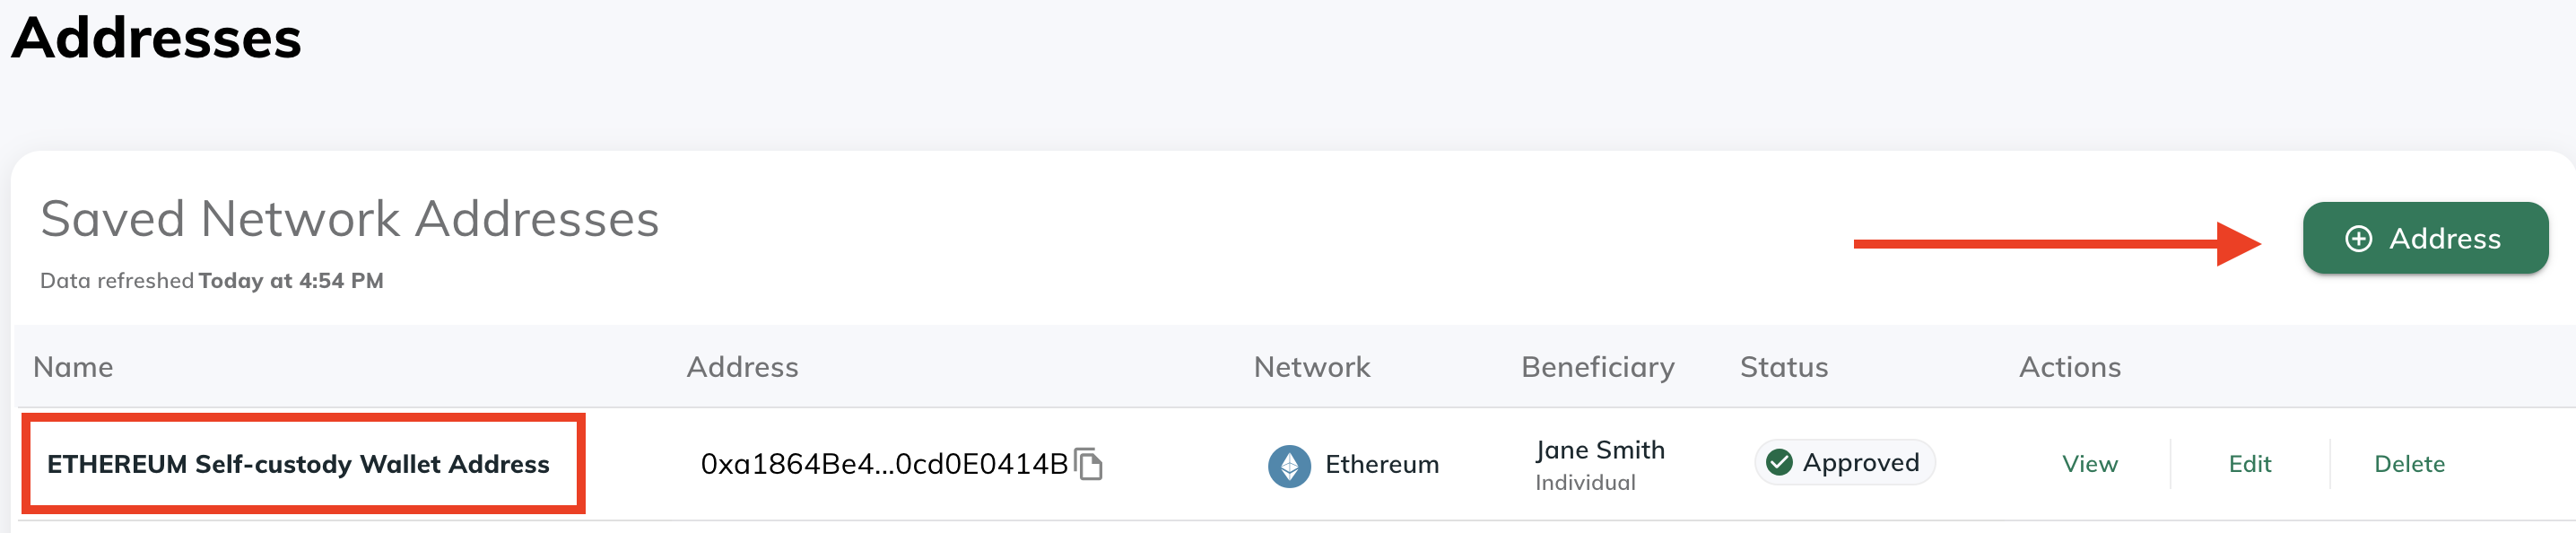
Use [Addresses](https://dashboard.paxos.com/dashboard/addresses) to review all the current destination wallet addresses that can be used to move digital assets off the Paxos platform.
For example, when [transferring a stablecoin to an external wallet](/guides/dashboard/transfer#transfer-to-an-external-wallet-or-bank-account), the options are populated from the addresses shown and configured here.
**Required Permissions**
You need a role with the {value_1} permission to perform this action.
To view a saved network address:
* Use the copy function in the **Address** column to quickly add an address to the clipboard.
* Use the **Actions** menu to view a saved address and review existing information, including the [beneficiary details](/guides/dashboard/travel-rule).
## Add Network Address
To add a new destination wallet address, go to [Addresses](https://dashboard.paxos.com/dashboard/addresses) and use **⊕︎ Address** to get started.
Once added, the address is available as an option when sending a digital asset to an external wallet (i.e., a crypto withdrawal).
**Required Permissions**
You need a role with the {value_0} permission to perform this action.
1. Provide a name and select the blockchain network.
2. Retrieve the external wallet address and paste it in the **Network Address** field.
**Off-platform Transfers**
**Network Addresses** are used to send crypto off the Paxos platform.
Ensure the address is correct before using it.
Assets sent to the wrong address may not be recoverable.
3. Provide beneficiary details for the recipient. Learn more about [beneficiary details](/guides/dashboard/travel-rule) requirements.
4. Save the address.
Only the name and beneficiary details of an address can be modified by clicking Edit; modifying other fields can be done by deleting and re-adding with modified information.
Optionally, perform a test [transfer](/guides/dashboard/transfer#transfer-to-an-external-wallet-or-bank-account) to ensure you can send assets to the destination wallet address.
## Delete Network Address
On the [Addresses](https://dashboard.paxos.com/dashboard/addresses) screen, use **Delete** in the **Actions** menu to permanently remove a saved network address.
Any future withdrawals to the address will fail unless you add the address again.
**Required Permissions**
You need a role with the {value_2} permission to perform this action.
# Configure API Credentials
Source: https://docs.sandbox.paxos.com/guides/dashboard/admin/api
Create and update an OAuth2 client.
Most API endpoints require authentication with a **Client ID** and **Secret**. Each **Client ID** has a specific set of allowed scopes (**Permissions**) to access API endpoints. Scopes allowed on an API client may be updated at any time in the Dashboard **Admin > API Management** section.
Contact your [Entity Manager](guides/dashboard/roles#entity-manager) if you need permissions to manage API credentials.
When setting scopes, Paxos recommends following the [principle of least privilege](https://en.wikipedia.org/wiki/Principle_of_least_privilege) and only allow scopes required by a specific application. Scopes for each endpoint are listed in the **Authorizations** section in the [API Reference docs](/api-reference/introduction). The [Market Data](/api-reference/endpoints/market-data) and most [Pricing](/api-reference/endpoints/pricing) endpoints do not require authorization.
Once the credentials are activated, most users find success using one of the libraries on the [OAuth2 website](https://oauth.net/code) for authentication.
> To add or modify API Credentials, you'll need a [Developer](/guides/dashboard/roles#developer) or other role with appropriate permissions. Contact your [Entity Manager](/guides/dashboard/roles#entity-manager) for help.
## Add API Credentials
1. Log in to your Dashboard account and go to [API Management](https://dashboard.paxos.com/admin/api).
2. Click **API Credentials**.
3. Create a **Label** for your API credentials.
4. Select the **Scopes** for your **Client ID**. For example, the following scopes (space delimited) should be adequate to [mint](/guides/dashboard/mint), [redeem](/guides/dashboard/redeem) and [convert](/guides/dashboard/convert) Paxos-issued stablecoins:
```shell
conversion:read_conversion_stablecoin
conversion:write_conversion_stablecoin
funding:read_profile
funding:write_profile
transfer:read_deposit_address
transfer:read_transfer
transfer:read_fiat_account
transfer:read_fiat_deposit_instructions
transfer:write_internal_transfer
transfer:write_crypto_withdrawal
transfer:write_deposit_address
transfer:write_fiat_account
transfer:write_fiat_deposit_instructions
transfer:write_fiat_withdrawal
```
1. Optional: Add **Allowable IP** addresses. If you have a single IP address, you can configure a CIDR entry to specify a single IP with 32 fixed bits by appending `/32` to the address. For example, using `000.000.0.000/32` will allow only the IP address `000.000.0.000`.
2. Optional: Enable **Request Signing**.
3. Click **Create Credentials**.
4. Copy the **Client ID** and **Client Secret** and store them in a safe place. The secret will not be displayed in the UI again, and it will have to be reset if forgotten.
## Update or Delete Credentials
To make changes to an existing client, select it from **API Credentials** and click either **Edit API Credentials** or **Delete API Credentials**.
# Approvals
Source: https://docs.sandbox.paxos.com/guides/dashboard/admin/approvals
Use Approvals to increase security and prevent mistakes on sensitive actions.
export const value_2 = "Approver: approve or reject a crypto address pending approval"
export const value_1 = "Treasurer: add or delete crypto addresses"
export const value_0 = "Entity Manager: enable or disable approvals"
Demo
**[Watch an Approvals Demo →](/images/approvals-demo.mp4)**\
Interested in Early Access to Approvals?
[Contact Support](https://support.paxos.com) to get started.
Approvals adds an extra layer of security to your most sensitive actions in the Paxos Dashboard. With Approvals enabled, certain actions require review and approval from another team member before they can be completed, helping prevent unauthorized or incorrect transactions.
## Current Approval Actions
Approvals is currently available for:
* Adding crypto destination [addresses](/guides/dashboard/addresses)
* Adding [fiat accounts](/guides/dashboard/fiat)
## Why Approvals Matter
Approvals helps your organization:
* Enhance security by requiring multiple people to review sensitive changes
* Reduce errors by adding verification steps to critical actions
* Meet compliance requirements through documented review processes
* Maintain better control over where assets can be sent
## How Approvals Work
Let's walk through an example of adding a new crypto destination address with Approvals enabled:
### ➊ Enable Approvals
**Required Permissions**
You need a role with the {value_0} permission to perform this action.
* An Entity Manager must first enable the Approvals feature for desired actions
* Go to [Admin > Approval Controls](https://dashboard.paxos.com/admin/approval-controls)
* Select "Add Address" to enable approval requirements for new crypto addresses
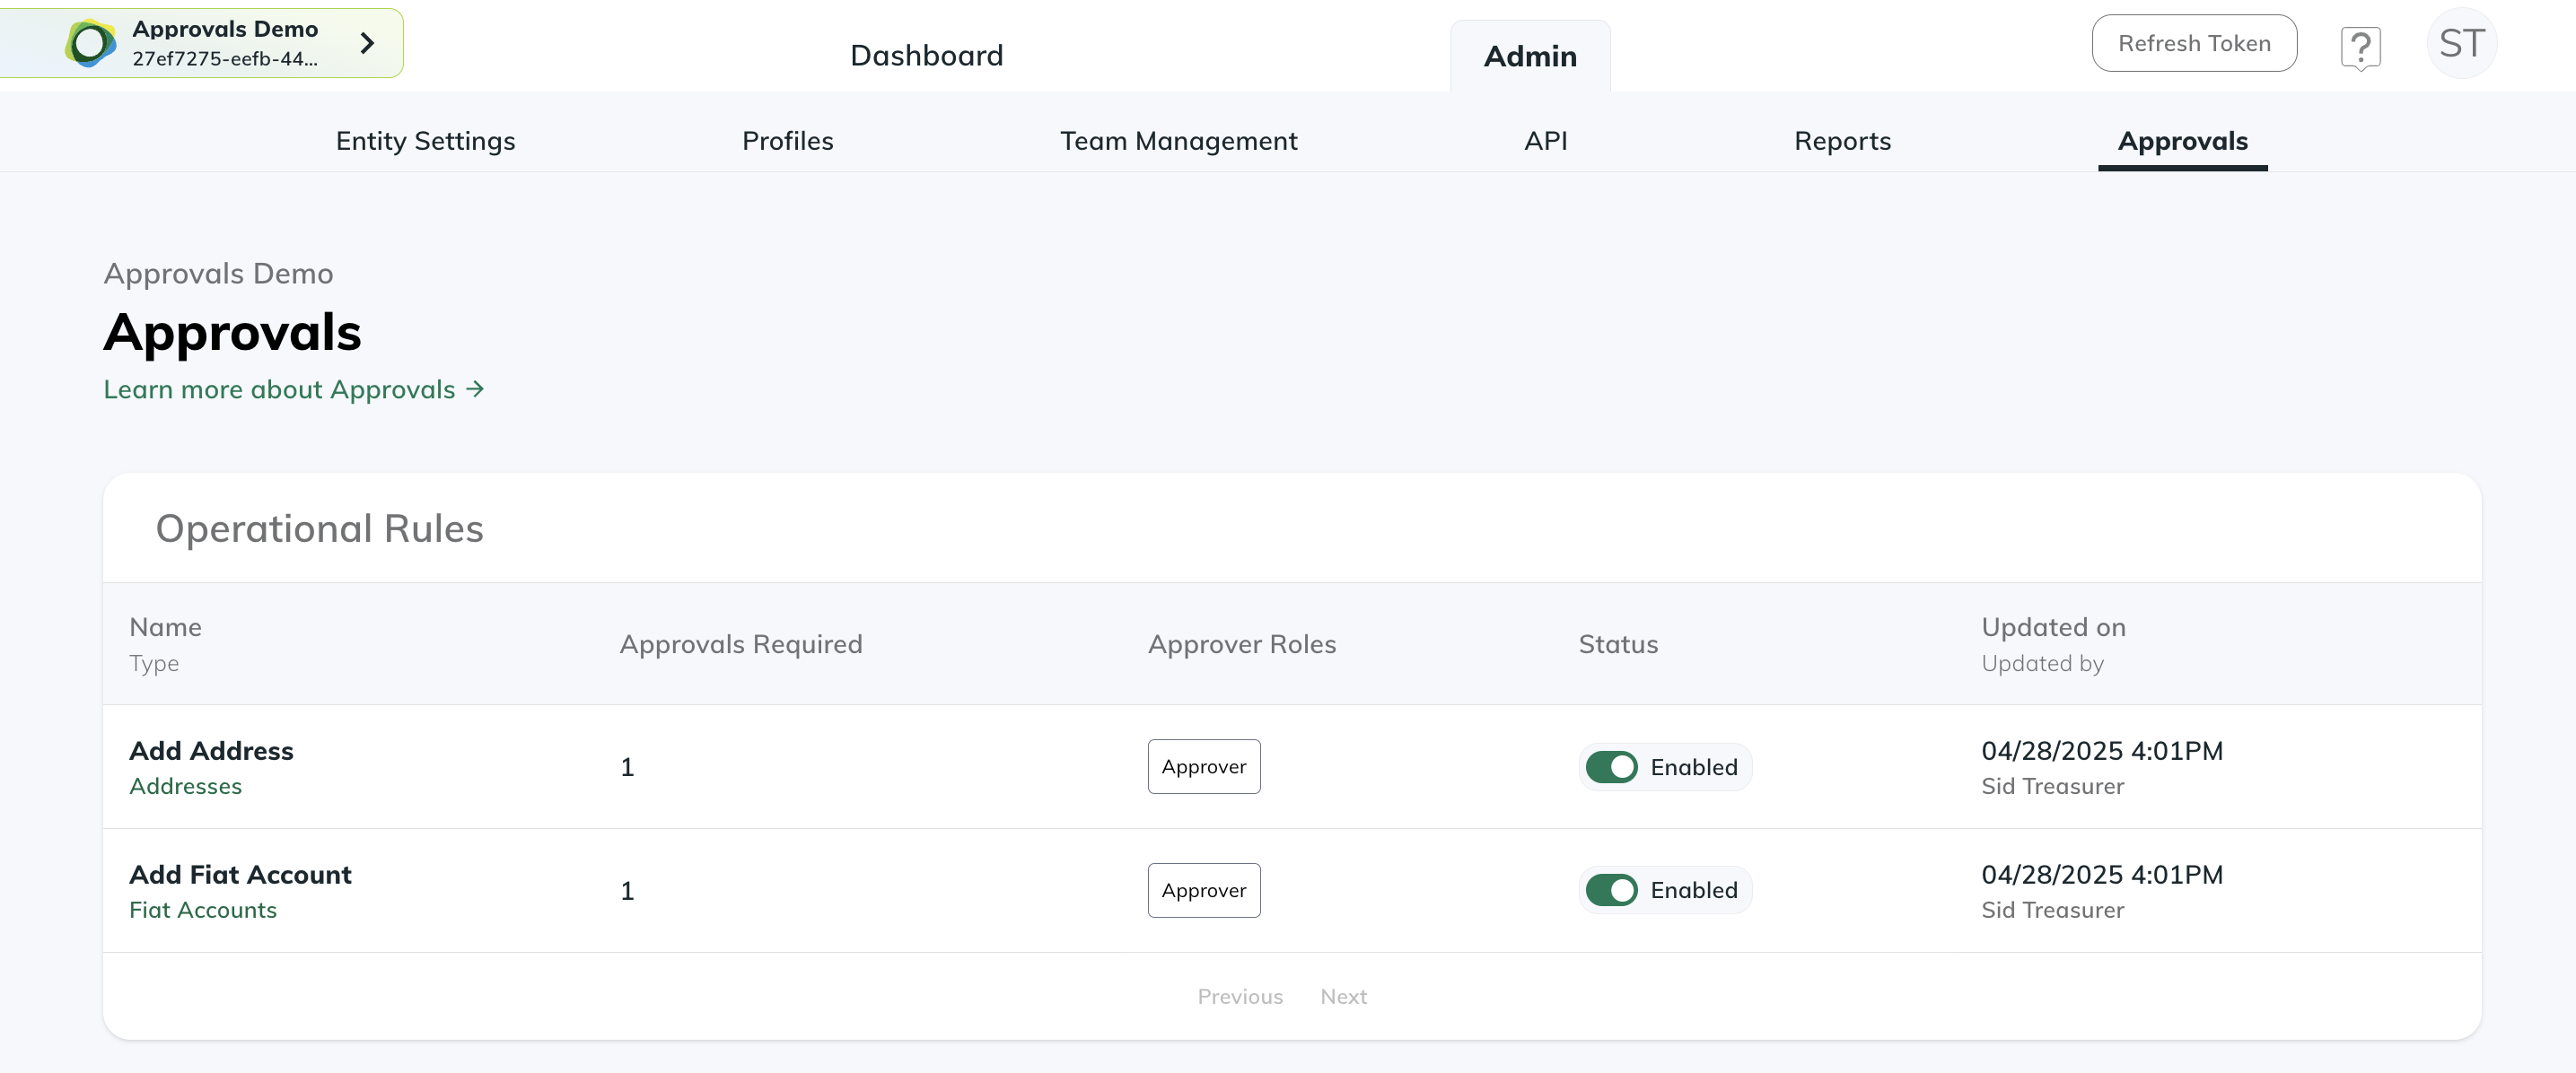
### ➋ Submit for Approval
**Required Permissions**
You need a role with the {value_1} permission to perform this action.
* A Treasurer submits a new crypto address following the standard [add address process](/guides/dashboard/addresses)
* Instead of being added immediately, the address is marked as "Pending Approval"

### ➌ Track Pending Approvals
Pending approval notifications appear on both:
* The Addresses page
* The main Dashboard page
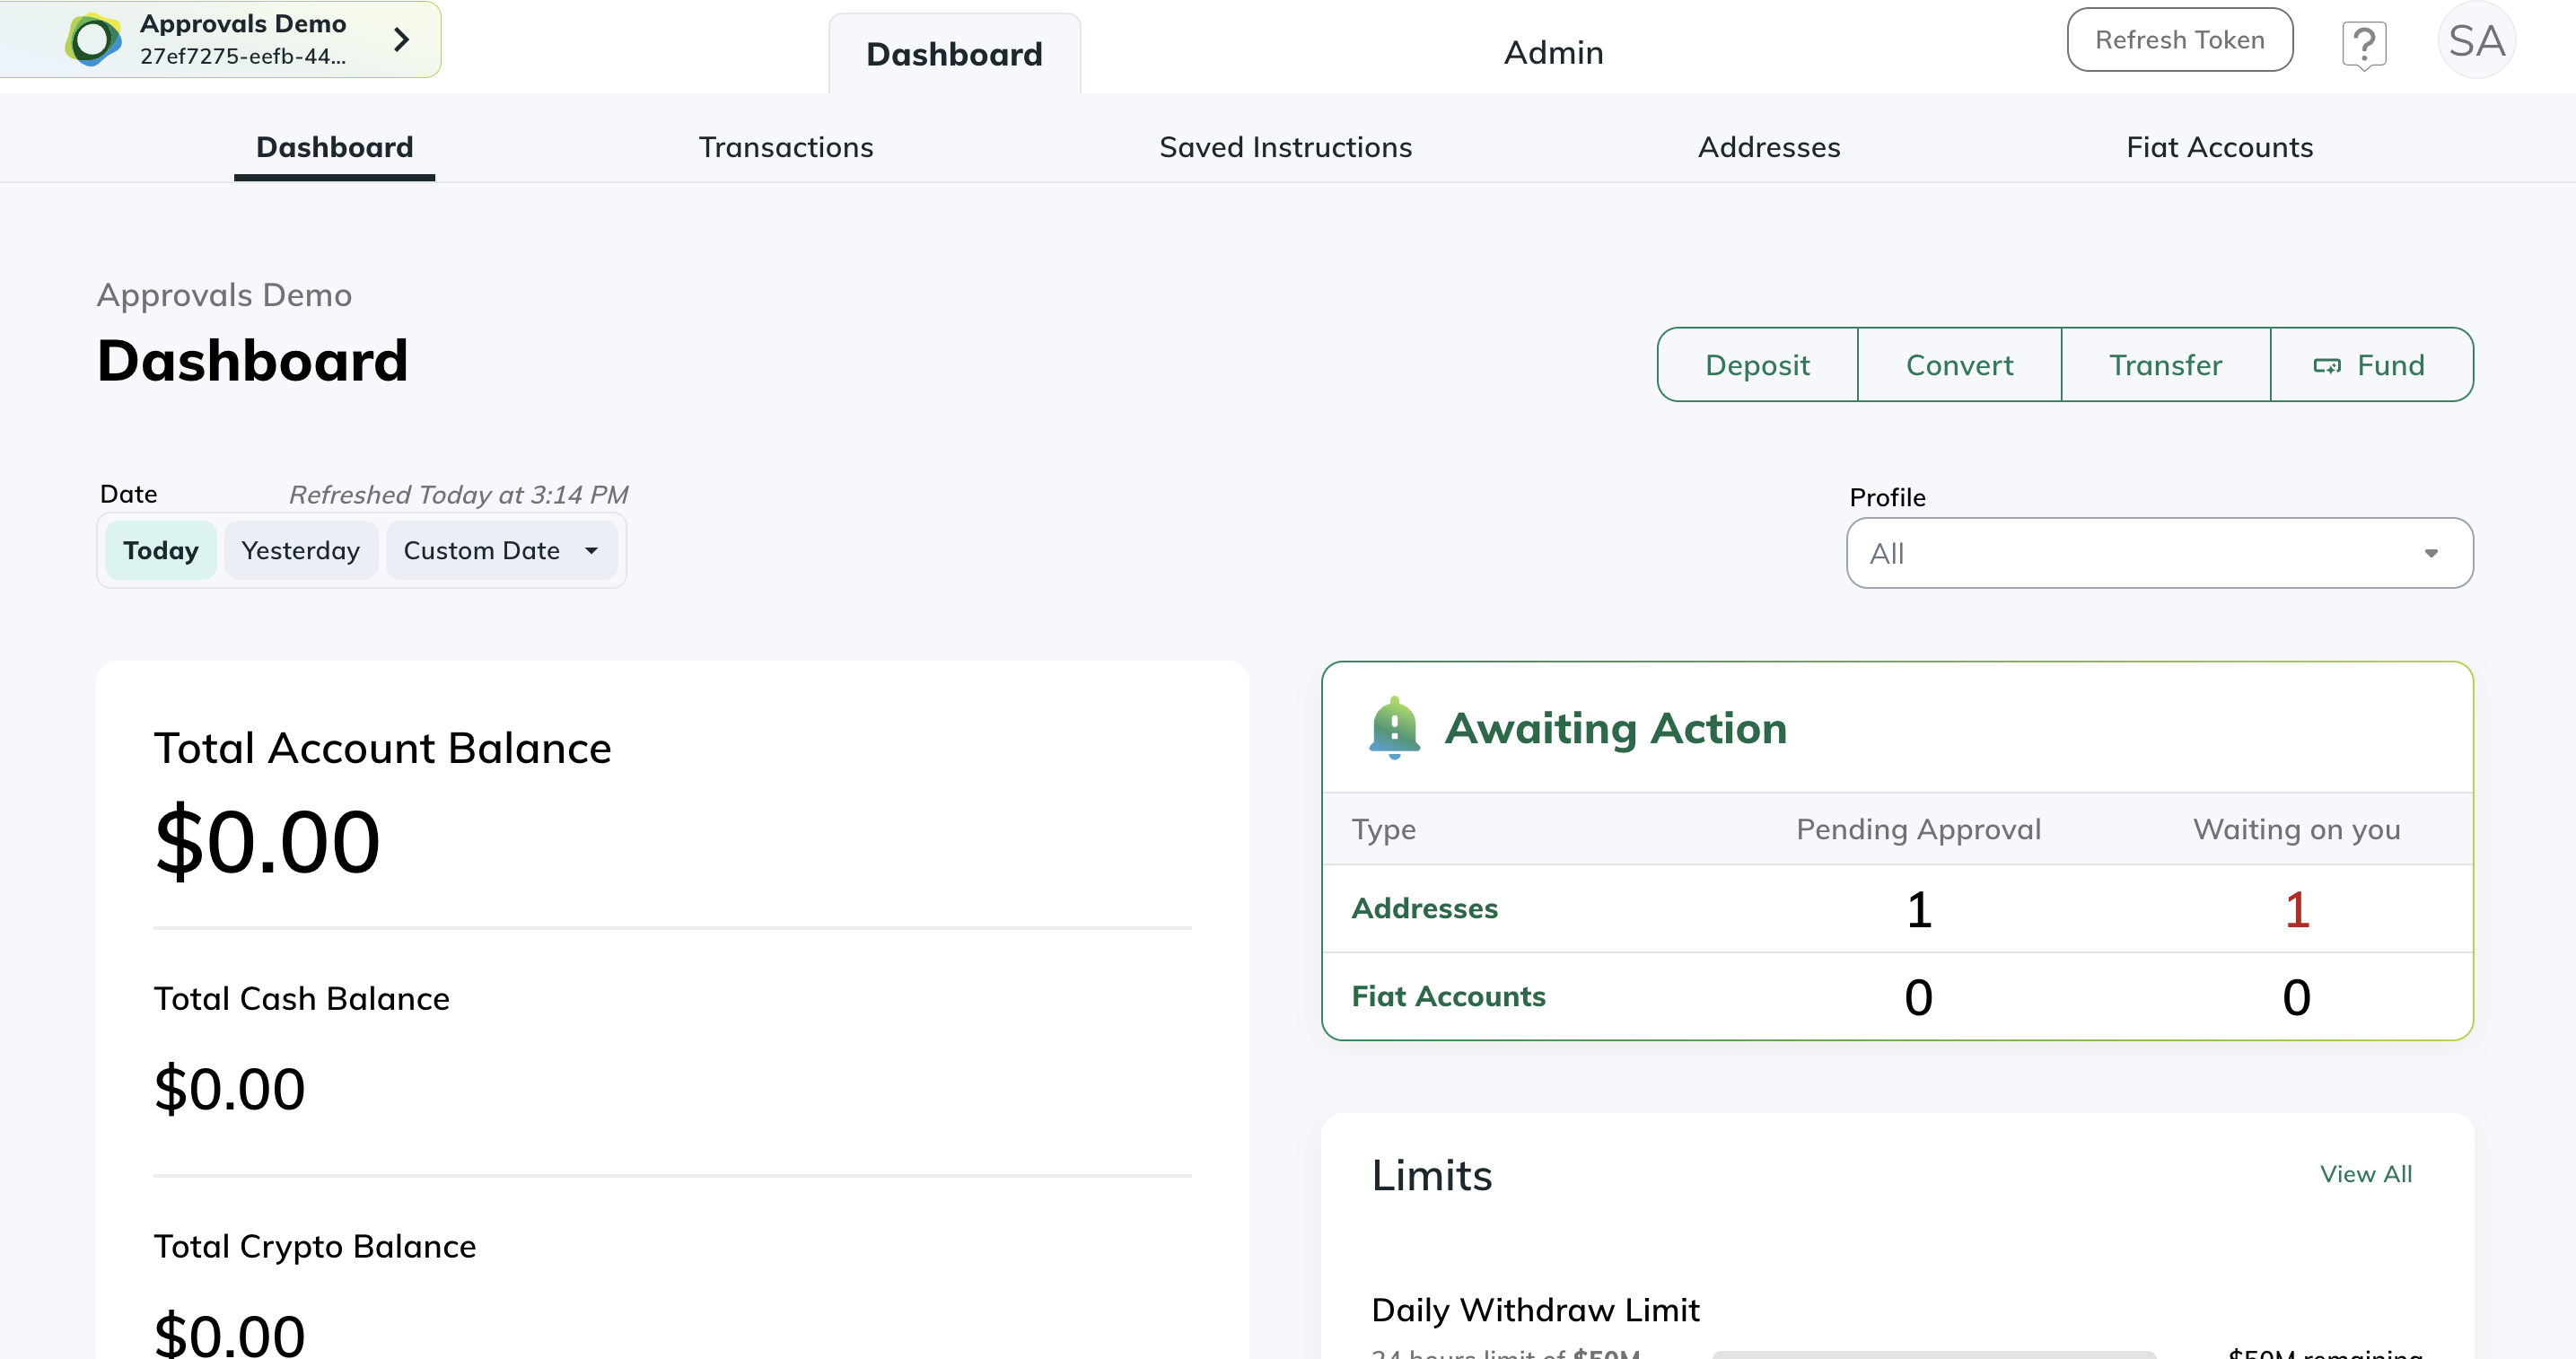
### ➍ Review and Approve
**Required Permissions**
You need a role with the {value_2} permission to perform this action.
* Any user with an Approver role can review pending submissions
* Approvers can choose to:
* Approve the address - making it available for future transactions
* Reject the address - preventing it from being added
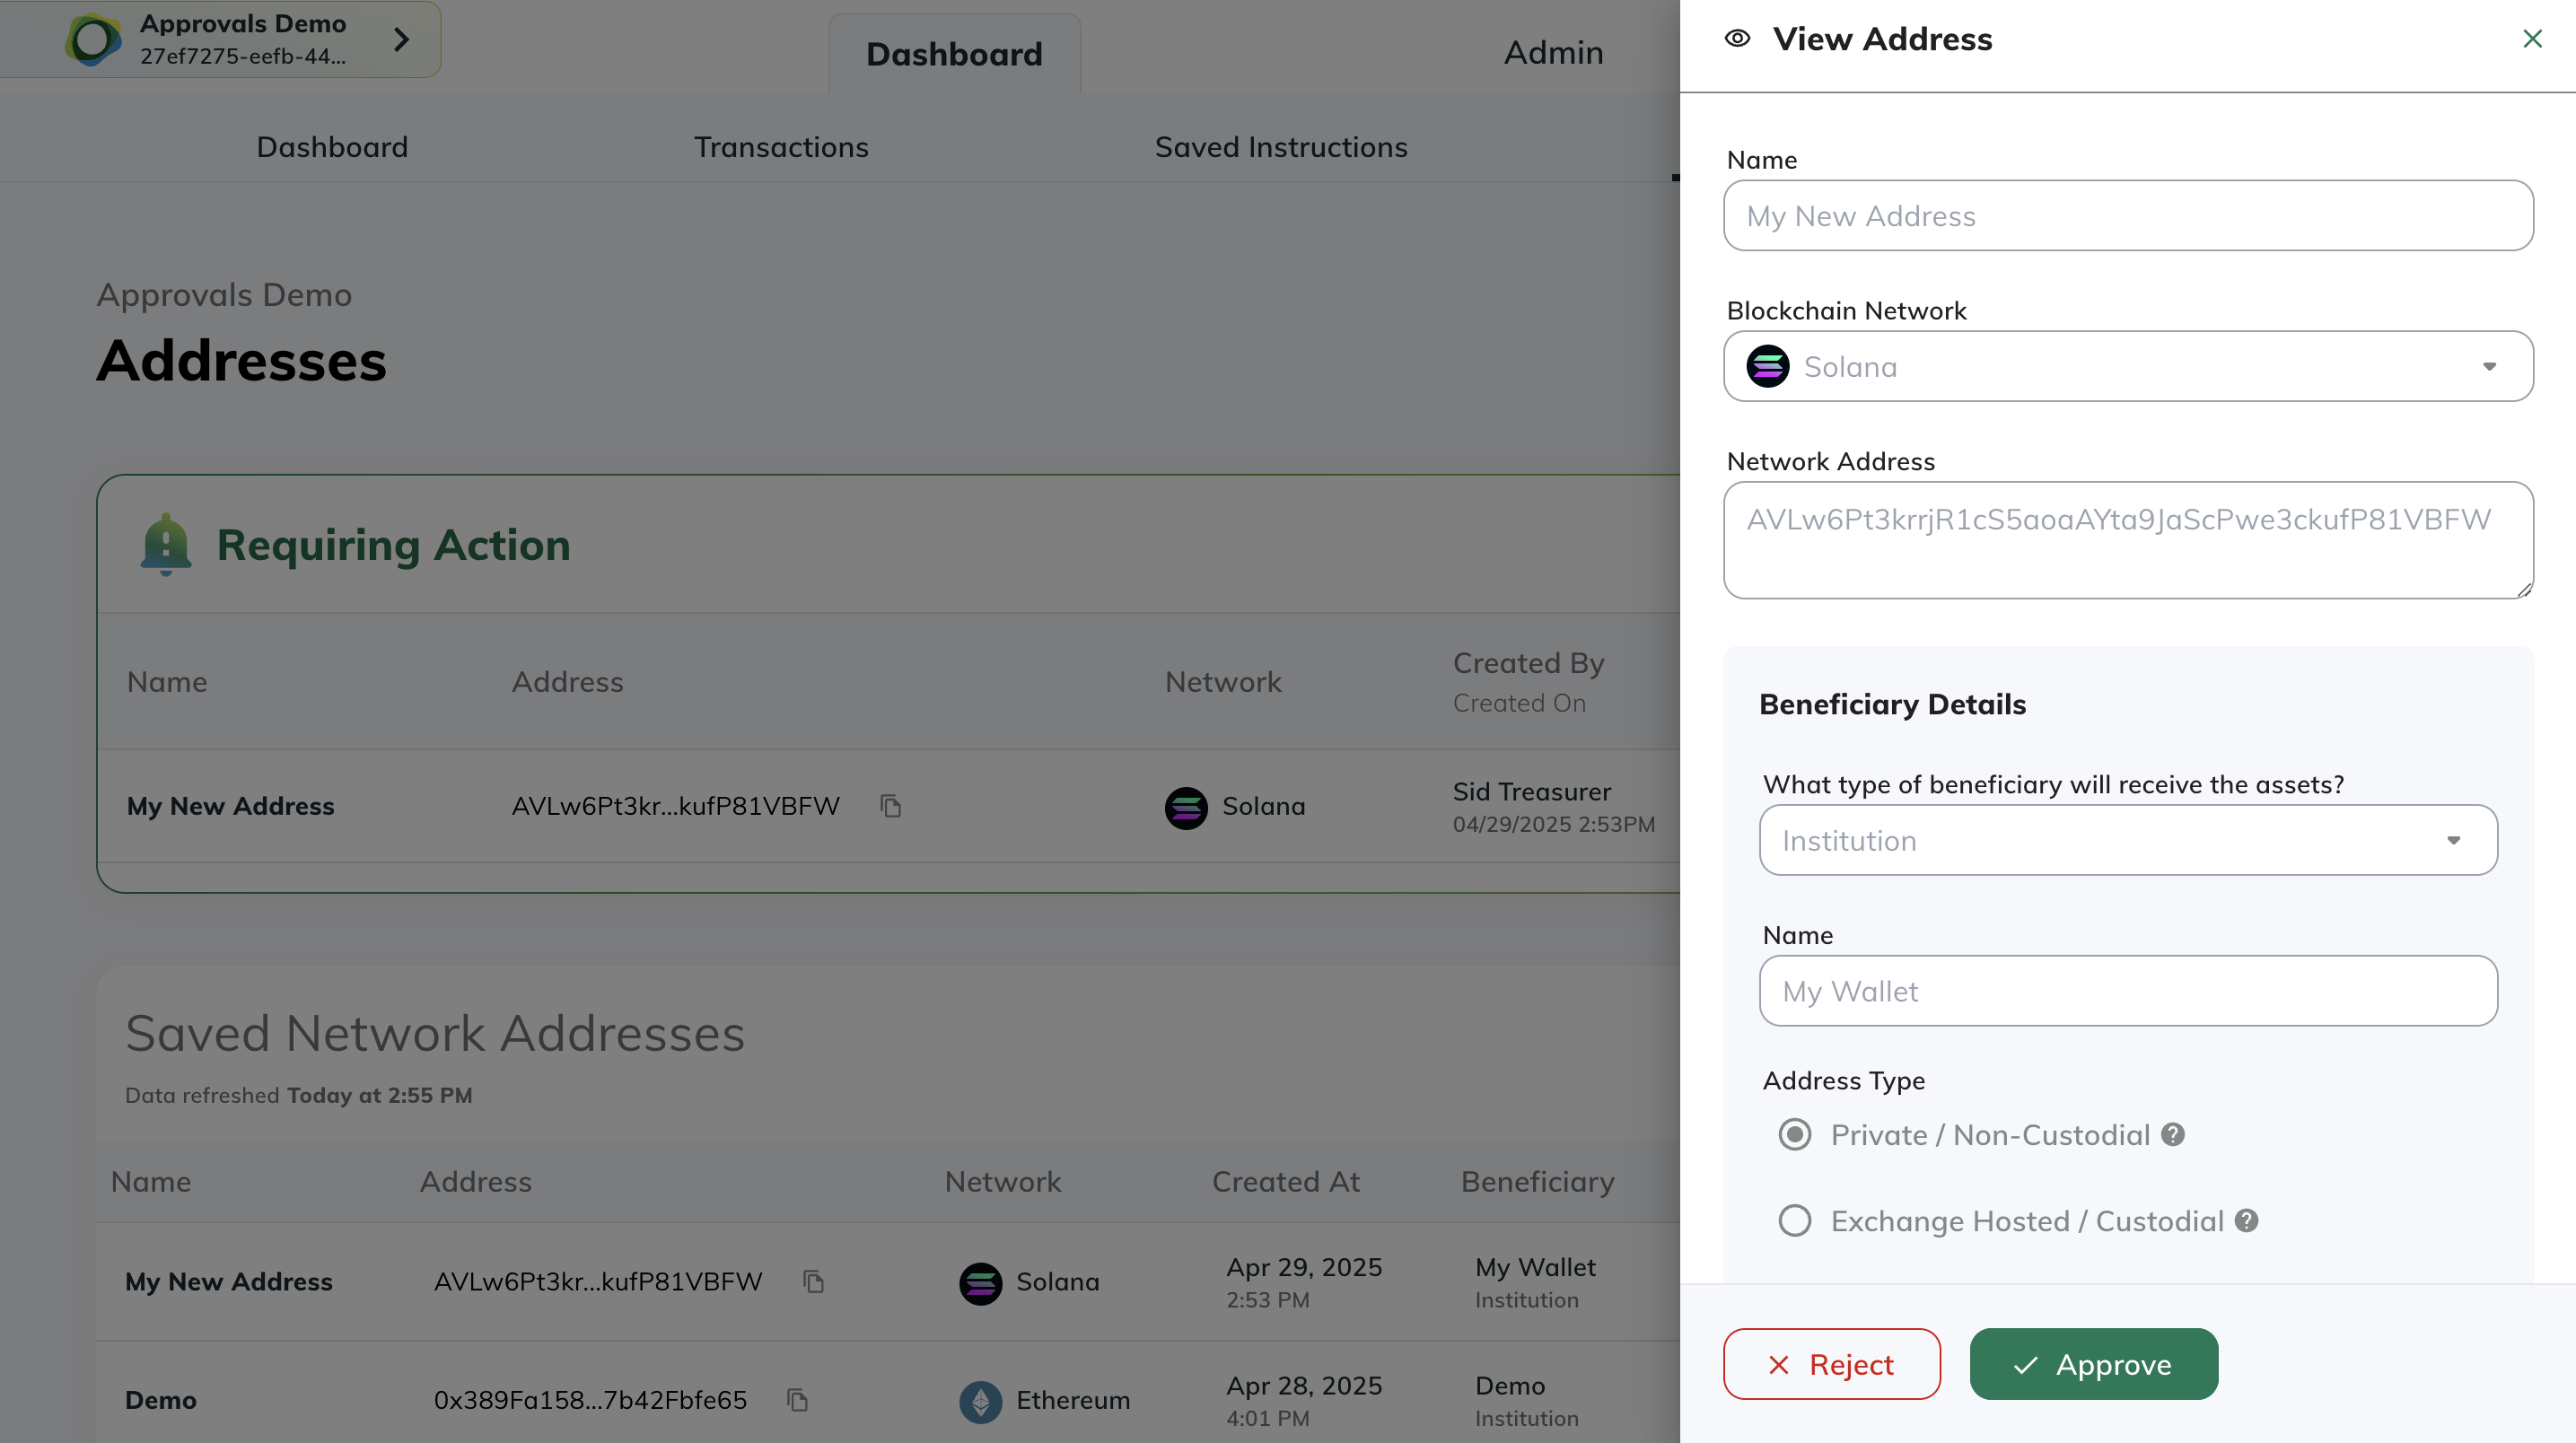
Important Notes
* Users cannot approve their own submissions
* Submitters can cancel their pending submissions before approval
* Once approved, addresses can be used like any other saved address
# Review Entity Settings
Source: https://docs.sandbox.paxos.com/guides/dashboard/admin/entity
Get the Entity details and limits.
[Entity Managers](/guides/dashboard/roles#entity-manager) can review [Entity](/guides/dashboard/organization#entity) specific settings at [Admin > Entity Settings](https://dashboard.paxos.com/admin).
> Use the Entity ID on the [Admin > Entity Settings](https://dashboard.paxos.com/admin) when contacting [Support](https://support.paxos.com/hc/en-us/requests/new).
# Reports
Source: https://docs.sandbox.paxos.com/guides/dashboard/admin/reports
View monthly balances and download daily balance and transaction reconciliation reports.
Go to [Admin > Reports](https://dashboard.paxos.com/admin/reports) to [activate](#activate), view and download daily reconciliation reports as CSV or PDF.
The [Profile Transactions Report](#ProfileTransactionReport) lists every transaction during a 24 hour period, including the full list and definition of transaction types and transaction metadata.
The [Profile Balances Report](#ProfileBalancesReport) provides the asset start and ending balances for every Profile during a 24 hour period.
> Migrating to the Dashboard? Existing legacy reconciliation reports are available in the Dashboard.
> The historical reconciliation reports match the files on the SFTP server, where they continue to be available.
In the reports, the Profile's starting balance is impacted by any associated Profile Transaction, and results in the corresponding Profile end balance.
* If a Profile has ever held a given asset at any point in the past, zero balances will be explicitly printed. For example, if Profile 1 held Bitcoin in the past, but not today, Profile Balances will appear as “BTC: 0”.
* If a Profile has never held an asset at any point in the past, zero balances will not be explicitly printed. For example, if Profile 1 has never held Bitcoin in the past, Profile Balances will not appear for the BTC asset at all.
Reports are in UTC 0 time, and have an exact hour cutoff for the UTC timezone indicated when [activating reporting](#activate).
Paxos delivers reports one time per day and does not support multiple cutoff times or changes to the pre-configured cutoff time.
## Onboard to Reporting
To start receiving daily reports, fill out the form on [Admin > Reports](https://dashboard.paxos.com/admin/reports).
Once submitted, you should start receiving reports in about five business days.
Reports are delivered on a go-forward basis, starting the first day reporting is activated.
> Contact [Support](https://support.paxos.com) for help obtaining older reports.
## Reporting Data Dictionary
This data dictionary provides a full list and definition of balance types.
### Profile Balances Report Fields
The following fields are provided on each row of the Profile Balances Report.
| Field | Data Type | Example/Description |
| ----------- | --------- | ----------------------------------------------------------------------- |
| Asset | String | USD, BTC, ETH, BCH, LTC, PAXG |
| Balance | String | 9977417.21588054 |
| BalanceType | Enum | See [BalanceType Value and Definitions](#BalanceTypeValuesDefinitions). |
| ProfileID | UUID | 7927d51a-a465-49b9-ab0e-1ca17b3a7c5b |
| Timestamp | Datetime | 2020-01-17T00:00:00.000Z |
### Profile Transactions Report Fields
The following fields are provided on each row of the Profile Transactions report.
| Field | Data Type | Always Returns Data | Example/Description |
| -------------------- | :-------: | :-----------------: | ---------------------------------------------------------------------------------------------------------------------------------------------------------------------------------------------------------------------------------- |
| AccountID | UUID | No | 1ab15e4f-6389-4a52-b908-62c3525b0da2 |
| Amount | String | Yes | 90.12345678 |
| Assets | String | Yes | USD, ETH, BTC, PAXG, BCH, LTC |
| BalanceType | Enum | Yes | See [BalanceType Values and Definitions](#BalanceTypeValuesDefinitions). |
| BaseAmount | String | No | `10.017` The amount in the base asset for this trade, currently only supported for QuoteExecutions. |
| Direction | String | Yes | CREDIT, DEBIT |
| ExternalID | String | No | Contains the transaction hash for a crypto deposit. Returns empty when no data is available. |
| Fee | String | No | `0.017` The fee for this interaction. Currently only supported for Transfers. |
| GroupID | UUID | No | Link for the debit and credit legs of an Internal Transfer. |
| IdentityID | UUID | No | 1ab15e4f-6389-4a52-b908-62c3525b0da2 |
| Market | String | No | ETHUSD, XBTUSD, PAXGUSD, BCHUSD, LTCUSD |
| Metadata | String | No | `{"key_1":"value_11","key_2":"value_23"}` Contains the customer specified metadata during a transaction on platform (withdrawal, transfer, quote execution) in json-string format. Returns empty when no data is available. |
| OrchestrationID | UUID | No | 7f716105-d501-40e8-a82f-309fffacd6d8 A unique identifier that links all related transactions within a single logical flow. For example, all balance updates during a deposit process. |
| OrchestrationRuleID | UUID | No | 9e124f3d-7c88-4b36-b54a-e389f6c398b2 The unique identifier of the automation rule that triggered this transaction set. |
| OrderType | String | No | LIMIT, MARKET, POSTONLYLIMIT, STOPMARKET, STOPLIMIT, HRQ |
| Price | String | No | 100.23 |
| ProfileID | UUID | Yes | 7927d51a-a465-49b9-ab0e-1ca17b3a7c5b |
| QuoteAmount | String | No | `10.50` The amount in the quote asset for this trade, currently only supported for QuoteExecutions. |
| Resource | Enum | Yes | See [Resource Values and Definitions](#ResourceValuesDefinitions). |
| ResourceID | UUID | Yes | ID of the Resource in question. For example, Order ID, Execution ID, Transfer ID. |
| ResourceRefID | String | No | Custom string specified in Create Order request as `ref_id`. |
| ResourceTimestamp | Datetime | No | The timestamp when the Resource was generated. For example, the time for an Order or an Execution. |
| RecourceTransferType | Enum | No | See [ResourceTransferType Values and Definitions](#ResourceTransferTypeValuesDefinitions). |
| Side | String | No | SELL, BUY |
| Timestamp | Datetime | Yes | The record timestamp. For example: 2024-01-17T18:36:31.345Z |
| TransactionType | Enum | Yes | See [TransactionType Values and Definitions](#TransactionTypeValuesDefinitions). |
| UniqueTxID | String | Yes | Unique identifier for a Profile transaction. Use with direction to guarantee unique line-item. |
### BalanceType Values and Definitions
The BalanceType field indicates which specific balance the row is referring to.
It provides a way to precisely follow movement of funds as transactions complete in the [Profile Transaction Report](#ProfileTransactionReport), and identify the volume of funds held in reserve or in pending transactions at the end of each day in the [Profile Balances Report](#ProfileBalancesReport).
| BalanceType Enum Value | Description |
| ---------------------- | ------------------------------------------------------------------------------------------------------------------------------- |
| AVAILABLE | Balance that is currently available to trade or transfer. |
| PENDING\_DEBIT | Balance that is currently reserved for pending debits. For example, an outgoing transfer has been requested but not completed. |
| TRADING | Balance that is currently reserved for trading. For example, a limit order has been placed but not filled. |
| PENDING\_CREDIT | Balance that is currently reserved for pending credits. For example, an incoming transfer has been requested but not completed. |
### Resource Values and Definitions
The Resource field denotes the category of transaction being recorded on each row of the [Profile Transactions Report](#ProfileTransactionReport).
| Resource Enum Value | Description |
| ------------------------ | ------------------------------------------------------------------------------------------- |
| CONVERSION | Stablecoin conversion transaction. |
| EXECUTION | An execution of an order on the order book. There can be multiple executions for one order. |
| ORDER | A market or limit order placed for trading. Using either FIX or the v2 Order service. |
| QUOTE\_EXECUTION | A Held Rate Quote transaction. |
| TRANSFER | A transfer on or off the Paxos platform. For example, a wire withdrawal or crypto deposit. |
| WIRE\_WITHDRAWAL\_UPLOAD | A manually created wire withdrawal. |
### ResourceTransferType Values and Definitions
The ResourceTransferType identifies the direction of each transfer and whether it was a movement of fiat into or out of the Paxos Platform (WIRE\_, SEN\_), a movement of crypto asset into or out of Paxos (CRYPTO\_), or a movement of crypto or fiat between profiles within the Paxos platform (PROFILE\_TRANSFER).
| Resource | TransferType | Description |
| -------- | -------------------------- | ------------------------------------------------------------------------------------------------------------- |
| TRANSFER | CRYPTO\_DEPOSIT | A crypto deposit into Paxos. |
| TRANSFER | CRYPTO\_WITHDRAWAL | A crypto withdrawal out of Paxos. |
| TRANSFER | INTERNAL\_TRANSFER\_CREDIT | Transfer received from another Profile. |
| TRANSFER | INTERNAL\_TRANSFER\_DEBIT | Transfer sent to another Profile. |
| TRANSFER | PAXOS\_TRANSFER\_CREDIT | Transfer received from another Peer. |
| TRANSFER | PAXOS\_TRANSFER\_DEBIT | Transfer sent to another Peer. |
| TRANSFER | SEN\_DEPOSIT | Deprecated. Does not appear in new reports. A deposit into Paxos platform on the Silvergate Exchange Network. |
| TRANSFER | SEN\_WITHDRAWAL | Deprecated. Does not appear in new reports. A withdrawal out of Paxos on the Silvergate Exchange Network . |
| TRANSFER | WIRE\_DEPOSIT | A wire deposit into Paxos. |
| TRANSFER | WIRE\_WITHDRAWAL | A wire withdrawal out of Paxos. |
### TransactionType Values and Definitions
The values of the TransactionType vary depending on the Resource.
The TransactionType denotes the specific purpose of the transaction.
| Resource | TransactionType | Description |
| ---------------- | ------------------------ | ------------------------------------------------------------------------------------------------------------------------------------------------------------------------------------------- |
| CONVERSION | CONVERSION\_CANCELLATION | A transaction to unreserve funds for a created stablecoin conversion. |
| CONVERSION | CONVERSION\_CREATION | A transaction to reserve funds for a stablecoin conversion. |
| CONVERSION | CONVERSION\_SETTLEMENT | Settlement of the stablecoin conversion transaction. |
| EXECUTION | COMMISSION | A transaction to collect commission from an executed trade. |
| EXECUTION | SETTLE\_BASE | Settlement of the base (crypto) side of the trade to/from the counterparty. |
| EXECUTION | SETTLE\_QUOTE | Settlement of the quote (cash) side of the trade to/from the counterparty For example, a SELL order has been executed. |
| EXECUTION | SETTLE\_UNRESERVE | A transaction to unreserve funds for trading because of a BUY side price improvement on an executed order. For example, a limit order used a BUY price of $50,000 but executed at $49,000). |
| ORDER | RESERVE | A transaction to reserve funds for trading. For example, a limit order has been placed. |
| ORDER | UNRESERVE | A transaction to unreserve funds for trading. For example, a limit order has been canceled. |
| QUOTE\_EXECUTION | COLLECT\_FROM\_EXECUTOR | A record of transaction indicating a credit of the account. |
| QUOTE\_EXECUTION | FUND\_EXECUTOR | A record of transaction indicating a debit of the account. |
| TRANSFER | DEPOSIT\_COMPLETION | A transaction to complete a deposit, resulting in funds being credited. |
| TRANSFER | DEPOSIT\_CREATION | A transaction to deposit funds into the Paxos platform. |
| TRANSFER | DEPOSIT\_FAILURE | A transaction to reserve the funds of a failed deposit into pending debit where they can move off the Paxos platform back to their source. |
| TRANSFER | FEE\_DEBIT | A transaction to debit the fees upon completion of the transfer. |
| TRANSFER | FEE\_ENCUMBERMENT | A transaction to reserve the transfer fee. |
| TRANSFER | INTERNAL\_TRANSFER | A book transfer of funds to another profile under the same customer account. |
| TRANSFER | PAXOS\_TRANSFER | A book transfer of funds to another Paxos customer. |
| TRANSFER | WITHDRAWAL\_COMPLETION | A transaction to complete a withdrawal, resulting in the transfer of funds off the Paxos platform. |
| TRANSFER | WITHDRAWAL\_CREATION | A transaction to initiate a withdrawal typically reserving the debit amount. For example, a wire withdrawal or crypto withdrawal. |
| TRANSFER | WITHDRAWAL\_FAILURE | A transaction to return funds previously reserved for a failed withdrawal. |
# Manage Team
Source: https://docs.sandbox.paxos.com/guides/dashboard/admin/team
Manage user access and roles within your Entity.
Any user accessing the Paxos Dashboard must be authorized and assigned one or more [Roles](https://dashboard.paxos.com/admin/team-management/roles), each of which consists of specific permissions that control access to various actions. Paxos provides a set of [predefined roles](https://dashboard.paxos.com/admin/team-management/roles) that are available as soon as you [sign up](/guides/dashboard/account) and onboard a new Entity.
* To view, search and manage user access: [Admin > Team Management > Users](https://dashboard.paxos.com/admin/team-management/users).
* To audit the list of permissions associated with a Role: [Admin > Team Management > Roles](https://dashboard.paxos.com/admin/team-management/roles)
* To disable user access or change Roles, use the Edit Status dropdown in the User Actions menu at [Admin > Team Management > Users](https://dashboard.paxos.com/admin/team-management/users).
## Passkey-Based Login
**Demo**
[Entity Managers](/guides/dashboard/roles#entity-manager) can manually invite users and assign their roles. Each user receives an email with a verification code and a link to [set up their passkey and sign in](/guides/dashboard/signin#passkey).
Users can have different [roles](/guides/dashboard/roles) across different [Entities](/guides/dashboard/organization#entity).
When inviting users, it is recommended to provide organization-specific instruction on the proper use and storage of [passkeys](https://www.passkeys.com/what-are-passkeys).
We recommend using tools like [iCloud Keychain](https://support.apple.com/guide/passwords/passkeys-mchl4af65d1a/mac), [Windows Hello](https://support.microsoft.com/en-us/account-billing/signing-in-with-a-passkey-09a49a86-ca47-406c-8acc-ed0e3c852c6d#), [Google Account](https://support.google.com/chrome/answer/13168025), [1Password](https://support.1password.com/save-use-passkeys/), [Proton Pass](https://proton.me/support/pass-use-passkeys), or other third-party password manager that enables passkey sync across devices.
Follow these steps to invite users to your entity:
1. Go to [**Admin > Team Management**](https://dashboard.paxos.com/admin/team-management/users)
2. Click **Invite Users**
4. Enter one or more emails and select a role from the dropdown.
5. Click **Invite Users**
Users are marked as **Active** once they log into the Dashboard.
Entity Managers can also modify User Roles as needed:
1. Go to [**Admin > Team Management>Users**](https://dashboard.paxos.com/admin/team-management/users)
2. Click on the **Edit Role** icon next to a user.
3. Select one or more roles from the dropdown.
4. Click the **Save** icon next to the dropdown.
## SSO-Based Login
**Demo**
Interested in using SSO?
Paxos supports SAML and OIDC supported Identity Providers. Contact [Support](https://support.paxos.com) to get started.
When using [Single Sign-On (SSO)](#sso), instead of inviting users individually, an Entity Manager uses the [Role Mapping interface](https://dashboard.paxos.com/admin/team-management/mapping) to map Roles to user groups within your organization's Identity Provider (i.e., Okta, Azure AD).
Typically, you work with your IT team to leverage existing groups; however, you may need to add new Identity Provider groups to match your expected Dashboard workflows.
Once you map the group to an existing [Dashboard Role](/guides/dashboard/roles), the next time users [sign in with SSO](/guides/dashboard/signin#sso) their permissions will update.
Follow these steps to map Identity Provider groups to Paxos Dashboard Roles:
1. Go to [**Admin>Team Management>Mapping**](https://dashboard.paxos.com/admin/team-management/mapping).
2. Click **Add Mapping**.
3. Enter the Group Name exactly as it appears inside your Identity Provider's configuration.
4. Enter one or more Roles to associate with this Group.
Any user with a user attribute that contains the Group will automatically be assigned the associated Role on login.
# Convert
Source: https://docs.sandbox.paxos.com/guides/dashboard/convert
Implement guaranteed 1:1 conversions between USD and Paxos-supported stablecoins.
Go to the [Dashboard](https://dashboard.paxos.com/) and click **Convert** in the top-right corner.
1. Select the **Asset** *to convert from*. For example, select USD to convert to a Paxos-issued stablecoin.
2. Choose the **Source** where the asset is located (a Profile or External Account/Wallet).
3. Select the **Asset** to convert.
4. Choose the **Destination** where the converted asset should go (a Profile or an External Account/Wallet).
Go to [Transactions > Asset Movements](https://dashboard.paxos.com/dashboard/transactions/asset-movements) or [Transactions > Conversions](https://dashboard.paxos.com/dashboard/transactions/conversions) to monitor activity.
> Can't find the right conversion options?
> The desired option may not be supported by the [Entity](/guides/dashboard/organization#entities) or by the Paxos platform.
> Reach out to your [Entity Manager](/guides/dashboard/roles#entity-manager) or [contact us](https://support.paxos.com/hc/en-us/requests/new) for help.
# Deposit
Source: https://docs.sandbox.paxos.com/guides/dashboard/deposit
Send cash or crypto to the Paxos platform.
Go to the [Dashboard](https://dashboard.paxos.com/) and click **Deposit** in the top-right corner to generate **Deposit Instructions** for sending USD or crypto to the Paxos platform.
1. Select the **Asset** and corresponding crypto or fiat **Network** for the deposit. For bank wire deposits, specify the routing type.
2. Choose the [Profile](/guides/dashboard/organization#profile) where the assets will be deposited on the Paxos platform. Optional: Save the deposit instructions to make them available for future use an on [Saved Instructions](https://dashboard.paxos.com/dashboard/saved-instructions).
3. Off the platform, use the generated instructions to send the asset to the Paxos platform.
Go to [Transactions > Asset Movements](https://dashboard.paxos.com/dashboard/transactions/asset-movements) to monitor activity.
# Fiat Accounts
Source: https://docs.sandbox.paxos.com/guides/dashboard/fiat
View and manage banking information to deposit and withdrawal USD.
Go to [Fiat Accounts](https://dashboard.paxos.com/dashboard/fiat-accounts) to view banking information used to [deposit](/guides/dashboard/deposit) and [withdraw (transfer)](/guides/dashboard/transfer) USD on and off the Paxos platform.
Using the Actions menu, review existing banking account details, including the banking network, owner and other account information.
Deleting a saved fiat account from the Actions menu permanently removes it from the platform.
Any future transactions using the fiat account will fail unless you add it again.
## Add Fiat Account
When adding banking information, use a street addresses.
Do not use a PO Box for any banking information.
1. Go to [Fiat Accounts](https://dashboard.paxos.com/dashboard/fiat-accounts) and click **Add Account**.
2. Select the banking network.
3. Enter bank account details.
4. Provide account owner information if required.
5. Save the fiat account. Optional: Perform a test [deposit](/guides/dashboard/deposit) or [withdrawal](/guides/dashboard/transfer).
# Overview
Source: https://docs.sandbox.paxos.com/guides/dashboard/index
Securely deposit, convert, transfer and custody assets with Paxos.
The [Paxos Dashboard](https://dashboard.paxos.com/) enables [treasurers](/guides/dashboard/roles#treasurer) and other institutional users to securely [deposit](/guides/dashboard/deposit) and [transfer](/guides/dashboard/transfer) fiat, stablecoins and other assets, as well as [mint](/guides/dashboard/mint), [convert](/guides/dashboard/convert) and [redeem](/guides/dashboard/redeem) Paxos-issued stablecoins.
The [multi-entity experience](/guides/dashboard/organization) unifies multiple business entities in different regions under a single interface while enabling a customized view of the Dashboard to help users focus on their tasks while providing security around asset movement workflows.
Within an entity, [Entity Managers](/guides/dashboard/roles#entity-manager) can quickly [onboard a user](/guides/dashboard/admin/team) via passkey or SSO and delegate access and responsibilities to more users with role-based permissions and [team management tools](/guides/dashboard/admin/team).
> To start using the Paxos Dashboard, [sign up for an account](https://dashboard.paxos.com/).
> If you already have an institutional account, it is easy to [migrate to the Dashboard](/guides/dashboard/migrate-to-dashboard).
# Saved Instructions
Source: https://docs.sandbox.paxos.com/guides/dashboard/instructions
View and manage instructions for depositing fiat and other assets onto the Paxos platform.
To access saved deposit instructions, go to [Saved Instructions](https://dashboard.paxos.com/dashboard/saved-instructions).
Saved instructions are immutable.
If your deposit requirements change, create a new set of instructions.
There are three types of deposit instructions:
* Deposit: The asset (Source) will be deposited directly into the selected Paxos Profile (Destination).
* Deposit > Convert: The asset deposited (Source) will be automatically converted into your chosen asset (Destination).
* Deposit > Convert > Transfer: The asset deposited (Source) will be automatically converted into your chosen asset and then immediately transferred to the selected external wallet or fiat account (Destination).
To download deposit instructions, select the **Actions** menu to open the instructions use **Export Instructions**.
# Migrate to the Dashboard
Source: https://docs.sandbox.paxos.com/guides/dashboard/migrate-to-dashboard
Switch to the Dashboard and access new features and improved workflows.
We are rolling out the Paxos Dashboard to more institutional account holders!
When you see a banner invite in the [Wallet UI](https://account.paxos.com/), your organization is eligible to start using the Dashboard.
Have an individual account?
Use the [Wallet UI](https://account.paxos.com/).
Migrating to the Dashboard takes a few minutes, and requires verifying your email address and creating a [passkey](https://www.passkeys.com/what-are-passkeys).
**Questions about passkeys?**
Start by contacting your IT organization. Your company may already have policies for using passkeys and can provide support when creating and using a passkey.
Paxos recommends saving and using passkeys with:
* [iCloud Keychain](https://support.apple.com/guide/passwords/passkeys-mchl4af65d1a/mac)
* [Windows Hello](https://support.microsoft.com/en-us/account-billing/signing-in-with-a-passkey-09a49a86-ca47-406c-8acc-ed0e3c852c6d#)
* [Google Account](https://support.google.com/chrome/answer/13168025)
* [1Password](https://support.1password.com/save-use-passkeys/)
* [Proton Pass](https://proton.me/support/pass-use-passkeys)
* Other third-party password managers that enable passkey synchronization across devices
Learn more about [using passkeys on the Paxos platform](/guides/dashboard/passkeys) or [try the passkey demo](https://passkey.org/) on [https://passkey.org](https://passkey.org).
Until your organization is ready to switch, all balances and transactions are available in both the Dashboard and the [Wallet UI](https://account.paxos.com/).
## ➊ Sign In to the Wallet UI
Go to [https://account.paxos.com/login](https://account.paxos.com/login) and sign in to the Wallet UI.
***Do not create a new Dashboard account***.
[Watch the demo →](/images/migrate.mp4)
## ➋ Start the Dashboard Migration Process
Go to [https://account.paxos.com/wallet](https://account.paxos.com/wallet) and select **Get Started** in the welcome banner then review and accept the **Terms & Conditions** and **Pricing** on the next screen.
[Watch the demo →](/images/migrate.mp4)
> Don't see the Dashboard invite?
> Some institutional account holders may need to provide additional information before accessing the Dashboard. Contact [Support](https://support.paxos.com) to get started.
## ➌ Verify your Email Address
After you accept the **Terms & Conditions** and **Pricing**, we will open a new screen so you can verify your email address using the code we sent you.
[Watch the demo →](/images/migrate.mp4)
## ➍ Create a Passkey and Sign In to the Dashboard
Follow the steps to create a [passkey](https://www.passkeys.com/what-are-passkeys).
We will automatically prompt you to sign in to the Dashboard once you save the passkey.
[Watch the demo →](/images/migrate.mp4)
**Questions about passkeys?**
Start by contacting your IT organization. Your company may already have policies for using passkeys and can provide support when creating and using a passkey.
Paxos recommends saving and using passkeys with:
* [iCloud Keychain](https://support.apple.com/guide/passwords/passkeys-mchl4af65d1a/mac)
* [Windows Hello](https://support.microsoft.com/en-us/account-billing/signing-in-with-a-passkey-09a49a86-ca47-406c-8acc-ed0e3c852c6d#)
* [Google Account](https://support.google.com/chrome/answer/13168025)
* [1Password](https://support.1password.com/save-use-passkeys/)
* [Proton Pass](https://proton.me/support/pass-use-passkeys)
* Other third-party password managers that enable passkey synchronization across devices
Learn more about [using passkeys on the Paxos platform](/guides/dashboard/passkeys) or [try the passkey demo](https://passkey.org/) on [https://passkey.org](https://passkey.org).
## Next Steps
Once migrated, start exploring the Dashboard's new features and improved workflows.
The [Dashboard](https://dashboard.paxos.com) comes with more self-serviceability, new stablecoin orchestration [mint](/guides/dashboard/mint), [convert](/guides/dashboard/convert) and [redeem](/guides/dashboard/redeem) flows, the ability to collaborate with more users from your organization, and [enterprise-grade access controls](/guides/dashboard/admin/team).
# Mint
Source: https://docs.sandbox.paxos.com/guides/dashboard/mint
Convert USD to Paxos-issued stablecoins and receive them in an external wallet.
This guide walks you through the standard automated minting flow (**USD > Stablecoin**), where funds are sent via bank transfer and converted into stablecoins on supported blockchain networks. The steps are the same for USDG, PYUSD and USDP.
Watch a demo: See the full minting flow from start to finish before getting started.
## **What You'll Do**
1. [Add a destination wallet address](/guides/dashboard/mint#withdraw-address) (This is where you'll receive the stablecoin).
2. [Create minting instructions](/guides/dashboard/mint#minting-instructions), which define:
* **How** you'll send USD to Paxos (SWIFT or ABA, DBS-ACT, CUBIX).
* **Which stablecoin** you want (USDG, PYUSD, USDP).
* **Where** the stablecoin should go (wallet + network).
3. [Send USD to the Paxos platform](/guides/dashboard/mint#send-usd) using the generated deposit details.
Paxos will automatically mint the stablecoin and send it to your wallet.
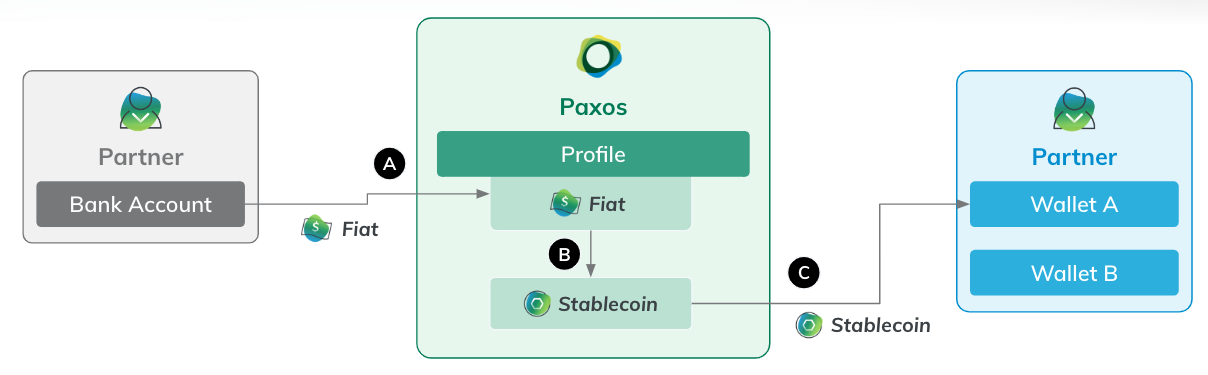
## Before you begin
### Requirements
* [A verified Paxos account](https://dashboard.sandbox.paxos.com/signin).
* A role (ex:Treasurer) with permissions to **Add** or **Delete** crypto addresses, and **Create Conversion Rules**.
### Supported Stablecoins and Networks
| Asset | Supported Network |
| ----- | ----------------- |
| USDG | Ethereum, Solana |
| PYUSD | Ethereum, Solana |
| USDP | Ethereum |
## ➊ Add Destination Wallet Address
You must add a wallet address before minting. This is where your stablecoins will be sent.

1. Navigate to [**Addresses**](https://dashboard.paxos.com/dashboard/addresses) in the Paxos dashboard.
2. Click **⊕︎ Address**.
3. Enter a **name** for the address and select the **blockchain network**.
4. Retrieve the external wallet address and paste it in the **Network Address** field.
5. Fill in the [beneficiary details](https://docs.paxos.com/dashboard/travel-rule) requirements.
6. Click **Save**
Use the [**Approvals**](https://docs.paxos.com/dashboard/admin/approvals) functionality to require additional team members to review any new addresses before they are saved.
This avoids potential mistakes around incorrect addresses and adds an extra layer of security. **Only approved addresses** can be used in any mint process.
## ➋ Create Minting Instructions
Once your wallet address is added, configure the minting rules for USD > Stablecoin.
Minting instructions are reusable and immutable. Access [Saved Instructions](https://dashboard.paxos.com/dashboard/saved-instructions) to reuse them anytime you want to mint the same asset.
1. Go to [**Dashboard**](https://dashboard.paxos.com/) **> Convert**.
2. Select **USD** as the asset you have. 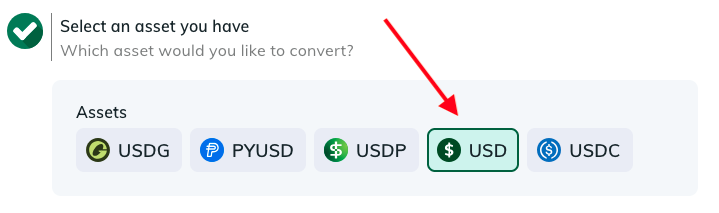
3. Select **External Account/Wallet** and then the fiat network you use to send USD to Paxos. If you choose **DBS-ACT**, it may need to be activated first. [Contact Support](https://support.paxos.com/hc/en-us) for details. 
Use the [**Paxos Profile**](https://docs.paxos.com/dashboard/organization#profile) option if you want to hold your stablecoin in your current account.
4. Select a stablecoin (for this guide we're minting [USDG](https://docs.paxos.com/stablecoin/usdg)).
5. For the destination, select **External Account/Wallet** and then choose one of the available networks and one of the existing **Addresses**.
6. Name the instructions. 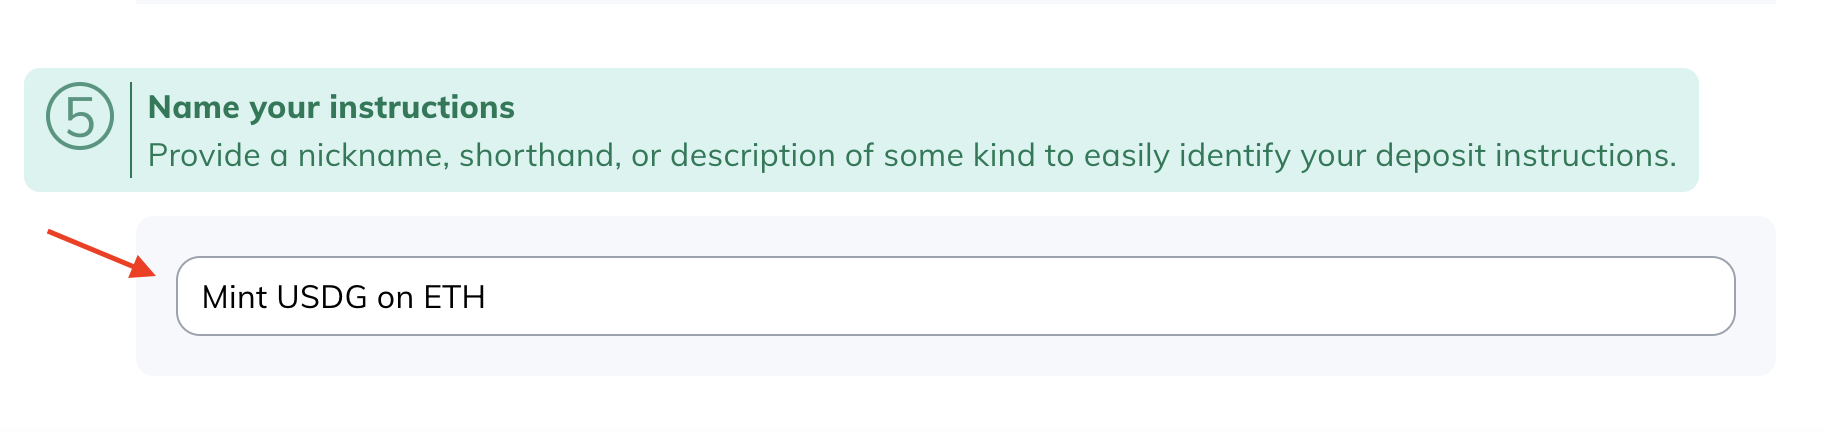
7. Click **Generate Deposit Instructions** to review the minting instructions. You can also download them for reference when sending USD to Paxos.
Test the minting instructions with a small amount before minting large volumes.
## ➌ Send USD to Paxos
Use the [Deposit instructions](/guides/dashboard/deposit) to send wire funds to Paxos.
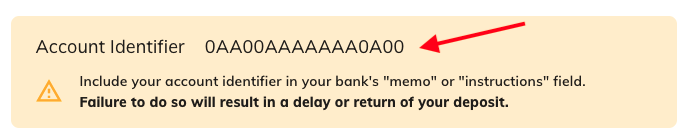
Once the funds are received, Paxos automatically executes the minting instructions and sends the requested stablecoin to the specified wallet.
## ➍ Review Transaction Status
Track your minting progress from the **Transactions >Asset Movements** section. You'll see two entries:
* **Fiat Deposit**: It usually takes a minute or two for the system to show the associated
* **Crypto Withdraw**: The actual crypto withdraw may take anywhere from seconds to hours, depending on the blockchain, mint amount and off-business-hour transactions.
Transactions have the following status:
* **Pending**: The transaction is executing, which may include a manual review. If a transaction is pending for an extended duration, contact Support.
* **Failed**: If a transaction shows the failed status, contact Support.
* **Complete**: The transaction is successful.
Crypto Network Fees: Crypto network fees are calculated at the time of withdraw and deducted from the total deposit amount. Use the **View** action to see a fee breakdown and other transaction details. 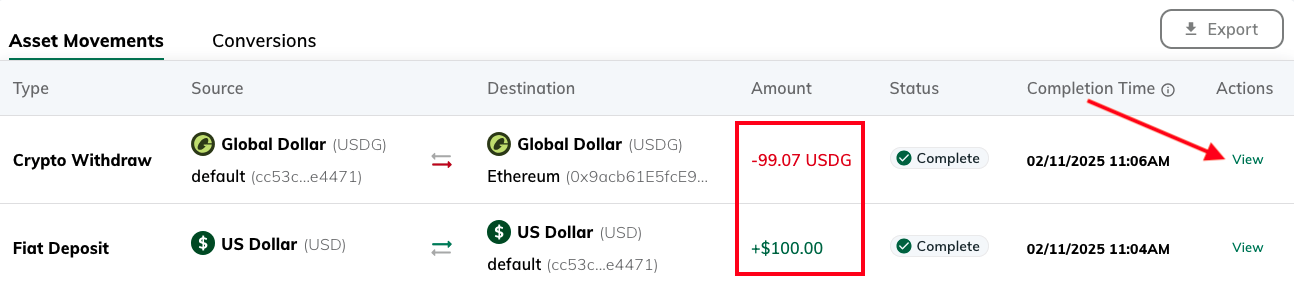
## Alternate Minting Flows
Paxos supports manual minting flows with a number of different options. Following are a few options:
* [Deposit USD](/guides/dashboard/deposit), then perform a manual [convert](/guides/dashboard/convert) followed by a [manual transfer](/guides/dashboard/transfer).
* Use **Convert** to deposit USD and [convert](/guides/dashboard/convert) it to a stablecoin, keeping it on-platform in the Profile of your choice, followed by a [manual transfer](/guides/dashboard/transfer).
Can't find the right minting options? The desired option may not be supported by the [Entity](https://docs.paxos.com/dashboard/organization#entities) or by the Paxos platform. Reach out to your [Entity Manager](https://docs.paxos.com/dashboard/roles#entity-manager) or [contact us](https://support.paxos.com/hc/en-us/requests/new) for help.
# Onboard to Paxos
Source: https://docs.sandbox.paxos.com/guides/dashboard/onboard
Learn more about the information required to start using the Paxos process.
Paxos collects certain business and personally identifying information (see below) to ensure your [Organization](/guides/dashboard/organization#organization) complies with all regulations and requirements for the jurisdictions your business operates in.
To start using the Paxos platform, onboard an [Entity](/guides/dashboard/organization#entity), which is typically mapped to teams, business groups, holding companies, or separate legal entities.
> Questions? Need help? Contact [Support](https://support.paxos.com).
Once you've gathered all the [supporting documents](#supporting-docs), completing the onboarding application usually takes about 30 minutes.
After submission, Paxos performs an extensive review of the provided information.
During the review process, a representative may request clarifying information or additional documentation.
Depending on your business structure and operating jurisdiction, the review process can take anywhere from a day to weeks.
## Business Details
Provide basic business (Institution) details to help determine onboarding requirements and ensure your use of the Paxos platform complies to the proper regulations and requirements for the jurisdiction.
You will need to provide the following:
* Institution type, incorporation ID type and incorporation ID.
* The legal incorporation address.
## Funding Details
Let Paxos know what industry sector your business operates in, the USD volume you expect to move to the Paxos platform, as well as the source of funds.
## Suitability Assessment
Depending on the business jurisdiction, provide additional details regarding your business to ensure compliance with regional requirements when using the Paxos platform.
## Business Members
Add personal identifying information for individuals that have a leadership role in the business.
Minimally, you will need to add a beneficial owner and a person with management control.
Depending on your business structure, you may need to add multiple persons.
An individual can perform more than one role.
## Review and Verify
Review and accept all applicable terms and conditions, pricing and fee information before reviewing and accepting the entity onboarding information you provided.
## Supporting Documents
Before you can complete onboarding, provide Paxos with supporting documents for your organization.
You an upload the documents in the web application.
The list below can be used as a general guide for most institutions.
Paxos may reach out to you for additional documentation as needed.
This information is required for all platform users meeting the criteria, even if you provided this previously for each person identified as Beneficial Owner, Authorized User, or persons with management control.
Please provide a scanned PDF not older than 6 months (e.g., utility bill, cell phone bill, or bank statement).
The ID must be scanned COLOR document of a Valid Passport, Driver's License, or National ID.
This information is required for all platform users meeting the criteria, even if you provided this previously for each person identified as Beneficial Owner, Authorized User, or Persons with Management Control.
Provide ONE of the following documents:
* Certificate of Incorporation
* Articles of Incorporation
* Certificate of Formation
* Articles of Organization
* National/State Government Registry filings, or equivalent
Ensure the number is issued by the Internal Revenue Service (for US entities) or relevant governing body (for international entities).
Bank statement or other equivalent document clearly showing the ownership under the Institution's name and dated within the last 6 months. Provide Proof of Funds substantiating requested trading volume.
Provide ONE of the following documents that was not provided as the first organizational document:
* Certificate of Incorporation
* Articles of Incorporation
* Certificate of Formation
* Articles of Organization
* National/State Government Registry filings, or equivalent
All Institutions that have been established for longer than 1 year must provide this document. This must be a document issued by a government registry and must be dated within the past year.
## ID Verification
When the supporting documents are accepted, the final step is to provide individual identify information, which usually consists of providing a government issued ID such as passport, national ID card or driver license and taking a real-time "selfie" photo of you holding your ID.
To avoid common errors with the ID verification process:
* Ensure your webcam is enabled in the browser.
* Before uploading the ID, ensure all four corners of your ID document are visible, the text is clear and legible, and that the ID is not expired.
* Do not use a professional headshot for the real-time "selfie" photo. Take your "selfie" photo while holding your ID document at or near the time of onboarding.
# Organization, Entities and Profiles
Source: https://docs.sandbox.paxos.com/guides/dashboard/organization
Learn more about the multi-entity experience.
The Paxos Dashboard supports a multi-entity experience, made up of three components: [Organization](#organization), [Entity](#entity) and [Profile](#profile).
Within the Organization, individual access is selectively provisioned across Entities, so an individual can only access the information and funds and based on their [roles](/guides/dashboard/roles) within the respective Entity.
Most implementations require use of multiple Profiles to organize balances and transactions on the Paxos platform.
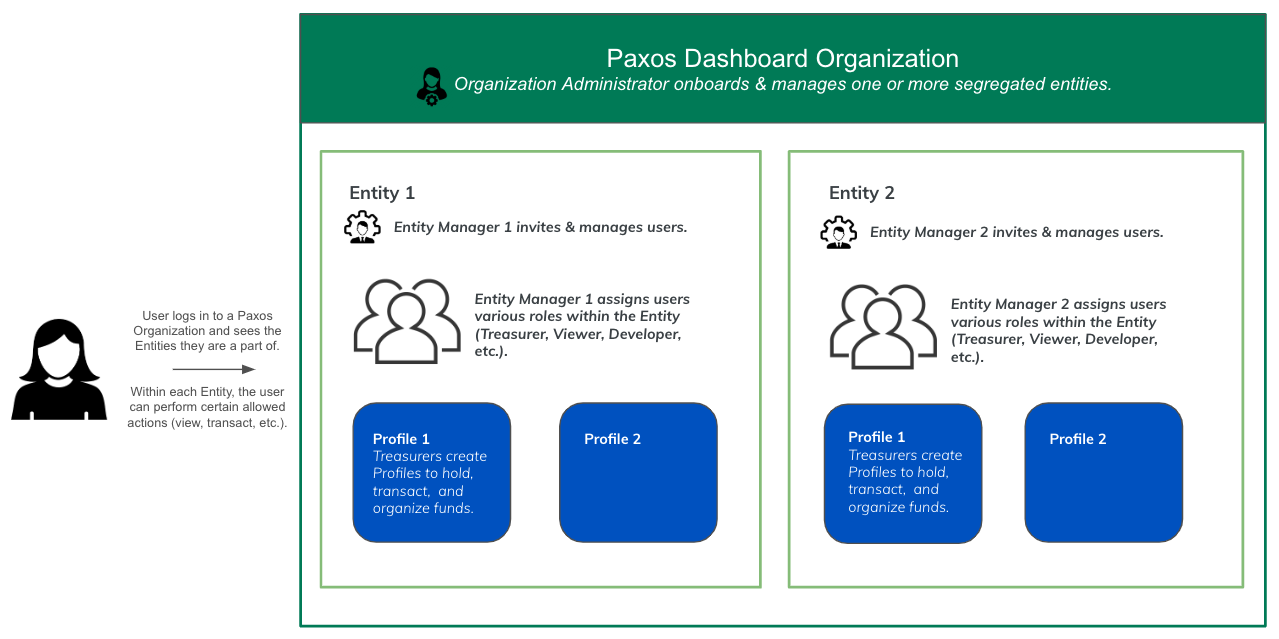
## Organization
When you [sign up for the Paxos Dashboard](/guides/dashboard/account), you are creating [Organization Administrator](/guides/dashboard/roles#organization-administrator) credentials to log into a Dashboard Organization.
As the top of the hierarchy the Organization typically maps to the parent of a legal entity or business group, comprising one or more entities.
For example, if **My Company** is comprised of three separate legal entities, **My Company Asia**, **My Company Europe** and **My Company North America**, using **My Company** as the organization will enable you to onboard the entities, using the legal business names, within the same organization bucket.
## Entity
Entities, typically mapped to teams, business groups, holding companies, or separate legal entities, are onboarded within the [Organization](#organization).
* Funds are segregated at the Entity level.
* Users belonging to a particular Entity can see balances, transfers, and other information on in the Entity they belong to.
* Roles & Permissions, APIs keys are scoped at an Entity level. For example, if an Organization has 3 entities, User A has a Treasurer role in Entity 1, a Viewer role in Entity 2, and no access to Entity 3. See [Roles and Responsibilities](/guides/dashboard/roles).
* [Organization Administrators](/guides/dashboard/roles#organization-administrator) who complete the onboarding for an Entity automatically become the [Entity Manager](/guides/dashboard/roles#entity-manager) for that new Entity. Entity Managers are allowed to assign roles, add users, map identity provider groups to roles, etc. Entity Managers can be reassigned later
## Profile
Every entity has a system-generated default Profile.
Most implementations require use of multiple Profiles to organize balances and transactions on the Paxos platform.
Profiles are also used to move funds within the same Entity.
A Profile is equivalent to a crypto wallet, with the addition of holding your USD (fiat) balance.
For example, [depositing USD](/guides/dashboard/deposit) into a Profile is the first step when [minting](/guides/dashboard/mint) a stablecoin.
Those with the [Treasurer](/guides/dashboard/roles#treasurer) create Profiles.
# Passkeys
Source: https://docs.sandbox.paxos.com/guides/dashboard/passkeys
Learn more about using passkeys with the Paxos Dashboard.
Passkeys provide a secure and easier way to sign in to the Paxos Dashboard.
With [passkeys](https://passkey.org/), there are no passwords to remember and no two-factor authentication.
Under the covers, when you add a passkey you are creating cryptographic key pairs for Paxos Dashboard: one key is stored on the Paxos server and the other is stored in your [password manager](#recommended-managers) or on your device.
When you [sign in with a passkey](/guides/dashboard/signin#passkey), the Paxos server ensures you are using the correct passkey.
There are numerous ways to use passkeys; however, we recommend using a [password manager](#recommended-managers) that can sync across multiple devices for the most portable experience.
Questions about passkeys?
Start by contacting your IT organization.
Your company may already have policies for using passkeys and can provide support when creating and using a passkey.
Learn more about passkeys and [try the passkey demo](https://passkey.org/) on [https://passkey.org](https://passkey.org).
## Recommended: Use a Password Manager
We recommend saving and using passkeys with the following password managers in conjunction with a [compatible browser](#passkey-browsers).
Third-party password managers may require you to create an account and install additional browser plugins/extensions.
Check with your IT organization if you have any questions about password managers.
* [Google Password Manager](https://support.google.com/chrome/answer/13168025)
* [1Password](https://support.1password.com/save-use-passkeys/)
* [Proton Pass](https://proton.me/support/pass-use-passkeys)
If you can't use any of the recommended password managers, use a password manager that allows for passkey synchronization across devices.
Before You Begin
Before creating a passkey, check with your IT organization and the user documentation for your particular device for policies, procedures, hardware requirements and restrictions.
## Browser Support for Passkeys
Minimum browser versions that support passkeys:
* Chrome 108
* Edge 108
* Safari 16.1
* Firefox 122. Limited support. Requires using the "Sign in with passkey" option.
* Opera 97
Before You Begin
Before creating a passkey, check with your IT organization and the user documentation for your particular device for policies, procedures, hardware requirements and restrictions.
## macOS Native Support for Passkeys
Starting with macOS 13, Apple's [iCloud Keychain](https://support.apple.com/guide/passwords/passkeys-mchl4af65d1a/mac) provides native support for passkey synchronization across devices.
Before You Begin
Before creating a passkey, check with your IT organization and the user documentation for your particular device for policies, procedures, hardware requirements and restrictions.
## Windows Native Support for Passkeys
Microsoft's [Windows](https://learn.microsoft.com/en-us/windows/security/identity-protection/passkeys/?tabs=windows%2Cintune) provide native support for passkeys starting with Windows 10 version 1903 and Windows 11 version 22H2. Requires setting up Windows Hello.
Before You Begin
Before creating a passkey, check with your IT organization and the user documentation for your particular device for policies, procedures, hardware requirements and restrictions.
# Redeem
Source: https://docs.sandbox.paxos.com/guides/dashboard/redeem
Deposit stablecoin and convert to USD. Transfer USD to your bank.
Redemption allows you to convert Paxos-issued stablecoins into USD and send the funds to your bank account.
Follow the steps below to complete this process using the **Convert** option in the Dashboard.
Watch a demo
Who can do this
Only users with the **Treasurer** role can redeem stablecoins. [View all roles and permissions](https://docs.paxos.com/dashboard/roles).
## What You'll Do
* Add a [**Fiat Account**](https://docs.paxos.com/dashboard/fiat).
* Convert a stablecoin to USD and transfer the funds to a bank account.
## Before you begin
Make sure you've deposited stablecoins via [**Dashboard > Deposit**](https://dashboard.paxos.com/actions/deposit) before starting a redemption.
### Requirements
* [A verified Paxos account](https://docs.paxos.com/dashboard/signin)
* A **Treasurer** role with the [required permissions](https://docs.paxos.com/dashboard/roles).
### Supported Stablecoins and Networks
| Asset | Supported Network |
| ----- | ----------------- |
| USDG | Ethereum, Solana |
| PYUSD | Ethereum, Solana |
| USDP | Ethereum |
## ➊ Add Fiat Account
Before you can redeem stablecoins, you need to add a [fiat account](https://docs.paxos.com/dashboard/fiat) in the Paxos Dashboard.
1. Go to the [Dashboard](https://dashboard.paxos.com/) > **Fiat Accounts**
2. Click **+ Fiat Account** in the top-right corner.
3. Select a network.
4. Enter account details.
5. Fill in recipient details.
6. Enter a mailing address.
7. Click **Save**.
Use the [Approvals](https://docs.paxos.com/dashboard/admin/approvals) functionality to require additional team members to review any new fiat accounts before they are saved. This avoids potential mistakes around incorrect information and adds an extra layer of security. **Only approved fiat accounts** can be used in the redemption process.
## ➋ Redeem Asset
1. Go to the [Dashboard](https://dashboard.paxos.com/) and click **Convert** in the top-right corner.
2. Select the **Asset** to redeem.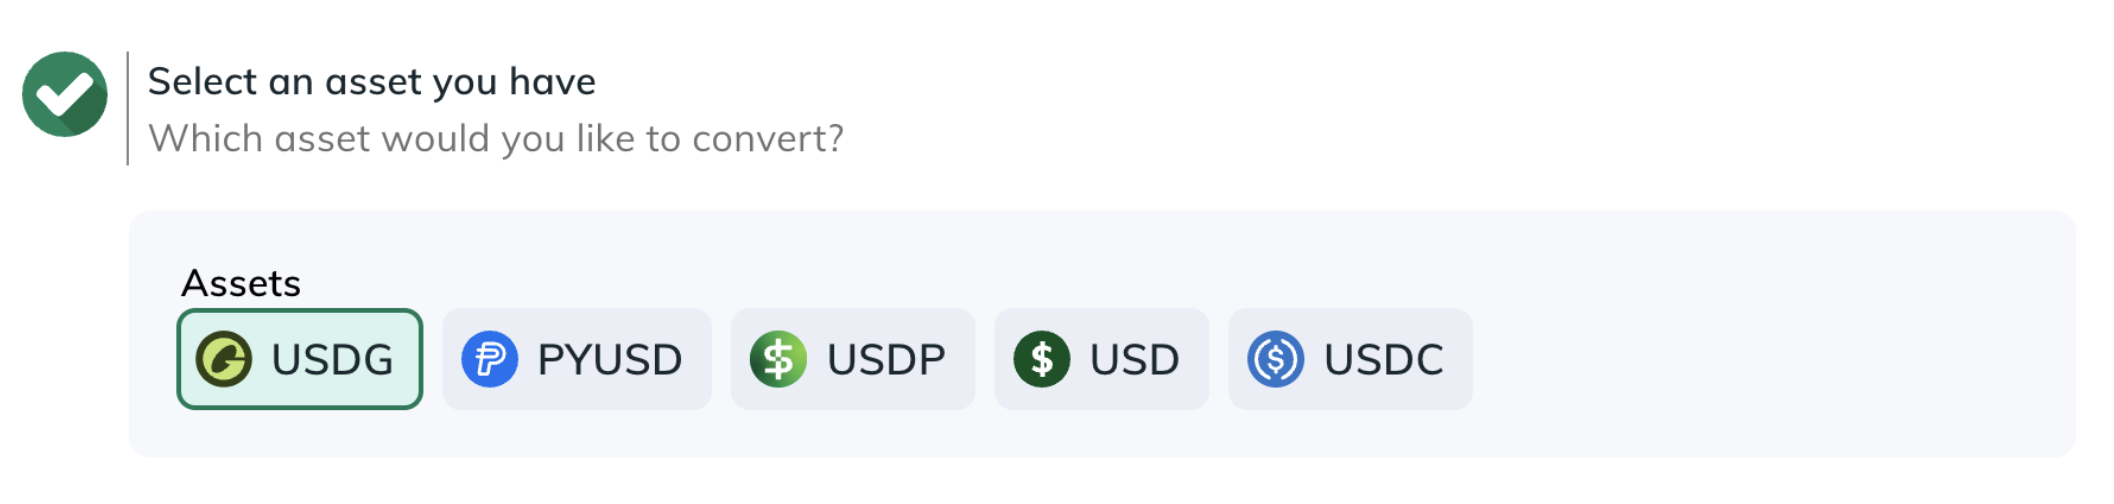
3. Choose the **Source** where the asset is located (a Profile or External Account/Wallet).
4. Select the **Asset** to receive.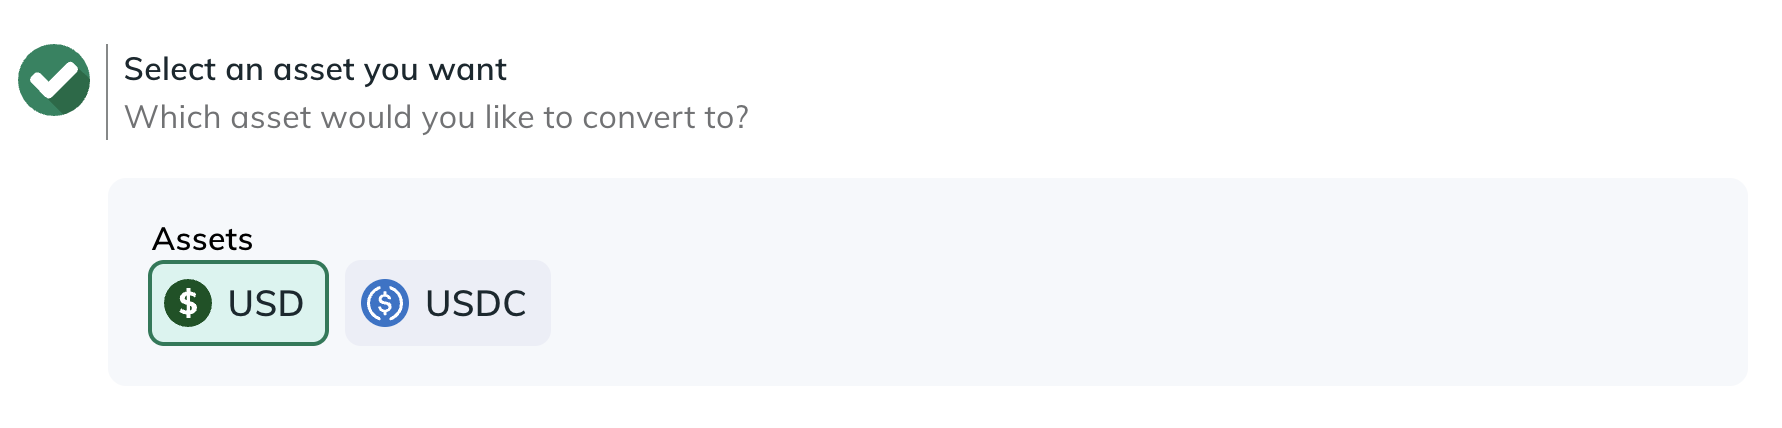
5. Choose the **Destination** where the converted asset should go (a Profile or an External Account/Wallet).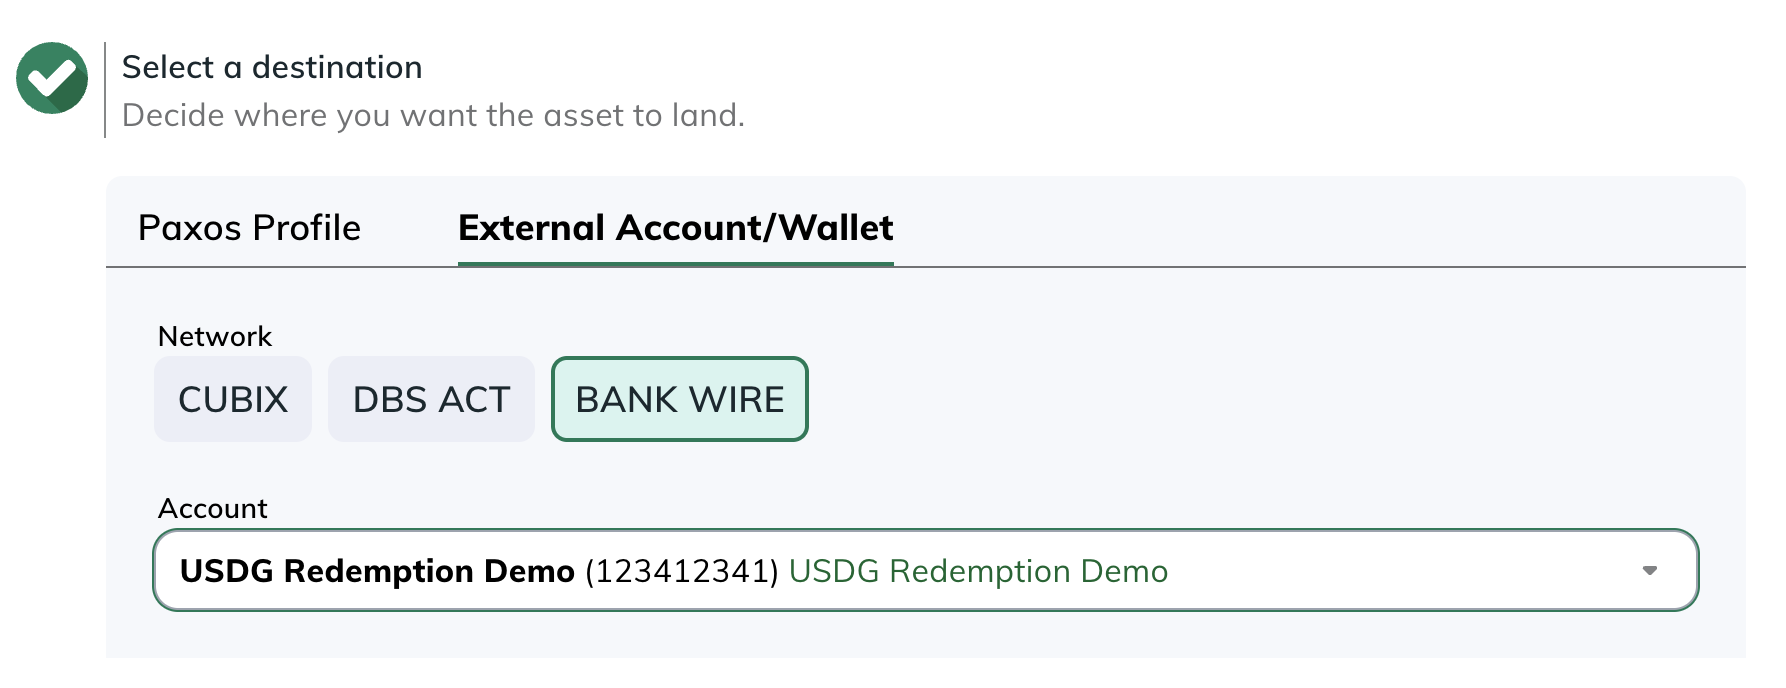
6. Go to [Transactions > Asset Movements](https://dashboard.paxos.com/dashboard/transactions/asset-movements) or [Transactions > Conversions](https://dashboard.paxos.com/dashboard/transactions/conversions) to monitor activity.
Need help?
Redemption options may vary based on your account or [Entity](/guides/dashboard/organization#entities) configuration. Reach out to your [Entity Manager](/guides/dashboard/roles#entity-manager) or [contact us](https://support.paxos.com/hc/en-us/requests/new) for support.
# Manage Payouts
Source: https://docs.sandbox.paxos.com/guides/dashboard/rewards/manage-payouts
Set or update a payout address.
### What is a payout address?
Your **payout address** is the address where Paxos will send your monthly USDG rewards. You must select one existing [withdrawal address](https://docs.paxos.com/dashboard/addresses) to designate as a payout address. Ethereum and Solana networks are currently the only networks supported for payouts.
You must set a payout address by month end in order to receive rewards. If you do not set a payout address before month end, your rewards will be deferred until the following month.
### Set or update your payout address
Required permissions
* To set a payout address, you need a role with the **update payout address** permission (i.e. Treasurer) to perform this action.
* To view a payout address or statement, you only need a role with the **view payout address** permission and “view statement” permission (i.e. Entity Manager and Viewer roles).
1. Go to the **Rewards** tab in the Paxos Dashboard
2. In the **Payout Address** section, click the dropdown on the right
3. Choose an existing withdrawal address, or click **Add new address**
4. Click **Submit**
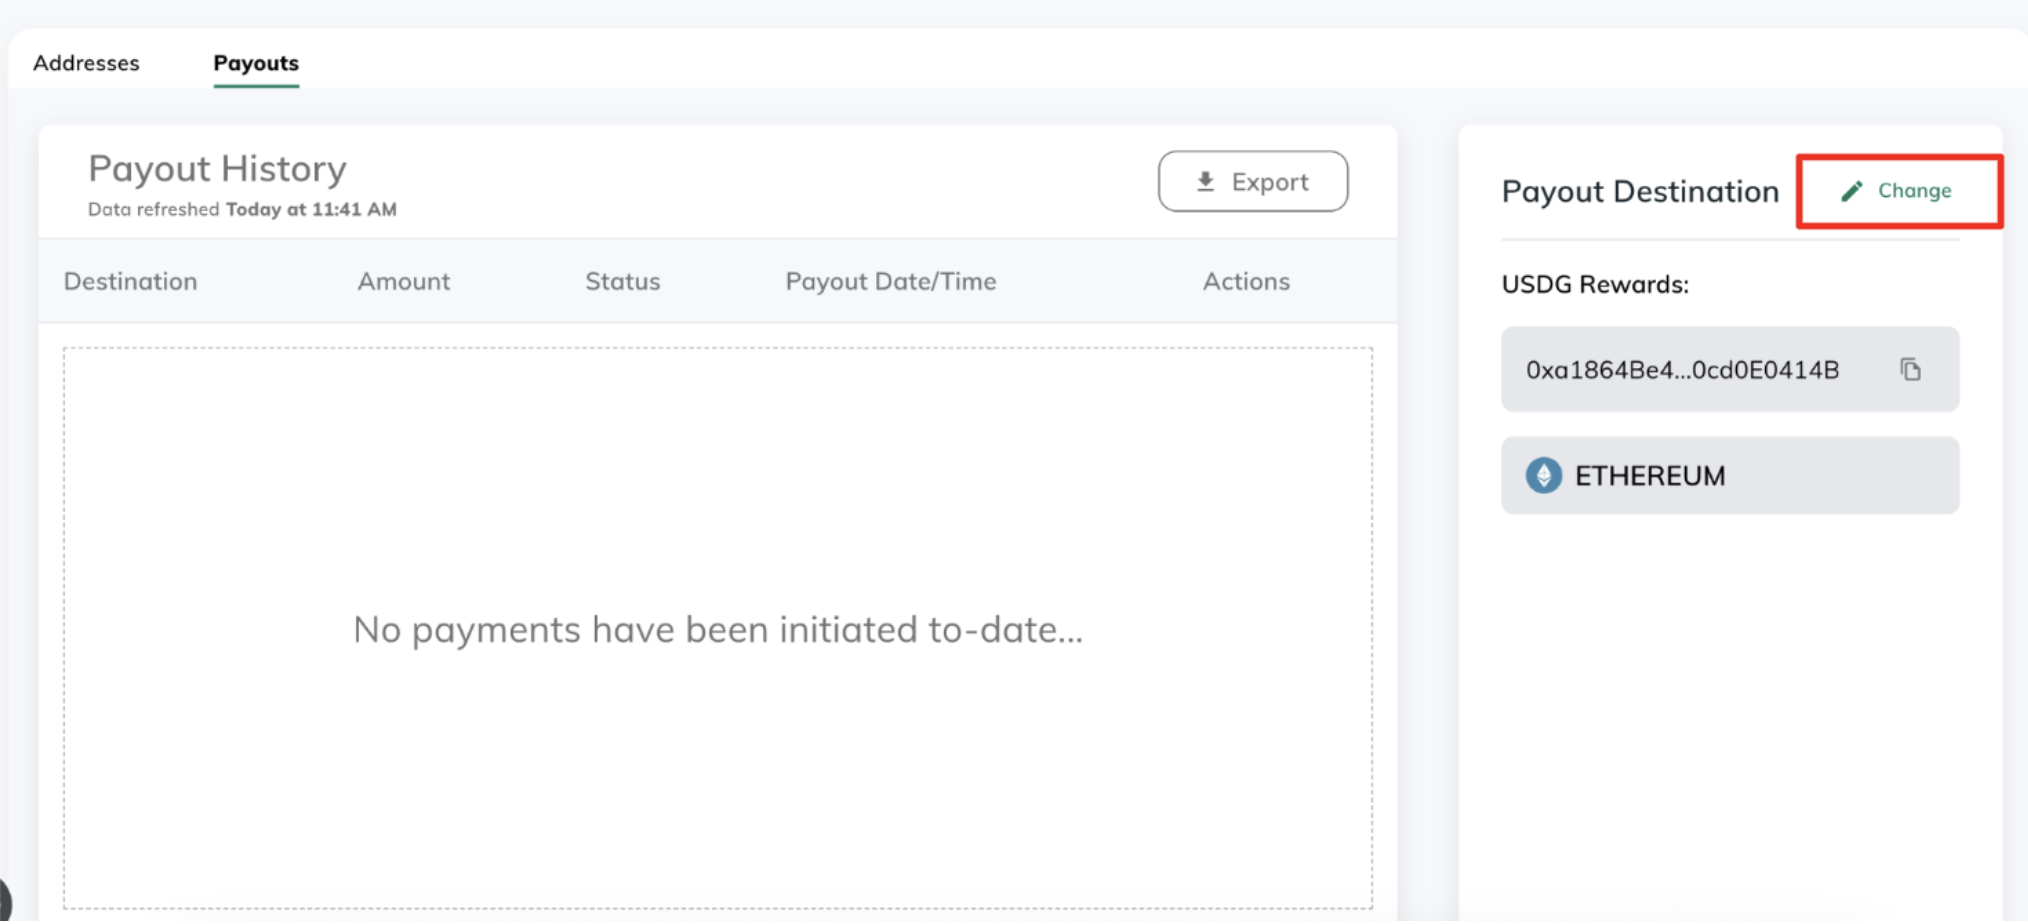
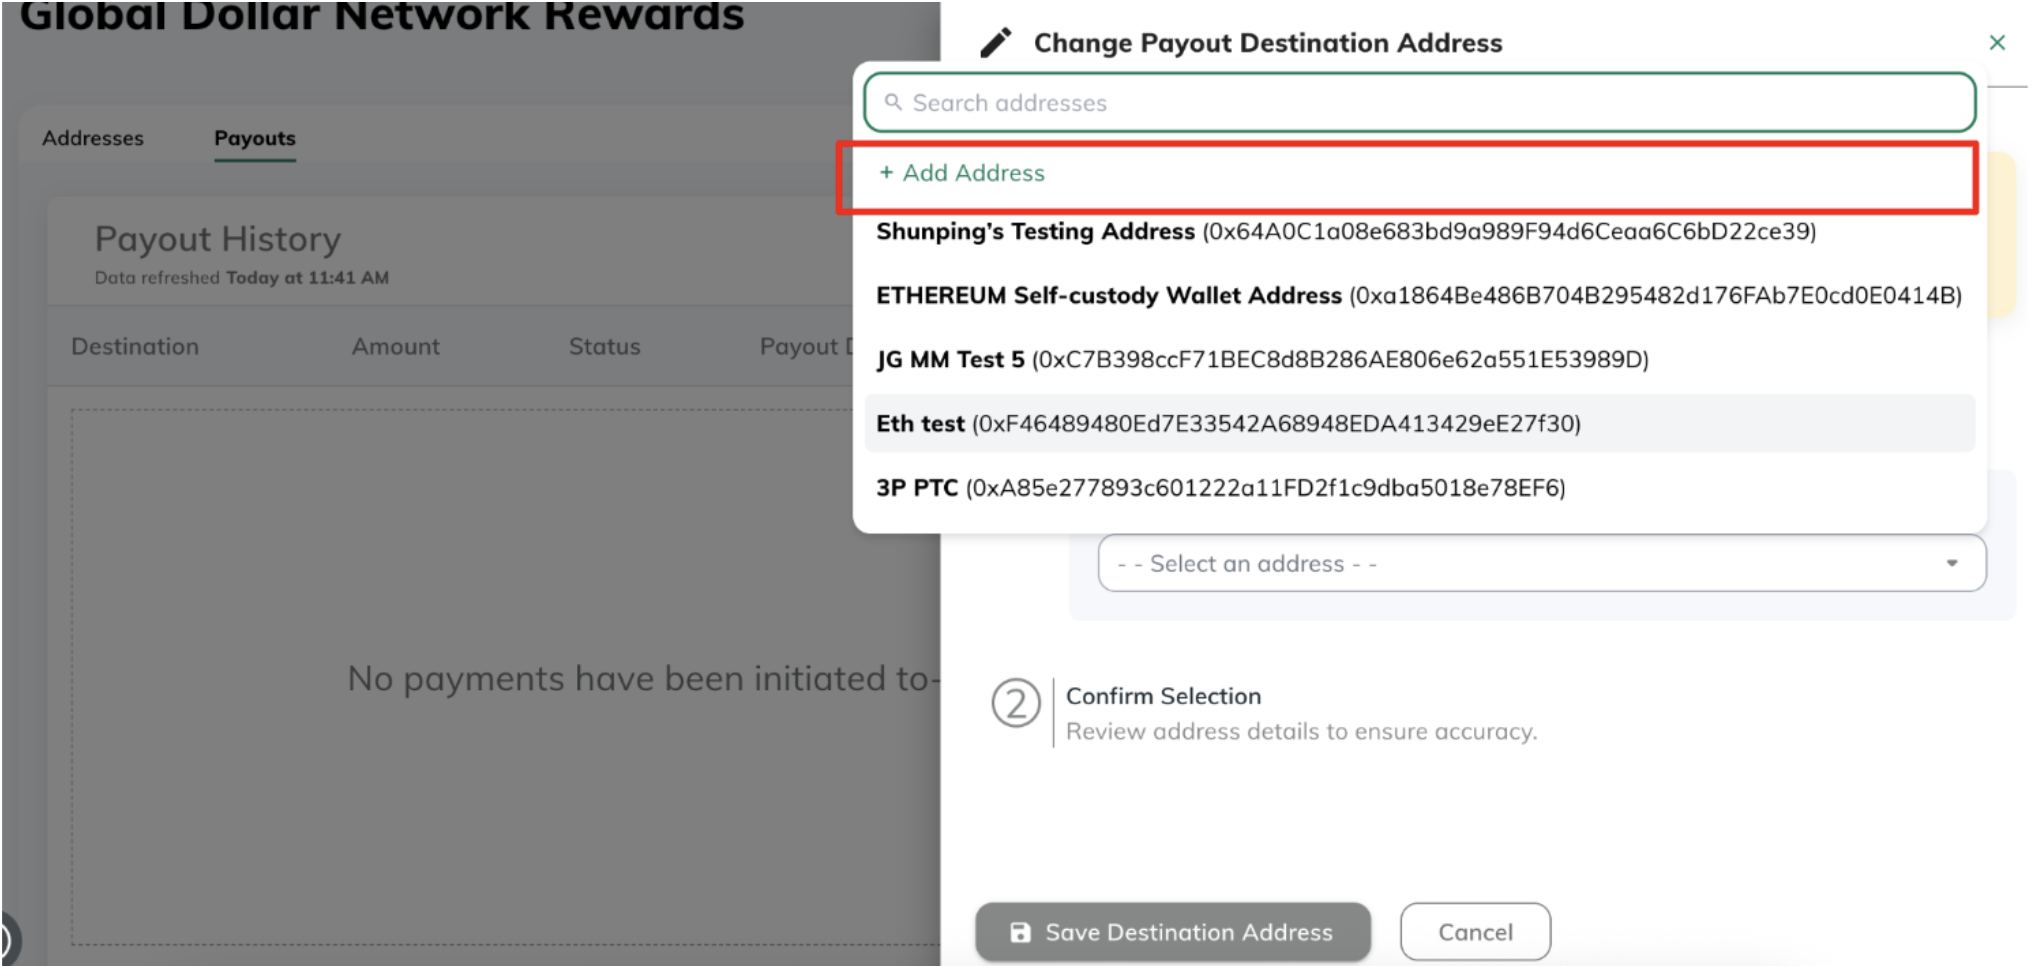
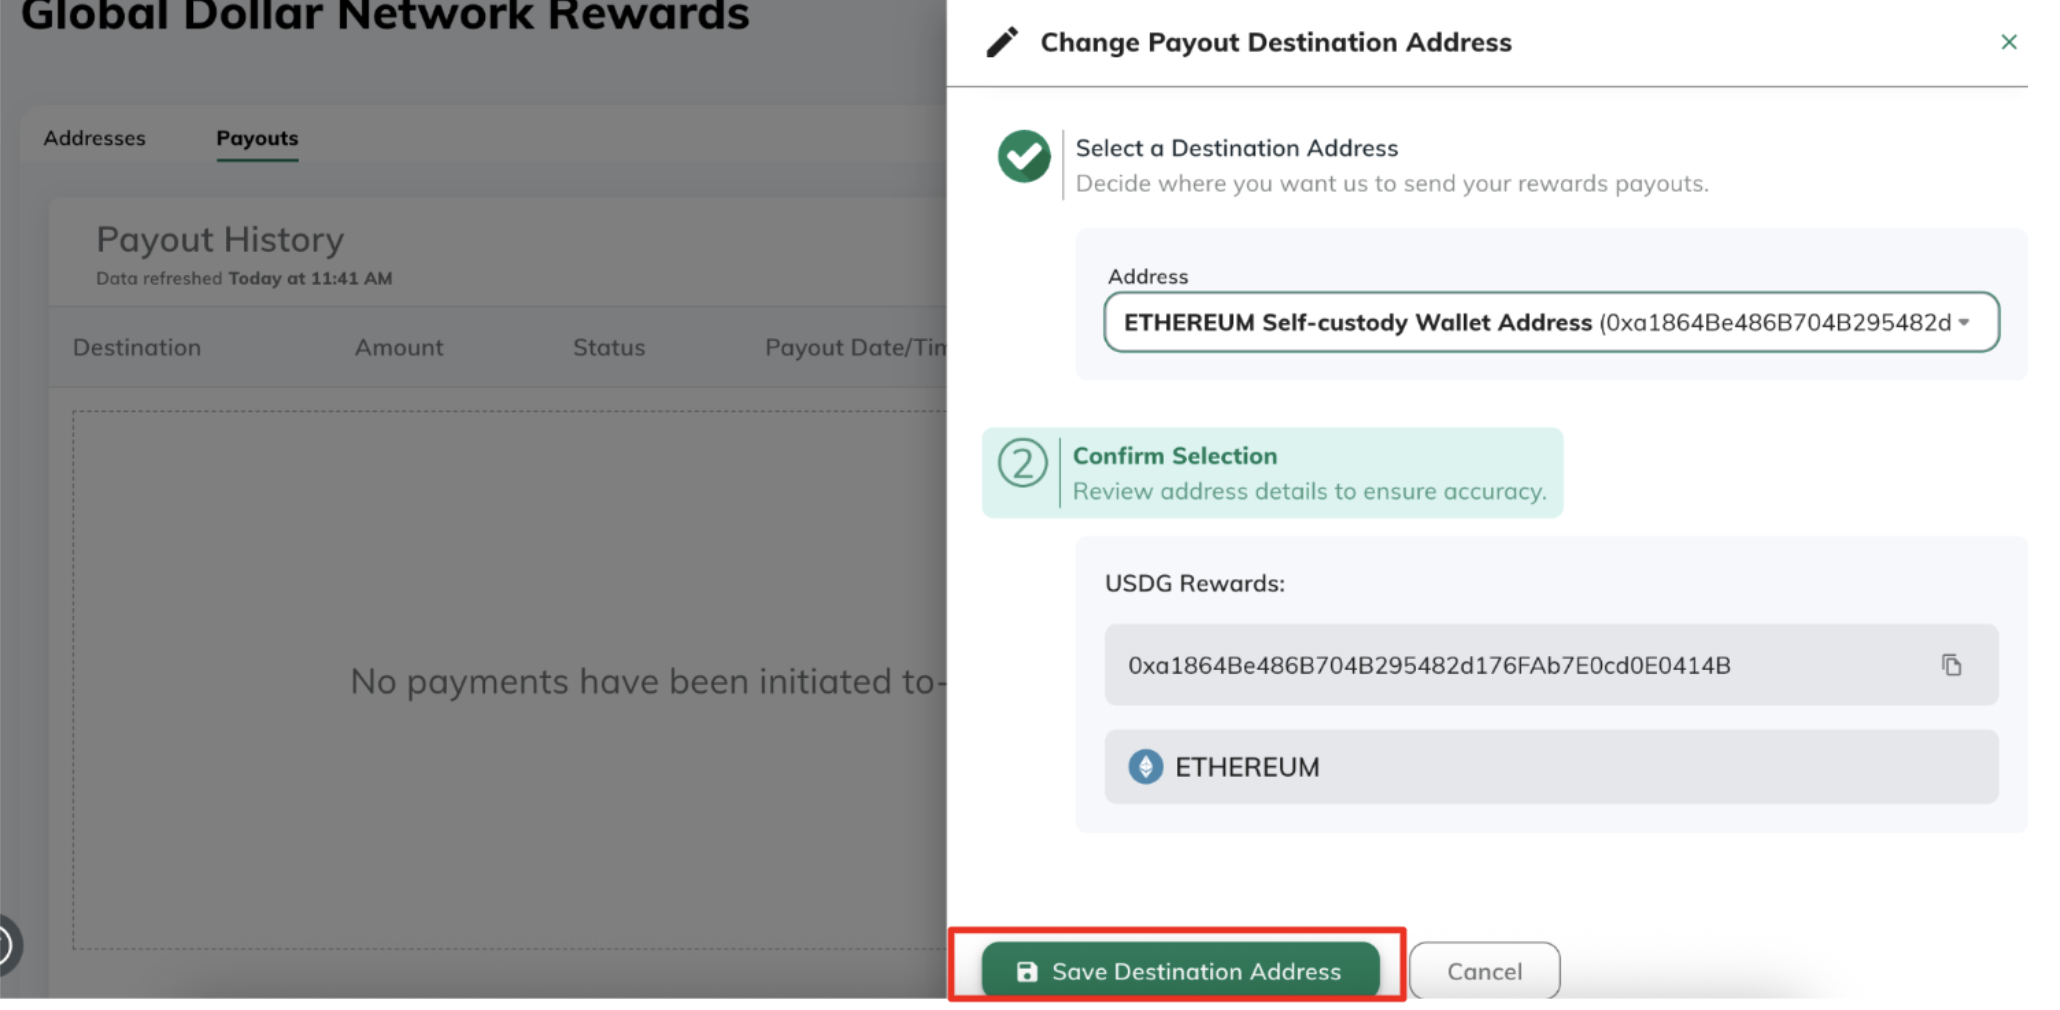
## View your active payout address
See your configured address, network, and last update timestamp.

# Monitor Addresses
Source: https://docs.sandbox.paxos.com/guides/dashboard/rewards/monitor-addresses
Add your first monitoring address.
## What is a monitoring address?
A **monitoring address** is a blockchain address that Paxos monitors daily for eligible activity tied to the Global Dollar Network. We recommend adding any addresses you expect to hold, receive, or mint USDG as a monitoring address in order to receive rewards for all of your USDG on-chain activity.
Monitoring addresses must be added by month end (23:59 UTC+0) in order to earn rewards for that month. Addresses added after month end will start earning rewards for the following month.
## Add a monitoring address
1. Go to the **Rewards** tab in the Paxos Dashboard
2. Click **Add Monitoring Address**
3. Enter:
* Network
* Address
* (Optional) Nickname
4. Click **Submit**
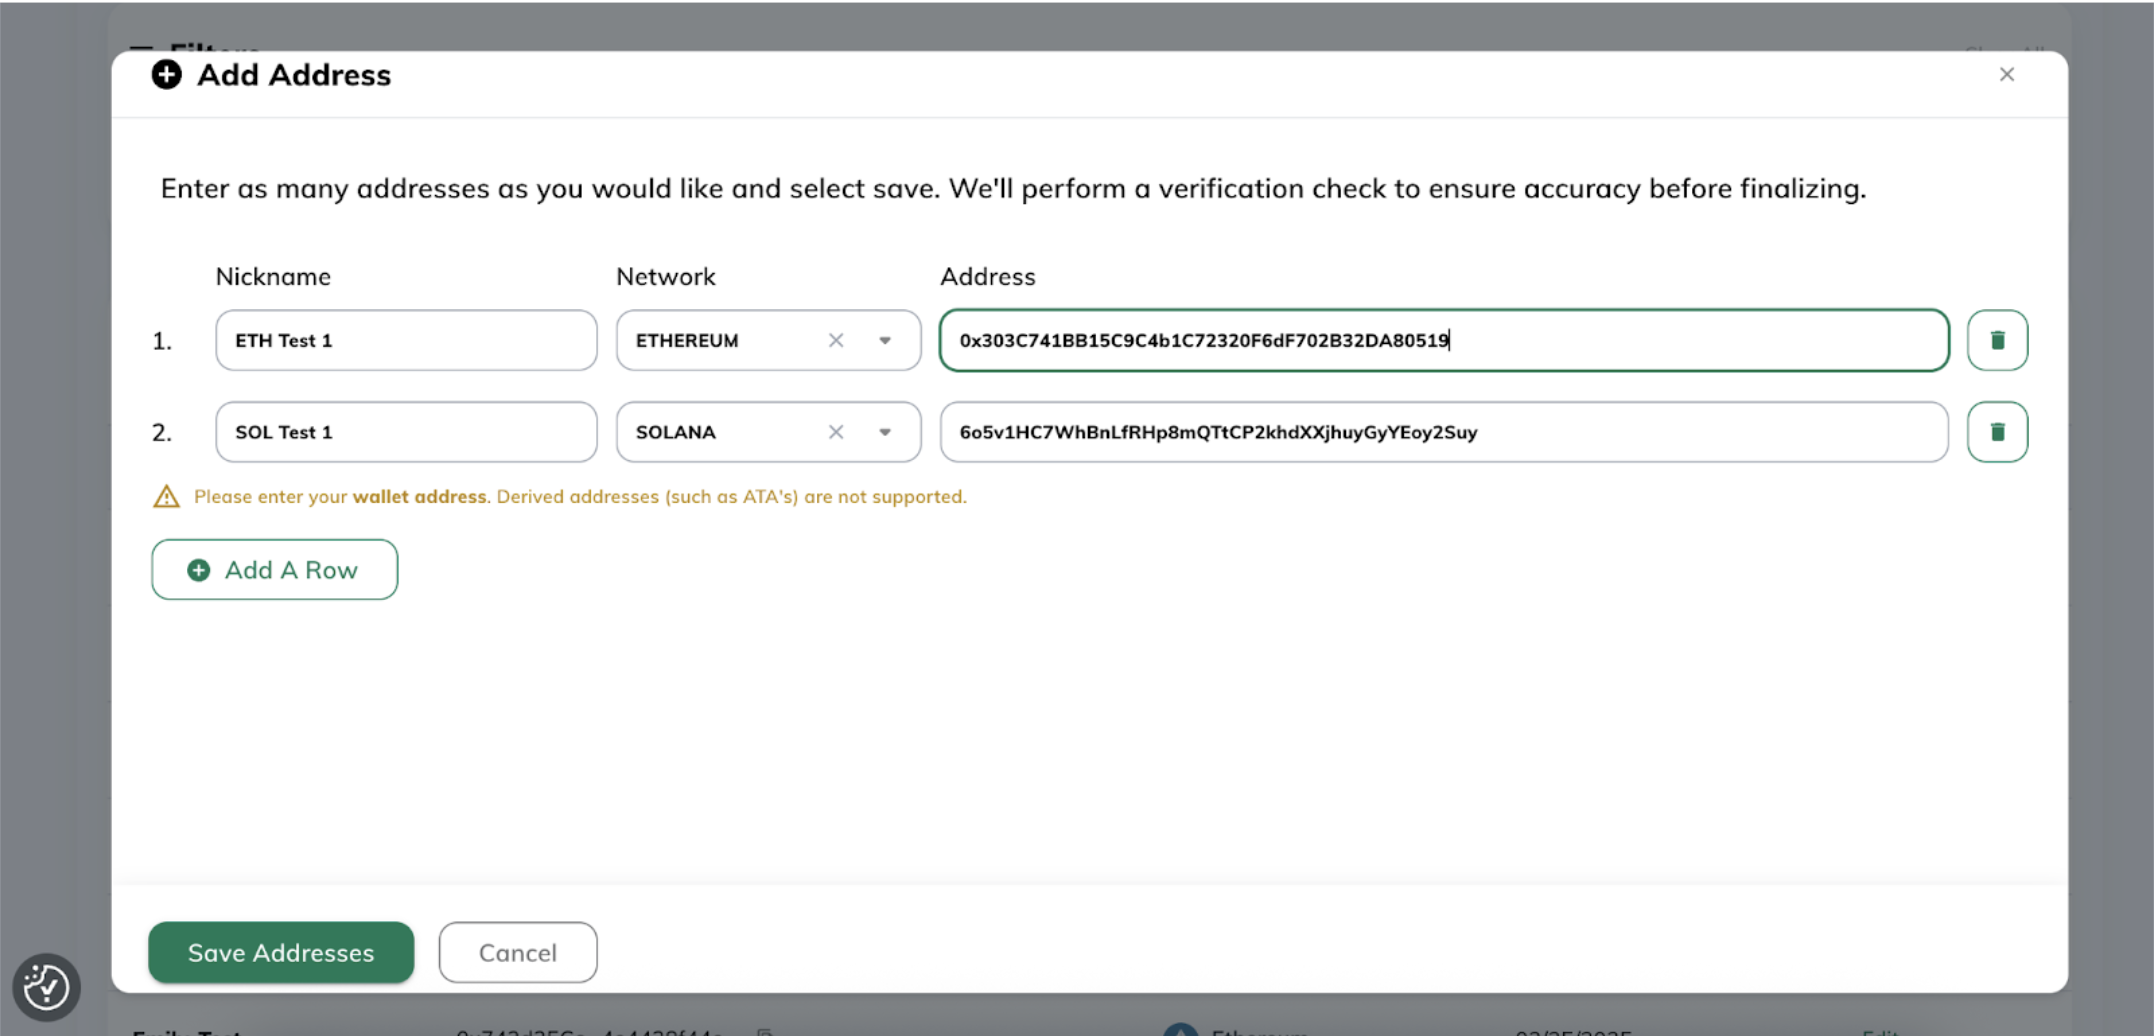
Once you submit monitoring addresses, Paxos will validate that the format of the address is valid for a chosen network. Invalid addresses will be individually flagged and must be resolved or removed before you can upload a batch of monitoring addresses.
Paxos validates addresses using the following address format standards:
* EVM: [https://ethereum.org/en/developers/docs/accounts/#account-creation](https://ethereum.org/en/developers/docs/accounts/#account-creation)
* Solana: [https://solana.com/docs/core/accounts#account](https://solana.com/docs/core/accounts#account)
For Solana, derived addresses (such as ATA’s) are NOT supported. Paxos derives the token accounts associated with your standard Solana wallet addresses. If you are a more advanced user and need support for derived addresses, please email [gdn-rewards@paxos.com](mailto:gdn-rewards@paxos.com).
## View monitoring addresses
See your list of monitored addresses, including:
* Network
* Address
* Nickname (if provided)
* Date added
Additionally, you can search by nickname, the address itself, or filter by network. You can also export your list of addresses directly from the Dashboard by clicking our **Export** icon.
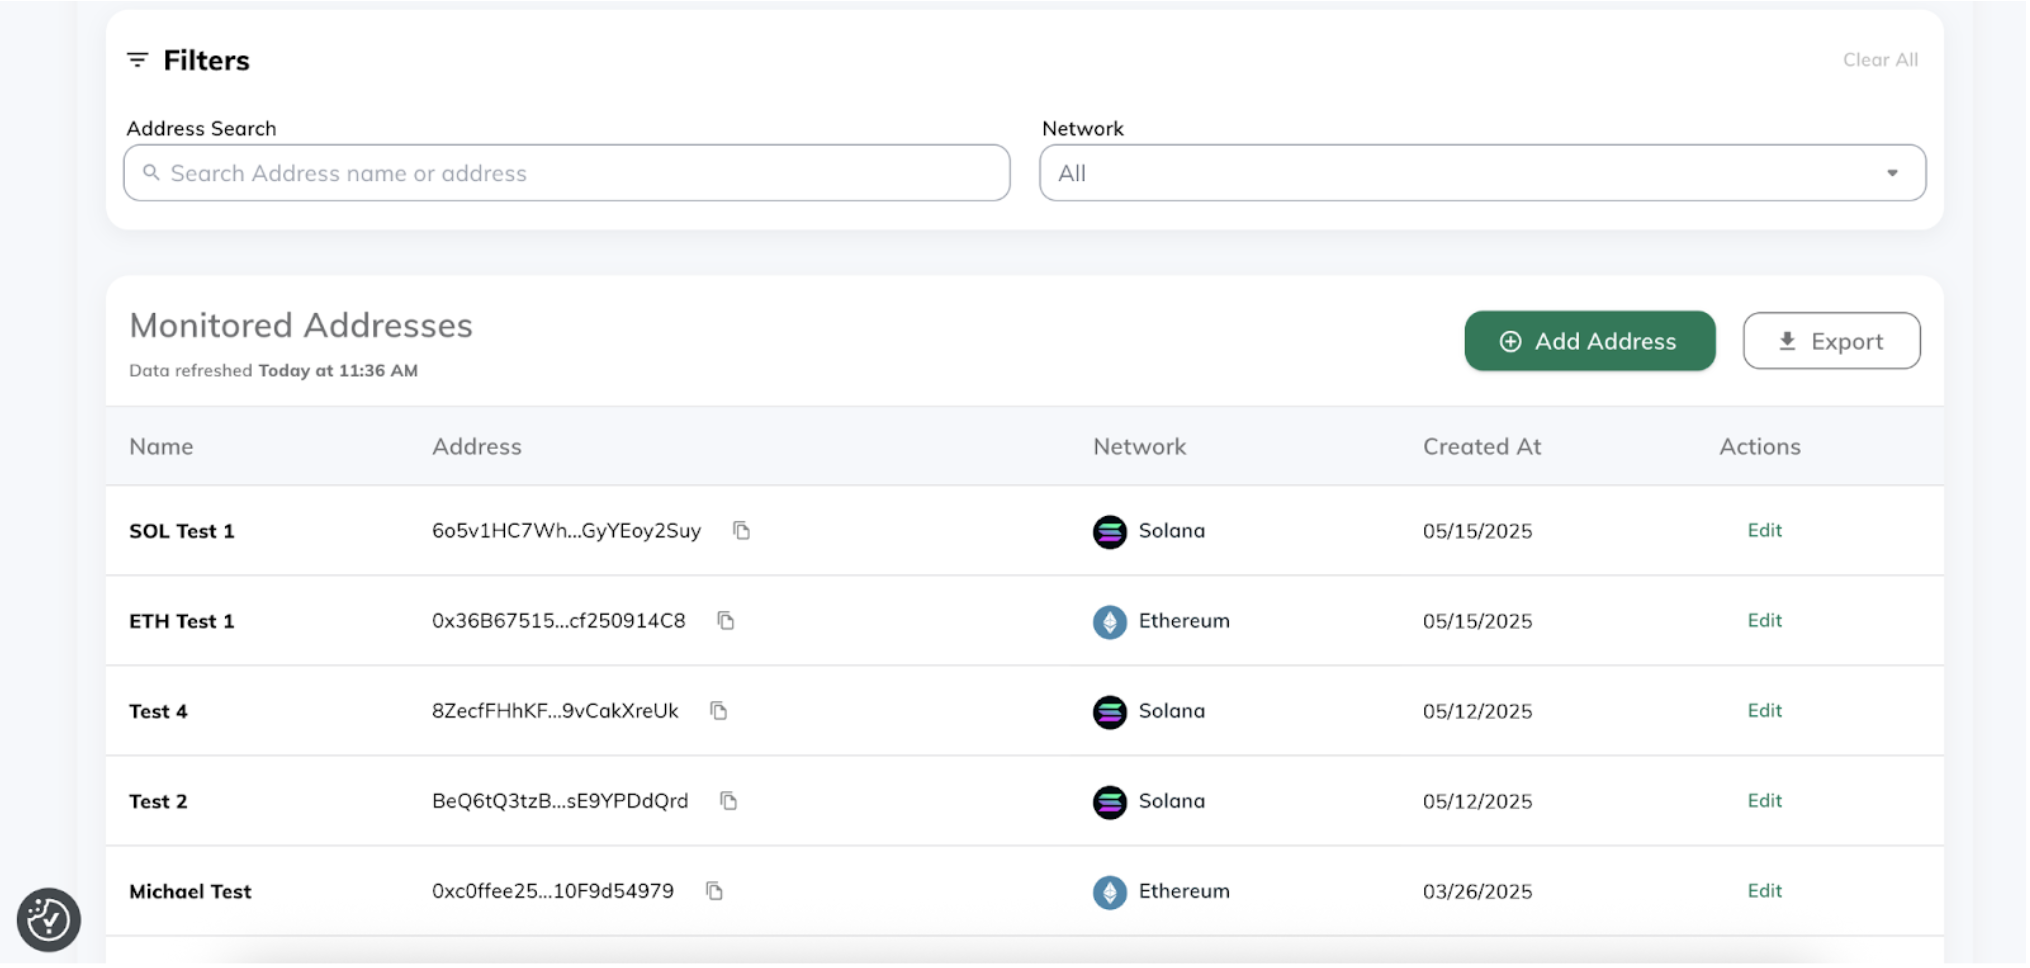
## Required Permissions
You need a role with the “update monitoring addresses” permission (i.e. Treasurer) to perform this action.
## FAQs
**What’s the difference between a monitoring address, a withdrawal address, and a payout address?**
A monitoring address is used by Paxos to determine how much your organization has earned in rewards by holding, minting, and accepting USDG on-chain.
A withdrawal address is an address your organization has registered with Paxos and can receive funds to on-chain from Paxos.
A payout address is designated withdrawal address where Paxos will pay out your USDG rewards
**Can I edit a monitoring address?**
You can edit the nickname. Network and address are permanent. If you need to change a monitoring address, simply add a new address via the steps above.
**Can I delete a monitoring address?**
No. If unused, a monitoring address will simply earn 0 rewards. For bookkeeping purposes, we plan to introduce the ability to “delete” a monitoring address later in 2025.
**When do I need to add monitoring addresses by?**
Before the last calendar day of the month at 23:59 UTC+0.
**How does Paxos validate if a monitoring address is valid?**
We validate addresses using standard address formatting conventions:
* EVM chains: [https://ethereum.org/en/developers/docs/accounts/#account-creation](https://ethereum.org/en/developers/docs/accounts/#account-creation)
* Solana: [https://solana.com/docs/core/accounts#account](https://solana.com/docs/core/accounts#account)
# Overview
Source: https://docs.sandbox.paxos.com/guides/dashboard/rewards/overview
Manage USDG rewards via the Paxos Dashboard.
Demo
**[Watch a Demo →](https://www.youtube.com/watch?v=jPUvOSNMyMc)**
Global Dollar Network partners can now manage USDG rewards via our self-serve rewards tools. Once onboarded to Paxos, you can manage everything directly from the Paxos Dashboard, or via our Rewards API endpoints.
To start earning, simply:
1. Add **monitoring addresses** to track eligible wallet activity
2. Set your **payout address** for receiving USDG rewards
3. View your **monthly rewards statements** and track your payouts
Don’t see the Rewards tab?
[Contact the Growth Team](https://globaldollar.com/#contact) to request access.
## How it works
USDG rewards are based on the on-chain activity attributed to the monitoring addresses attributed to your organization. Paxos calculates rewards based on daily snapshots (taken at 23:59 +0 UTC), and distributes payouts once per month.
With our self-serve rewards product, you can:
* Add or update monitoring addresses at any time
* Set and update payout address
* View your rewards payouts
## Key Rewards Concepts
### Monitoring Address
A blockchain address that Paxos monitors on a daily basis to calculate your stablecoin rewards based on eligible on-chain activity. In order to receive rewards for using USDG, you must [register at least one monitoring address](.) that will hold, mint, or accept USDG on-chain. Examples of types of monitoring addresses you may want to add include:
* Omnibus wallet addresses for your exchange
* Dedicated wallets for your institutional custody business
* Payment addresses your organization uses to accept payments for goods/services
End user self-custodial wallets are not yet supported. If you need to add self-custodial wallets for your end users, please reach out to your account contact or [support@paxos.com](mailto:support@paxos.com).
### Payout Address
A blockchain address that Paxos will send your monthly USDG rewards to on-chain. You can select a payout address from any withdrawal address added to your Paxos organization.
[Learn how to set and configure payout addresses](.).
### Statements & Payouts
Monthly rewards statements are shared by email. Payouts occur on a fixed schedule, one time per month.
#### Reward Payout Timeline
| Time | Example Date | Event |
| ---- | ------------- | -------------------------------------------------------------------------------------------- |
| T | May 31, 2025 | Last day to add monitoring addresses for current month |
| T+20 | June 20, 2025 | Rewards statement emailed to your team (will be available in the Dashboard and via API soon) |
| T+25 | June 25, 2025 | Deadline to report any issues with your rewards statement |
| T+30 | June 30, 2025 | USDG rewards paid to your configured payout address |
Monitoring addresses must be added by month end (23:59 UTC+0) in order to earn rewards for that month. Addresses added after month end will start earning rewards for the following month.
# Timeline and Disputes
Source: https://docs.sandbox.paxos.com/guides/dashboard/rewards/timeline-and-disputes
Monthly Rewards Timeline.
Paxos uses a fixed rewards timeline each month:
| Milestone | Example Dates | What happens |
| ---------------- | --------------------- | ----------------------------------------------------------------------------------------------------------------------------------------------------------------------------------------------------------- |
| Calendar Month | May 1 - May 30 | - Paxos takes daily snapshots of on-chain activity for all your monitoring addresses. - Monitoring addresses added on during the month will be eligible to earn rewards. |
| T (end of month) | June 1 at 00:00 UTC+0 | - Cutoff for adding new monitoring addresses. - Monitoring addresses added this date will NOT earn rewards for the prior month (i.e. wallets added on June 1 will not result in any reward payouts for May) |
| T+20 | June 20 | Rewards statement emailed to your team |
| T+25 | June 25 | Deadline to raise any issues or disputes with your reward statement |
| T+30 | June 30 | USDG rewards paid to your payout address |
## What to do
**Before Month End (T):**
Add or confirm monitoring addresses
**T+20 → T+25:**
* Review statement
* Raise any issues or disputes to Paxos
**Before T+30:**
* Confirm payout address is correct
**After T+30:**
* Confirm payout amount and destination matches statement amount
## Reviewing your rewards statement
Statements include:
Total amount of rewards earned
Your designated payout address
Breakdown of rewards earned by reward type
List of all monitoring addresses and their associated rewards
Breakdown of rewards earned under cash vs accrual methods
Statements are **emailed** to you on the 20th each month.
## Raising a dispute
1. Go to **Rewards** tab
2. Click **Report an Issue**
3. Fill in details (address, dates, issue)
4. Submit between T+20 and T+25
# Roles and Responsibilities
Source: https://docs.sandbox.paxos.com/guides/dashboard/roles
Learn more about the default roles for your Entity.
The Dashboard includes a default set or associated roles and permissions that the [Entity Manager](#entity-manager) provisions before using the Dashboard.
These roles and associated permissions are bound to the Entity, so it is possible to have different roles depending on an individual's Entity-specific responsibilities.

Have questions about your role and access?
Contact your [Entity Manager](#entity-manager) for help.
## Organization Administrator
All Organizations have at least one Organization Administrator with permission to onboard Entities.
Organization Administrators who complete the onboarding for an Entity automatically become the [Entity Manager](#entity-manager) for that Entity.
## Entity Manager
Entity Managers assign roles, add users, map identity provider groups to roles, etc.
Entity Managers can [review Entity specific settings](https://dashboard.paxos.com/admin).
Entity Managers can be reassigned once an Entity has been created.
Entity Managers have view permissions across the Dashboard, but cannot perform treasury focused actions.
> Use the Entity ID on the [ Admin > Entity Settings](https://dashboard.paxos.com/admin) when contacting [Support](https://support.paxos.com).
## Treasurer
The Treasurer role enables users to:
* Create Profiles and update balances.
* Deposit, transfer and withdrawal supported assets.
* Mint, convert and redeem Paxos-issued stablecoins.
* View reports.
## Approver
The Approver can approve or reject any submitted action that requires [Approvals](https://docs.paxos.com/dashboard/admin/approvals).
## Developer
The Developer can view, create, update and delete [API credentials](https://dashboard.paxos.com/admin/api).
## Viewer
A Viewer has read-only access to view user roles and permissions, cash and crypto balances, deposit and transfer details, API keys, reports as well as conversion information.
# Sign In
Source: https://docs.sandbox.paxos.com/guides/dashboard/signin
Access the Dashboard using a passkey or SSO.
To access the Dashboard, your [Entity Manager](/guides/dashboard/roles#entity-manager) will either email you an invite to register for a [passkey-based sign in](#passkey) or integrate the Dashboard into your company's [Single Sign-On (SSO)](#sso) solution.
Having trouble signing in? Don't know what method to use?
Contact your [Entity Manager](/guides/dashboard/roles#entity-manager) or IT organization for help.
## First Time Sign In with Passkey
If you have been invited to join an Organization by an [Entity Manager](/guides/dashboard/roles#entity-manager) for an existing [Entity](/guides/dashboard/organization#entity), use the link provided in your invite email to join your Organization's Dashboard account.
Learn more in the [passkeys guide](/guides/dashboard/passkeys).
**Questions about passkeys?**
Start by contacting your IT organization. Your company may already have policies for using passkeys and can provide support when creating and using a passkey.
Paxos recommends saving and using passkeys with:
* [iCloud Keychain](https://support.apple.com/guide/passwords/passkeys-mchl4af65d1a/mac)
* [Windows Hello](https://support.microsoft.com/en-us/account-billing/signing-in-with-a-passkey-09a49a86-ca47-406c-8acc-ed0e3c852c6d#)
* [Google Account](https://support.google.com/chrome/answer/13168025)
* [1Password](https://support.1password.com/save-use-passkeys/)
* [Proton Pass](https://proton.me/support/pass-use-passkeys)
* Other third-party password managers that enable passkey synchronization across devices
Learn more about [using passkeys on the Paxos platform](/guides/dashboard/passkeys) or [try the passkey demo](https://passkey.org/) on [https://passkey.org](https://passkey.org).
Provide your name, email address and the verification code from the email we sent you.
Click **Next** then **Create a Passkey**.
Save the passkey for [subsequent sign ins](#passkey).
### Set Up Account Recovery
Add a secondary method of login in case you lose access to your account or change device.
Once set, the security question will be used if you need to [recover your account](#recover).
1. Go to your account preferences in the top right corner and select the security questions manager.
2. Select a question and provide a memorable answer. The answer must not include any identifying information, such as your name, nor match commonly used passwords such as 123456.
3. Write down your answer and store it in a secure place before submitting. The answer cannot be retrieved once it is set.
To change your security question, follow the steps above.
## Sign In with Passkey
Make sure you have completed [first time sign in](#first-time-sign-in-with-passkey) before signing in.
If you saved the passkey locally, make sure you use the same device to sign in.
Learn more in the [passkeys guide](/guides/dashboard/passkeys).
Go to [https://dashboard.paxos.com/](https://dashboard.paxos.com/), select **Sign In**, click the email input field then select your passkey.
If your browser does not support passkey autofill, enter your email address and click **Next**.
If required, select the appropriate passkey.
**Questions about passkeys?**
Start by contacting your IT organization. Your company may already have policies for using passkeys and can provide support when creating and using a passkey.
Paxos recommends saving and using passkeys with:
* [iCloud Keychain](https://support.apple.com/guide/passwords/passkeys-mchl4af65d1a/mac)
* [Windows Hello](https://support.microsoft.com/en-us/account-billing/signing-in-with-a-passkey-09a49a86-ca47-406c-8acc-ed0e3c852c6d#)
* [Google Account](https://support.google.com/chrome/answer/13168025)
* [1Password](https://support.1password.com/save-use-passkeys/)
* [Proton Pass](https://proton.me/support/pass-use-passkeys)
* Other third-party password managers that enable passkey synchronization across devices
Learn more about [using passkeys on the Paxos platform](/guides/dashboard/passkeys) or [try the passkey demo](https://passkey.org/) on [https://passkey.org](https://passkey.org).
### Add or Remove a Passkey
Go to your account preferences in the top right corner and use the passkey manager to add or delete a passkey.
The Dashboard supports multiple passkeys for each individual user.
However, availability of this feature depends on the technology used to create your first passkey.
If you get an error message when trying to create a new passkey, the functionality is not available for your setup.
The passkey labeled **Accessed from this browser** is the one used to log in during the current session.
You must have at least two passkeys associated with your account to enable deletion.
### Recover Account (Passkey)
1. Go to [https://dashboard.paxos.com/](https://dashboard.paxos.com/), select **Recover Account** and follow the on-screen instructions. **Keep the window open and do not navigate away from the screen**.
2. Retrieve the security code from your email to verify it is you.
3. Answer your security question.
> If you forgot your answer or never set up [account recovery](#set-up-recovery), contact [Support](https://support.paxos.com) for assistance.
1. Create a new passkey.
**Questions about passkeys?**
Start by contacting your IT organization. Your company may already have policies for using passkeys and can provide support when creating and using a passkey.
Paxos recommends saving and using passkeys with:
* [iCloud Keychain](https://support.apple.com/guide/passwords/passkeys-mchl4af65d1a/mac)
* [Windows Hello](https://support.microsoft.com/en-us/account-billing/signing-in-with-a-passkey-09a49a86-ca47-406c-8acc-ed0e3c852c6d#)
* [Google Account](https://support.google.com/chrome/answer/13168025)
* [1Password](https://support.1password.com/save-use-passkeys/)
* [Proton Pass](https://proton.me/support/pass-use-passkeys)
* Other third-party password managers that enable passkey synchronization across devices
Learn more about [using passkeys on the Paxos platform](/guides/dashboard/passkeys) or [try the passkey demo](https://passkey.org/) on [https://passkey.org](https://passkey.org).
## Sign In with SSO
Go to [https://dashboard.paxos.com/](https://dashboard.paxos.com/), select **Sign In**, enter your work email address then click **Sign in with SSO**.
# Transactions
Source: https://docs.sandbox.paxos.com/guides/dashboard/transactions
Monitor Dashboard & API driven Paxos transactions and balances.
Go to [Transactions](https://dashboard.paxos.com/dashboard/transactions) to track and review current and past activity.
Select either [Asset Movements](https://dashboard.paxos.com/dashboard/transactions/asset-movements) to see deposits and transfers or [Conversions](https://dashboard.paxos.com/dashboard/transactions/conversions) to review assets that have been converted and moved to another [Profile](/guides/dashboard/organization#profile) within the same [Entity](/guides/dashboard/organization#entity).
A list of recent transactions is available for offline viewing using **Export**.
> When contacting [Support](https://support.paxos.com) about a transfer, include the unique **Transfer ID** and **Group ID** in your message to help our agents find the correct transaction.
## Travel Rule Actions
The Paxos platform supports [Travel Rule](/guides/dashboard/travel-rule) to ensure regulatory compliance within certain geographies.
If any of your transactions are missing information due to Travel Rule requirements, you'll see a **Requiring Action** section at the top of the [Transactions](https://dashboard.paxos.com/dashboard/transactions) page.
This section includes all transactions that need attention and action.
# Transfer
Source: https://docs.sandbox.paxos.com/guides/dashboard/transfer
Move fiat or crypto off the Paxos platform or between Profiles.
Go to the [Dashboard](https://dashboard.paxos.com/) and click **Transfer** in the top-right corner to send an asset to an external destination or to another [Profile](/guides/dashboard/organization#profile) within the same [Entity](/guides/dashboard/organization#entity).
## Transfer to an External Wallet or Bank Account
1. Select **To an External Address/Fiat Account**.
2. Choose the **Asset**. If sending crypto, select the **Network** for the transfer.
3. Select the Profile where the assets will be *transferred from* (the source).
4. Choose a saved address or fiat account where the asset will be *transferred to* (the destination). Optional: [Create a new network address](/guides/dashboard/addresses#new-address) or [add a fiat account](/guides/dashboard/fiat).
5. Enter the **Amount** to transfer. Optional: Add a note for the transfer.
Go to [Transactions > Asset Movements](https://dashboard.paxos.com/dashboard/transactions/asset-movements) to monitor activity.
## Transfer to a Different Profile Within the Same Entity
Ensure the destination [Profile](/guides/dashboard/organization#profile) already exists before beginning the transfer.
1. Select **To a different Paxos Profile**.
2. Choose the **Asset**.
3. Select the Profile where the assets will be *transferred from* (the source).
4. Choose the Profile where the assets will be *transferred to* (the destination).
5. Enter the **Amount** to transfer. Optional: Add a note for the transfer.
Go to [Transactions > Asset Movements](https://dashboard.paxos.com/dashboard/transactions/asset-movements) to monitor activity.
## Transfer to a Different Paxos Entity
Move assets between two Entities belonging to the same Organization or to a different Organization on the Paxos platform.
> Transferring USD between Entities is prohibited in some jurisdictions.
> Contact [Support](https://support.paxos.com) if you run into any problems with this restriction.
Ensure the destination [Profile](/guides/dashboard/organization#profile) already exists before beginning the transfer.
This may require contacting someone outside your Organization to get the destination Profile ID.
1. Select **To a different Paxos Entity**.
2. Choose the **Asset**.
> If an asset is not listed, it is not available for transfer.
1. Select the Profile where the assets will be *transferred from* (the source).
2. Enter the Profile ID where the assets will be *transferred to* (the destination).
3. Enter the **Amount** to transfer. Optional: Add a note for the transfer.
Go to [Transactions > Asset Movements](https://dashboard.paxos.com/dashboard/transactions/asset-movements) to monitor activity.
> When contacting [Support](https://support.paxos.com) about a transfer, include the unique **Transfer ID** and **Group ID** in your message to help our agents find the correct transaction.
# Travel Rule Compliance
Source: https://docs.sandbox.paxos.com/guides/dashboard/travel-rule
Learn more about Travel Rule requirements and the blockchain.
The Paxos platform supports [Travel Rule](https://notabene.id/crypto-travel-rule-101/what-is-the-crypto-travel-rule) as part of our Crypto Transfers product to ensure compliance with our regulators in certain geographies.
The Crypto Travel Rule requires virtual asset service providers (VASPs) like banks, exchanges, custodial solutions, and financial services providers to identify and share details of the origin and destination of crypto transactions above a specific threshold, similar to how these details are shared between banks when making fiat wire transfers.
[Entities](/guides/dashboard/organization#entity) onboarded to certain geographies must adhere to Travel Rule checks when depositing and withdrawing crypto to and from the Paxos platform.
> Reach out to [Support](https://support.paxos.com) with questions or problems.
## Crypto Deposit Travel Rule Requirements
Incoming deposits from a new or unrecognized crypto address might need to be [explicitly resolved](/guides/dashboard/transactions).
* For deposits from individuals, the sender's first and last name must be provided.
* For deposits from institutions, the institution name must be provided.
Deposits that we do not already have this information for will be held in a Pending state until it is provided.
Once provided, we will credit the funds to your account.
## Crypto Withdrawal Travel Rule Requirements
Crypto withdrawals can only be made to [saved addresses](/guides/dashboard/addresses) that include beneficiary details.
* Beneficiary Type
* Indicate whether the address belongs to an Individual or an Institution
* Beneficiary Name
* Provide the name of the beneficiary who will be receiving the funds
* Address Type (Private / Non-Custodial or Exchange Hosted / Custodial)
* A Private wallet address is one which you control the keys / seed phrase (e.g. Metamask)
* A Custodial wallet address is one where a centralized wallet provider manages the keys for you (e.g. a wallet on a trading platform like Robinhood)
* Note: if the provider you are looking for is not listed, unfortunately it's not supported yet. Please select 'Other' and reach out to our [Support](https://support.paxos.com) team to let us know who you would like to see.
For customers onboarded to Paxos Global (PTE), to transfer crypto off the Paxos platform, the recipient address must be hosted by one of the hosting providers displayed in the drop-down. If the provider you are looking for is not listed, it is not supported yet. Please select "Other" as the option and reach out to our Support team to inform us of the provider you were looking for.
### Failed Withdrawals due to Travel Rule
If a transaction has a status of Failed, and it is due to Travel Rule, you will see this indicated in the Transfer Details panel, which can be accessed by clicking **View** in the [transactions](/guides/dashboard/transactions) list.
# Create Developer Account
Source: https://docs.sandbox.paxos.com/guides/developer/account
Sign Up for access to the Sandbox environment.
To create an account you will need an email address, the business name and country of incorporation, as well as a way to create a [passkey](https://www.passkeys.com/what-are-passkeys) using a [compatible device](https://www.passkeys.io/compatible-devices).
> Sandbox developer accounts are usually approved in less than one business day and take under an hour to create and onboard.
## ➊ Sign Up in Sandbox
Before you begin, ensure you are able to create and store a [passkey](https://www.passkeys.com/what-are-passkeys) on your device.
All modern [operating systems and browsers](https://www.passkeys.io/compatible-devices) support passkeys.
**Questions about passkeys?**
Start by contacting your IT organization. Your company may already have policies for using passkeys and can provide support when creating and using a passkey.
Paxos recommends saving and using passkeys with:
* [iCloud Keychain](https://support.apple.com/guide/passwords/passkeys-mchl4af65d1a/mac)
* [Windows Hello](https://support.microsoft.com/en-us/account-billing/signing-in-with-a-passkey-09a49a86-ca47-406c-8acc-ed0e3c852c6d#)
* [Google Account](https://support.google.com/chrome/answer/13168025)
* [1Password](https://support.1password.com/save-use-passkeys/)
* [Proton Pass](https://proton.me/support/pass-use-passkeys)
* Other third-party password managers that enable passkey synchronization across devices
Learn more about [using passkeys on the Paxos platform](/guides/dashboard/passkeys) or [try the passkey demo](https://passkey.org/) on [https://passkey.org](https://passkey.org).
1. Go to [https://dashboard.sandbox.paxos.com](https://dashboard.sandbox.paxos.com), select **Sign Up** and provide a name and email address to create an *Institutional (Business) account*. Individual account holders are not eligible for API access via the Dashboard.
2. Retrieve the verification code from the welcome email from Paxos and enter the code in the browser. If you don't get an email within a few minutes, check email filters and Spam/Junk folders for an email from `@paxos.com`. Contact [Support](https://support.paxos.com) if the email never arrives.
3. Create a passkey.
4. Provide basic business information. The **Country of Incorporation** and **What do you plan to use your account for?** fields determine which assets you will have access to.
## ➋ Onboard Developer Account
You have a choice:
1. **skip onboarding** which takes you directly to an approved account, or
2. experience the entire onboarding process, which you'd have to undergo in production
### Skip Onboarding
If you choose to **skip onboarding** then click the "Bypass Onboarding" button which appears on the overall progress page next to the "Get Started" button.
Then proceed to the ➍ **Enable Developer Access** instructions on this page.
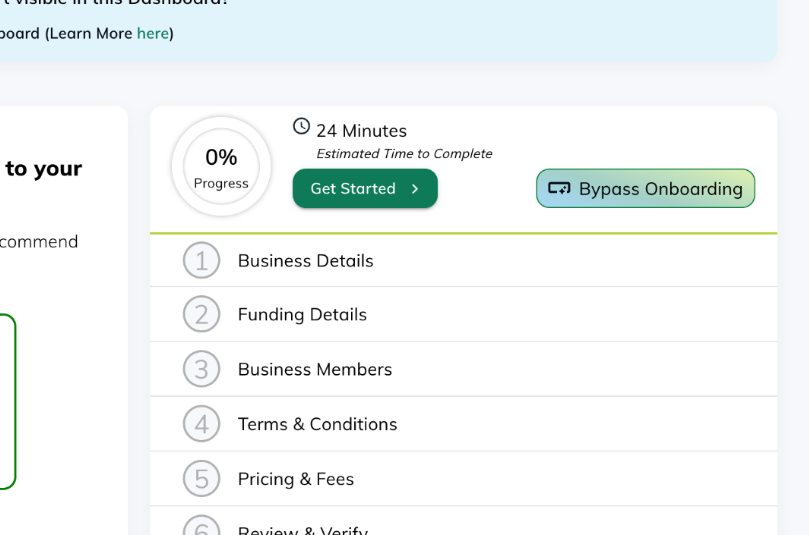
### Experience the Onboarding Process
Otherwise, click the "Get Started" button and complete the first six onboarding steps.
Use stubbed (fake) text when entering data.
The information provided will not be used when creating the production account.
1. **Business Details**. Selecting **Corporation** as the institution type provides the quickest experience. The country field is pre-populated with the information you provided when creating the account.
2. **Funding Details**. Select **No** for the trust structure and nominee shareholder options.
3. Some account types will require you to fill out the **Suitability Assessment**. If you are not presented with this option, go to the next step. If you see the assessment: Select **Yes** and **Advanced** for the first two options.
4. **Business Members**. Open the edit dialog for the name you gave during account creation and provide the required fields. You can use fake (dummy) text.
* **Beneficial Owner Designation**. Ensure **Yes** is selected. Give information. The **% of Ownership** should be `100`.
* For **Authorized User Designation**, **Persons with Management Control Designation** and **Director Designation**, select **Yes**.
5. Accept the **Terms & Conditions** and **Pricing & Fees** then complete **Review & Verify**.
Stop the onboarding process. Do not upload documents and go through ID verification.
## ➌ Contact Support
[Support](https://support.paxos.com) must activate your Developer account before you can use it.
To ensure a smooth process, include your email address and business (organization) name when [submitting a request](https://support.paxos.com/hc/en-us/requests/new).
You will receive an email from support confirming your Developer Sandbox account is good to go.
> Occasionally, [Support](https://support.paxos.com/hc/en-us) may reach out to you via email requesting additional information or if there is an issue creating the account.
## ➍ Enable Developer Access
Once the account is activated, you are assigned the [Entity Manager](/guides/dashboard/roles#entity-manager) role by default.
However, this role does not have write access to [Admin > API](https://dashboard.sandbox.paxos.com/admin/api), where credentials are configured.
You will need to add the [Developer](/guides/dashboard/roles#developer) role to your user.
1. Go to [**Admin > Team Management > Users**](https://dashboard.sandbox.paxos.com/admin/team-management/users).
2. Under the **Actions** column, open the **Edit Status** dropdown and select **Edit Roles**.
3. Click in the **Edit Roles** form and select **Developer**.
4. Log out and sign in to start a new session.
> Once your user has the **Developer** role, you can [create API credentials](/guides/developer/credentials).
# AI-Assisted Development
Source: https://docs.sandbox.paxos.com/guides/developer/ai-assisted-development
Use AI coding assistants effectively with Paxos documentation and API specifications.
export const PreviewButton = ({children, href}) => {
return
{children}
;
};
The Paxos documentation is optimized for AI-assisted development through comprehensive resources that provide contextually-aware help with your integration.
## Documentation Resources
### llms.txt File
The `llms.txt` file is an industry standard that helps AI tools index content more efficiently, similar to how a sitemap helps search engines. It provides a structured overview of all available documentation pages.
Open the llms.txt for this site
### Complete Documentation Compilation
The `llms-full.txt` file combines the entire documentation site into a single file as context for AI tools. You can paste a single URL as context for AI tools for more relevant and accurate responses.
Open the llms-full.txt for this site
## API Specification
Our OpenAPI specification provides detailed API endpoints, request/response schemas, and error messages to ensure accurate implementation. This is particularly valuable for understanding exact API requirements and handling error cases properly.
Open the REST API Specification
## Best Practices
When working with AI coding assistants:
1. **Reference the llms-full.txt** for comprehensive context about Paxos APIs and integration patterns
2. **Use the OpenAPI spec** for precise API implementation details
3. **Include specific error handling** based on documented error responses
4. **Follow authentication patterns** outlined in the developer guides
> Both documentation files are always up to date and require zero maintenance.
# Migrate from v1 to v2 API
Source: https://docs.sandbox.paxos.com/guides/developer/api-migrate
Learn how to migrate your REST integrations.
The Paxos v1 APIs have reached End of Life.
Access to all Paxos v1 APIs has been removed.
This change ensures all Paxos customers are using supported APIs.
Customers should migrate remaining usage from the v1 API as all functionality is now available in [Paxos v2 APIs](/api-reference).
We recommend you test your integrations in Sandbox before applying the changes to your integration in Production.
To help with the transition, this guide provides suggestions on implementing similar functionality using the Paxos REST API (v2).
If you have any questions, or run into any problems during the migration, contact [support@paxos.com](mailto:support@paxos.com) to set up a time to discuss your concerns.
## Get Started in Sandbox
We recommend you test your integration in the Sandbox environment prior to deploying the changes in production.
If not already done so, [sign up for a Sandbox account](https://dashboard.sandbox.paxos.com/).
Then [configure API credentials](/guides/developer/credentials).
| v1 API Endpoint | v2 API Endpoint |
| --------------------------------------------------------------------------------------------------------------------------------------- | ----------------------------------------------------------------------------------------------------------------------------------------------------------------------------------------------------------------- |
| GetActivities | [List Transfers](/api-reference/endpoints/transfers/list-transfers) |
| GetActivity | [Get Transfer](/api-reference/endpoints/transfers/get-transfer) |
| ListAutoConversions | [List Transfers](/api-reference/endpoints/transfers/list-transfers) |
| ListBankAccounts | [List Fiat Accounts](/api-reference/endpoints/fiat-transfers/list-fiat-accounts) |
| CreateBankAccount | [Create Fiat Account](/api-reference/endpoints/fiat-transfers/create-fiat-account) |
| GetBankAccount | [Get Fiat Account](/api-reference/endpoints/fiat-transfers/get-fiat-account) |
| ArchiveBankAccount | [Delete Fiat Account](/api-reference/endpoints/fiat-transfers/delete-fiat-account) |
| CreateCbitWithdrawal CBIT is no longer supported. [Use CUBIX](https://support.paxos.com/hc/en-us/articles/31700769434004) instead. | [Create Fiat Withdrawal](/api-reference/endpoints/fiat-transfers/create-fiat-withdrawal) |
| CreateCryptoWithdrawal | [Create Crypto Withdrawal](/api-reference/endpoints/crypto-withdrawals/create-crypto-withdrawal) |
| ListProfiles | [List Profiles](/api-reference/endpoints/profiles/list-profiles) |
| GetProfile | [Get Profile](/api-reference/endpoints/profiles/get-profile) |
| GetProfileBalances | [List Profile Balances](/api-reference/endpoints/profiles/list-profile-balances) |
| GetProfileDepositInstructions | [Create Deposit Address](/api-reference/endpoints/deposit-addresses/create-deposit-address) and [Create Fiat Deposit Instructions](/api-reference/endpoints/fiat-transfers/create-fiat-deposit-instructions) |
| CreateProfileTransfer | [Create Internal Transfer](/api-reference/endpoints/internal-transfers/create-internal-transfer) |
| CreateWireWithdrawal | [Create Fiat Withdrawal](/api-reference/endpoints/fiat-transfers/create-fiat-withdrawal) |
| GetCustStatus | [Get Identity](/api-reference/endpoints/identity/get-identity) |
| CreatePeerTransfer | [Create Paxos Transfer](/api-reference/endpoints/paxos-transfers/create-paxos-transfer) |
If you have any questions, or run into any problems during the migration, contact [support@paxos.com](mailto:support@paxos.com) to set up a time to discuss your concerns.
## Removed Endpoints
The following APIs have been removed as there is no current v2 use case for them.
* ArchiveProfile
* GetCryptoAddress
* CreateCryptoAddress
* CreateSenWithdrawal
* CreateSignetWithdrawal
* CreateIntrabankWithdrawal
* GetBankAccountAutoConversionInstructions
* GetCryptoAddressAutoConversionInstructions
* UpdateCryptoDeposit
* RejectCryptoDeposit
# Authenticate
Source: https://docs.sandbox.paxos.com/guides/developer/authenticate
Generate an authentication token.
The APIs use industry standard OAuth2 for authentication.
Most users find success with one of the libraries on the [OAuth2 website](https://oauth.net/code).
The following URLs can be used when using an off-the-shelf OAuth2 library:
| Environment | Root URL | Full Path |
| ----------- | ------------------------------------------------------------------ | -------------------------------------------------------------------------------------------- |
| Sandbox | [https://oauth.sandbox.paxos.com](https://oauth.sandbox.paxos.com) | [https://oauth.sandbox.paxos.com/oauth2/token](https://oauth.sandbox.paxos.com/oauth2/token) |
| Production | [https://oauth.paxos.com](https://oauth.paxos.com) | [https://oauth.paxos.com/oauth2/token](https://oauth.paxos.com/oauth2/token) |
## ➊ Add Scopes (Client Permissions)
When authenticating, include the scopes (**Client Permissions**) necessary for the client to complete the intended actions.
> Scopes for each endpoint are listed in the **Authorizations** section in the [API Reference docs](/api-reference).
> The [Market Data](/api-reference/endpoints/market-data) and most [Pricing](/api-reference/endpoints/pricing) endpoints do not require authorization.
For example, the following scopes (space delimited) should provide sufficient permissions to [mint](/guides/developer/mint), [redeem](/guides/developer/redeem), and [convert](/guides/developer/convert) Paxos-isssued stablecoins:
```shell
conversion:read_conversion_stablecoin
conversion:write_conversion_stablecoin
funding:read_profile
funding:write_profile
transfer:read_deposit_address
transfer:read_transfer
transfer:read_fiat_account
transfer:read_fiat_deposit_instructions
transfer:write_internal_transfer
transfer:write_crypto_withdrawal
transfer:write_deposit_address
transfer:write_fiat_account
transfer:write_fiat_deposit_instructions
transfer:write_fiat_withdrawal
```
## ➋ Get Access Token
Every endpoint that requires a **Scope** must be accompanied by an "Authorization"` header
with a value that follows the \"Bearer {access_token}"` schema.
### Sandbox
To authenticate with [https://oauth.sandbox.paxos.com/oauth2/token](https://oauth.sandbox.paxos.com/oauth2/token), use your [credentials](/guides/developer/credentials) to create a bearer token.
The authentication request must include `{client_id}` (**Client ID**) and `{client_secret}` (**Client Secret**) configured for your [API credentials](/guides/developer/credentials).
Include sufficient `{client_scopes}` (**Client Permissions**).
```shell highlight={5}
curl --location 'https://oauth.sandbox.paxos.com/oauth2/token' \
--form grant_type=client_credentials \
--form client_id={client_id} \
--form client_secret={client_secret} \
--form scope='{client_scopes}'
```
### Production
To authenticate with [https://oauth.paxos.com/oauth2/token](https://oauth.paxos.com/oauth2/token), use your [credentials](/guides/developer/credentials) to create a bearer token.
The authentication request must include the `{client_id}` (**Client ID**) and `{client_secret}` (**Client Secret**) configured for your [API credentials](/guides/developer/credentials).
Include sufficient `{client_scopes}` (**Client Permissions**).
```shell highlight={5}
curl --location 'https://oauth.paxos.com/oauth2/token' \
--form grant_type=client_credentials \
--form client_id={client_id} \
--form client_secret={client_secret} \
--form scope='{client_scopes}'
```
Confirm the response includes the requisite scopes and save the `access_token` to use in the request authorization header (`-H "Authorization: Bearer {access_token}"`).
```json highlight={2,4}
{
"access_token": "{access_token}",
"expires_in": 3599, // Seconds (59 Minutes and 59 Seconds)
"scope": "{client_scopes}",
"token_type": "bearer"
}
```
Once you have the `access_token`, [make an API call in Sandbox](/guides/developer/request).
# Assets and Blockchains
Source: https://docs.sandbox.paxos.com/guides/developer/blockchains
Learn more about supported assets, stablecoins and blockchains.
The assets and crypto networks listed on this page are fully supported on the Paxos Platform.
These assets are supported in the context of three main use cases:
* Deposit and withdraw USD via Fedwire, SWIFT and CUBIX. Get started with [fiat transfers](/guides/developer/fiat-transfers).
* Use stablecoins for [deposits](/api-reference/endpoints/deposit-addresses), [withdrawals](/api-reference/endpoints/crypto-withdrawals) and [transfers](/api-reference/endpoints/transfers). Learn more about stablecoin [conversions](/guides/developer/convert) and [payments](/guides/payments).
* The crypto trading assets are primarily available for [Crypto Brokerage](https://paxos.com/crypto-brokerage/) partners to buy, sell deposit and withdraw via APIs, in addition to holding the assets on the Paxos platform. Trading pairs that incorporate USD are also available in [USDP](/guides/stablecoin/usdp) and [PYUSD](/guides/stablecoin/pyusd). Read the [orders reference docs](/api-reference/endpoints/orders) and the [HRQ guide](/guides/crypto-brokerage/quotes/index).
## Stablecoins
| Stablecoin | Arbitrum One | Ethereum | Polygon PoS | Solana |
| ----------------------------------------------------------------------------------- | :----------: | :------: | :---------: | :----: |
| Binance USD ([BUSD](/guides/stablecoin/busd))[\*](#busd-restrictions) | -- | ✅ | -- | -- |
| Global Dollar ([USDG](/guides/stablecoin/usdg)) | -- | ✅ | -- | ✅ |
| Lift Dollar ([USDL](https://docs.liftdollar.com/index.html))[†](#usdl-restrictions) | ✅ | ✅ | -- | -- |
| Pax Dollar ([USDP](/guides/stablecoin/usdp)) | -- | ✅ | -- | ✅ |
| PayPal USD ([PYUSD](/guides/stablecoin/pyusd)) | -- | ✅ | -- | ✅ |
| USD Coin (USDC) | -- | ✅ | ✅ | ✅ |
\* [BUSD](/guides/stablecoin/busd) withdrawals are no longer available on the Paxos Platform. [BUSD](/guides/stablecoin/busd) (ERC-20) deposits are supported to redeem for USD or convert to [USDP](/guides/stablecoin/usdp). **Do not deposit BUSD via Binance Smart Chain (BSC)**.
† [USDL](https://docs.liftdollar.com/index.html) is not available to residents of the US and certain other countries. [Learn more](https://liftdollar.com/terms-and-conditions/).
## Trading and Custody
| Digital Asset | Bitcoin | Bitcoin Cash | Ethereum | Litecoin | Solana |
| --------------------------------------------- | :-----: | :----------: | :------: | :------: | :----: |
| Aave (AAVE) | -- | -- | ✅ | -- | -- |
| Bitcoin (BTC)[‡](#btc) | ✅ | -- | -- | -- | -- |
| Bitcoin Cash (BCH) | -- | ✅ | -- | -- | -- |
| Chainlink (LINK) | -- | -- | ✅ | -- | -- |
| Ethereum (ETH) | -- | -- | ✅ | -- | -- |
| Litecoin (LTC) | -- | -- | -- | ✅ | -- |
| Pax Gold ([PAXG](https://paxos.com/paxgold/)) | -- | -- | ✅ | -- | -- |
| Polygon (MATIC)[§](#matic) | -- | -- | ✅ | -- | -- |
| Solana (SOL)[¶](#sol) | -- | -- | -- | -- | ✅ |
| Uniswap (UNI) | -- | -- | ✅ | -- | -- |
‡ Supported wallet types for BTC withdrawals: P2WPKH, P2WSH, P2PKH, P2SH, and P2TR (Taproot).
§ Trading or custody of MATIC is not available to residents of the US.
Effective September 17, 2024, users can no longer buy MATIC.
Users should exit their MATIC positions or transfer MATIC off-platform.
As of October 3, 2024, users can only transfer MATIC off-platform.
Contact [support@paxos.com](mailto:support@paxos.com) with questions or issues.
¶ Trading or custody of SOL is not available to residents of the US.
## Blockchain Transactions
Digital assets may be deposited and withdrawn to and from your Paxos account 24/7.
Deposits are credited to your account once the requisite blockchain confirmations are complete.
Withdrawals to new addresses may be subject to additional compliance review if the automated checks fail.
Withdrawals may take longer on US and Singapore national holidays.
### Required Confirmations
Paxos considers a blockchain transaction (deposit or withdraw) complete once the required number of blockchain confirmations have been completed.
| Crypto Network | Confirmations | Approximate Processing Time |
| -------------- | ------------- | --------------------------- |
| Arbitrum One | 40 | 2 minutes |
| Bitcoin | 3 | 30 minutes |
| Bitcoin Cash | 15 | 150 minutes |
| Ethereum | 12 | 3 minutes |
| Litecoin | 12 | 30 minutes |
| Polygon PoS | 256 | 9 minutes |
| Solana | 32 slots | 16 seconds |
# API Breaking Change Policy
Source: https://docs.sandbox.paxos.com/guides/developer/breaking-change/policy
Learn about what qualifies as a breaking change and the what happens when one is necessary.
The policy below applies only to Partners with a fully executed and active SLA.
Paxos will make commercially reasonable efforts to notify users without a service agreement of breaking changes.
See the [Changelog](/changelog) for current breaking changes.
## Definitions
**"Core Platform Services”** means the services provided by Paxos that enable End Users to (i) onboard onto the Paxos platform (if applicable given the integration utilized by the Customer) and (ii) submit and execute Orders to buy and sell certain Cryptocurrency Assets from or to other individuals via the Exchange Platform or Paxos' liquidity providers using U.S. dollars or other Cryptocurrency Assets, and (iii) transfer Cryptocurrency Assets to and from the Exchange Platform.
The Core Platform Services include (a) market and order data streams provided via websockets, (b) the Paxos FIX Service (if applicable given the API integration utilized by the Customer), (c) Reconciliation Reports and (d) the following v2 REST API services: Profiles, Markets, Orders, Quotes, Quote Executions, Pricing, Identity, Transfers and Accounts.
For the avoidance of doubt, any service designated as a "Preview, “Beta” or “Alpha” in Paxos's API documentation is not included as part of the Core Platform Services.
**“Exchange Platform”** means Paxos' cryptocurrency exchange platform and services whereby individuals can buy or sell certain Cryptocurrency Assets from or to other individuals or liquidity providers using U.S. dollars or other Cryptocurrency Assets.
**“Paxos FIX Service”** means the Paxos service that allows Customer to send messages to and receive messages from the Exchange Platform using the FIX protocol.
## Breaking Changes
In the normal course of business, Paxos may need to make changes that will require Customer to adjust its integration with Paxos (**“Breaking Changes”**). When Paxos makes a Breaking Change to the Core Platform Services, Exchange Platform, or FIX Service, Paxos will ensure the previous functionality remains available to Customer for at least ninety (90) days to provide Customer time to make necessary changes.
When Paxos makes a Breaking Change to Reconciliation Reports, Paxos will either allow Customer to immediately opt-in to the new version, or provide Customer with both the new and old version of the Reconciliation Reports for at least ninety (90) days (the **“Change Policy”**).
## Breaking Change Notifications
When Paxos makes a Breaking Change to the Core Platform Services or FIX Service, Paxos will issue a Breaking Change notification.
Such notification will be sent at least ninety (90) days ahead of the change to all registered Customer Service Contacts via email and include **“Breaking Change Notification”** in the subject.
## Types of Breaking Changes
For reference, the following changes qualify as examples of Breaking Changes:
* Removing or renaming an API service.
* Removal of a field or enumerated value from an API response.
* Removing or renaming a column in the Reconciliation Reports.
* Change of a request field or parameter from non-mandatory to mandatory.
* Change of a field or parameter name.
* Addition of new validation rules to a field, resulting in previously accepted requests being rejected.
* Modification of the data type of a field (for example, converting a single object to a list of objects).
This list is non-exhaustive and Paxos may identify additional Breaking Changes in its discretion.
## Backwards Compatible Changes
Backwards compatible changes are any changes that (i) are not explicitly identified by Paxos as Breaking Changes, (ii) do not materially reduce any functionality with respect to the Core Platform Services and (iii) do not materially change the schema or query parameters with respect to the Core Platform Services (collectively, **“Backwards Compatible Changes”**).
All users of Paxos APIs should expect and manage identified Backwards Compatible Changes without error.
For reference, the following changes are considered Backwards Compatible Changes:
* Addition of a new API service.
* Addition of a method to an API service.
* Addition of a new non-mandatory field, parameter, or header to an API request or response.
* Changing the length or format of a field identified as a string in the API reference documentation.
* Addition of new enumerated values, including but not limited to status codes or error codes.
* Changes to error messages.
* Addition of a new report to the Reconciliation Reports.
* Addition of a new column to the Reconciliation Reports.
* Modification of the order of columns to the Reconciliation Reports.
* Deprecation of a field in a request or response without removing it.
* Change in order of fields in an object, or objects in an array.
* Addition of a new FIX tag.
This list is non-exhaustive and Paxos may identify additional Backwards Compatible Changes in its discretion.
## End of Life
If Paxos decides to entirely remove or no longer support a Core Platform Service, Paxos will provide Customer Service Contacts with an **“End of Life”** notification at least ninety (90) days in advance of the change.
## Exceptions
This policy only applies to services listed as Core Platform Services.
Paxos will use commercially reasonable efforts to provide advance notice of changes to other services over email to all Customer Service Contacts.
## Required Changes
Paxos may make breaking changes without notice in order to fix material defects or to comply with legal obligations.
In addition, Paxos may throttle requests or disable access to any or all components of the Core Platform Services if Paxos determines that a Customer's usage of the service poses a risk to the stability of the platform.
In the case where Paxos manually throttles requests or disables access, Paxos will immediately notify all registered Customer Service Contacts within forty-five (45) minutes of taking such action.
# Convert
Source: https://docs.sandbox.paxos.com/guides/developer/convert
Implement guaranteed 1:1 conversions between USD and Paxos-issued stablecoins.
Next, use the [Stablecoin Conversion API](/api-reference/endpoints/stablecoin-conversion/create-stablecoin-conversion) to easily convert USD to any [supported asset](/guides/developer/convert#assets), and vice verse, without any fees.
Keep track of all your conversions with [List Stablecoin Conversions](/api-reference/endpoints/stablecoin-conversion/list-stablecoin-conversions) or [lookup a single conversion](/api-reference/endpoints/stablecoin-conversion/get-stablecoin-conversion).
> If you've already authenticated and have USD and USDG balances in a Profile, skip ahead to the [request a conversion](#request-conversion) step.
## ➊ Authenticate
Include the following scopes when [authenticating](/guides/developer/authenticate):
```shell
conversion:read_conversion_stablecoin conversion:write_conversion_stablecoin funding:read_profile
```
> If you don't see all the scopes when [creating or editing API credentials](/guides/developer/credentials), contact [Support](https://support.paxos.com).
## ➋ Deposit USD and USDG
Use [Create Sandbox Deposit](/api-reference/endpoints/sandbox-deposits/create-sandbox-deposit) to add USD to the Profile (`profile_id`) you want the conversion to be associated with. See the [First API Request](/guides/developer/request) guide for help retrieving Profile IDs.
This guide also includes examples for the USDG → USD conversion, so if you are following along make sure you add some USDG to the Profile.
You can also use the [Fiat Transfers funding flow](/guides/developer/fiat-transfers/quickstart#funding) if you've already set up a Fiat Account.
### USD
```shell highlight={2}
curl --request POST \
--location 'https://api.sandbox.paxos.com/v2/sandbox/profiles/0d3172c5-8840-4bae-bdd4-30688f0268fc/deposit' \
--header 'Authorization: Bearer {access_token}' \
--data '{
"asset": "USD",
"amount": "1000"
}'
```
### USDG
```shell
curl --location 'https://api.sandbox.paxos.com/v2/sandbox/profiles/0d3172c5-8840-4bae-bdd4-30688f0268fc/deposit' \
--header 'Content-Type: application/json' \
--header 'Accept: application/json' \
--header 'Authorization: Bearer {access_token}' \
--data '{
"asset": "USDG",
"amount": "100",
"crypto_network": "ETHEREUM"
}'
```
## ➌ Request Conversion
Request a conversion using [Create Stablecoin Conversion](/api-reference/endpoints/stablecoin-conversion/create-stablecoin-conversion).
Include the following body parameters in your request to convert the `source_asset` of \$100 USD into the `target_asset`.
For [Third-party integrations](/guides/crypto-brokerage/ledger-type#fiat-and-crypto-subledger), you must also specify `identity_id` and `account_id`.
### USDG → USD
```shell
curl --location 'https://api.sandbox.paxos.com/v2/conversion/stablecoins' \
--header 'Content-Type: application/json' \
--header 'Authorization: Bearer {access_token}' \
--data '{
"ref_id": "sc_usdg_a284608c-4cf0-4605-ae0a-5c1f7ff109d3",
"profile_id": "0d3172c5-8840-4bae-bdd4-30688f0268fc",
"amount": "100",
"source_asset": "USDG",
"target_asset": "USD",
}'
```
The acknowledgement response includes the `id`, which can be used to lookup the transaction, and the status will always be `CREATED`.
The `source_asset` is immediately debited from the associated `profile_id` balance.
The `target_asset` will not be credited until the [conversion status](/guides/developer/convert#statuses) is "status": "SETTLED"\`.
```json
{
"id": "ea284608c-4cf0-4605-ae0a-5c1f7ff109d3",
"profile_id": "0d3172c5-8840-4bae-bdd4-30688f0268fc",
"amount": "100",
"source_asset": "USDG",
"target_asset": "USD",
"status": "CREATED",
"ref_id": "sc_usdg_a284608c-4cf0-4605-ae0a-5c1f7ff109d3",
...
}
```
### USD → PYUSD
```shell
curl --location 'https://api.sandbox.paxos.com/v2/conversion/stablecoins' \
--header 'Content-Type: application/json' \
--header 'Authorization: Bearer {access_token}' \
--data '{
"ref_id": "sc_pyusd_8f91a9c5-0a6e-46dc-ad68-17bc8fb4eafb",
"profile_id": "0d3172c5-8840-4bae-bdd4-30688f0268fc",
"amount": "100",
"source_asset": "USD",
"target_asset": "PYUSD",
}'
```
The acknowledgement response includes the `id`, which can be used to lookup the transaction, and the status will always be `CREATED`.
The `source_asset` is immediately debited from the associated `profile_id` balance.
The `target_asset` will not be credited until the [conversion status](/guides/developer/convert#statuses) is "status": "SETTLED"\`.
```json
{
"id": "f190b163-208f-4d73-8deb-4fb8b24add00",
"profile_id": "0d3172c5-8840-4bae-bdd4-30688f0268fc",
"amount": "100",
"source_asset": "USD",
"target_asset": "PYUSD",
"status": "CREATED",
"ref_id": "sc_pyusd_8f91a9c5-0a6e-46dc-ad68-17bc8fb4eafb",
...
}
```
## ➍ Confirm the Conversion
Use [List Stablecoin Conversions](/api-reference/endpoints/stablecoin-conversion/list-stablecoin-conversions) to check the conversion status.
The request requires the `profile_id` query parameter.
```shell
curl --location 'https://api.sandbox.paxos.com/v2/conversion/stablecoins?profile_id=0d3172c5-8840-4bae-bdd4-30688f0268fc&order=DESC' \
--header 'Accept: application/json' \
--header 'Authorization: Bearer {access_token}'
```
The returned array includes the `settled_at` parameter and the status is `SETTLED` for all conversions executed for the given Profile.
```json
{
"items": [
{
"id": "08f67bca-fb30-4006-8ed2-d46750dd1293",
"profile_id": "0d3172c5-8840-4bae-bdd4-30688f0268fc",
"amount": "100",
"source_asset": "USDG",
"target_asset": "USD",
"status": "SETTLED",
...
"settled_at": "2024-09-25T15:07:56.076853Z"
},
{
"id": "9f458a60-8b9b-4b3c-b5a4-ee57bc795086",
"profile_id": "0d3172c5-8840-4bae-bdd4-30688f0268fc",
"amount": "100",
"source_asset": "USD",
"target_asset": "PYUSD",
"status": "SETTLED",
...
"settled_at": "2024-09-25T15:07:21.548903Z"
},
]
}
```
## Stablecoin Conversion Asset Precision
You can convert USD to any supported asset and vice versa.
However, you cannot convert one stablecoin to another.
All conversions use the lowest maximum precision among the asset pairs.
| Supported Asset | Maximum Decimal Precision | Example Conversion Precision |
| --------------------------------- | ------------------------- | ---------------------------- |
| USD | 0.01 (1e-2) | USD → USDG = 0.01 (1e-2) |
| [PYUSD](/guides/stablecoin/pyusd) | 0.000001 (1e-6) | PYUSD → USD = 0.01 (1e-2) |
| [USDG](/guides/stablecoin/usdg) | 0.00000001 (1e-8) | USDG → USD = 0.01 (1e-2) |
| [USDP](/guides/stablecoin/usdp) | 0.00000001 (1e-8) | USDP → USD = 0.01 (1e-2) |
## Stablecoin Conversion Statuses
There are three conversion statuses:
* `CREATED`: The conversion has been submitted successfully but has not yet settled.
* `SETTLED`: The conversion has been completed.
* `CANCELLED`: The conversion was stopped [using the cancel endpoint](/api-reference/endpoints/stablecoin-conversion/cancel-stablecoin-conversion) for the pending conversion.
When a conversion is in `CREATED` status, the `source_asset` (for example, fiat for acquiring stablecoin) will be debited from the `profile_id` balance.
The `target_asset` (for example, USDG for acquiring stablecoin) will not be credited until the order has `SETTLED`.
Best Practice
* Build a pending conversion settlement workflow for edge cases where the conversion does not settle immediately. This is especially important for subledgered customers, where the user will be unable to sell or transfer the assets until the conversion has settled and the asset has been credited to their Profile.
* Log the transaction details from each conversion in a database.
* Cache Profile balances. Balances should be updated once there has been a change to the Profile balance (for example, after a conversion) and then perform a reconciliation to confirm the updated balance matches the client's internal calculation.
* Create a polling workflow to query the results in ascending order. Keep track of the `created_at` timestamp of the most recent conversion in the paged results.
# Configure API Credentials
Source: https://docs.sandbox.paxos.com/guides/developer/credentials
API credentials using Client ID and Secret. Set allowed scopes to access specific API endpoints.
Most API endpoints require authentication with a **Client ID** and **Secret**. Each **Client ID** has a specific set of allowed scopes (**Permissions**) to access API endpoints. Scopes allowed on an API client may be updated at any time in the Dashboard **Admin > API Management** section.
Contact your [Entity Manager](guides/dashboard/roles#entity-manager) if you need permissions to manage API credentials.
When setting scopes, Paxos recommends following the [principle of least privilege](https://en.wikipedia.org/wiki/Principle_of_least_privilege) and only allow scopes required by a specific application. Scopes for each endpoint are listed in the **Authorizations** section in the [API Reference docs](/api-reference/introduction). The [Market Data](/api-reference/endpoints/market-data) and most [Pricing](/api-reference/endpoints/pricing) endpoints do not require authorization.
1. Go to **Admin > API Management** to add new credentials.
The Developer Sandbox is completely segregated from production, so credential configuration must take place in both environments.
* **Developer Sandbox**: [https://dashboard.sandbox.paxos.com/admin/api](https://dashboard.sandbox.paxos.com/admin/api)
* **Production**: [https://dashboard.paxos.com/admin/api](https://dashboard.paxos.com/admin/api)
1. Create a **Label** for your API credentials and select the **Scopes** for your **Client ID**. For example, the following scopes (space delimited) should be adequate to [mint](/guides/developer/mint), [redeem](/guides/developer/redeem) and [convert](/guides/developer/convert) Paxos-issued stablecoins:
```shell
conversion:read_conversion_stablecoin
conversion:write_conversion_stablecoin
funding:read_profile
funding:write_profile
transfer:read_deposit_address
transfer:read_transfer
transfer:read_fiat_account
transfer:read_fiat_deposit_instructions
transfer:write_internal_transfer
transfer:write_crypto_withdrawal
transfer:write_deposit_address
transfer:write_fiat_account
transfer:write_fiat_deposit_instructions
transfer:write_fiat_withdrawal
```
2. Save the credentials.
3. Copy the **Client ID** and **Client Secret** and store them in a safe place. The secret will not be displayed in the UI again and will have to be reset if forgotten.
Once you have the **Client ID** and **Client Secret**, you can [authenticate in Sandbox](/guides/developer/authenticate).
# Paxos API FAQ
Source: https://docs.sandbox.paxos.com/guides/developer/faq
Get answers to commonly asked questions.
## Stablecoin Conversions
The [stablecoin conversion guide](/guides/developer/convert) takes you through the simple process. Reach out to [Support](https://support.paxos.com) if you need assistance.
None. Conversions between the [supported asset pairs](/guides/developer/convert#assets) incure no fees.
By default, there is a \$500,000 USD transaction limit per conversion.
Contact [Support](https://support.paxos.com) for additional details.
Dust is a small amount of an asset leftover from a transaction.
Dust can accumulate when converting [assets with different precisions](/guides/developer/convert#assets).
Most conversions execute near instantaneously; however, under rare conditions a settlement delay may occur.
You can use the [Cancel Stablecoin Conversion](/api-reference/endpoints/stablecoin-conversion/cancel-stablecoin-conversion) endpoint to cancel a pending conversion.
# Fiat Transfers FAQ
Source: https://docs.sandbox.paxos.com/guides/developer/fiat-transfers/fiat-transfers-faq
Get answers to common questions about the Fiat Transfers API.
## What can I do with the Fiat Transfers API?
* Paxos can accept wires from or send wires to a bank account, even if the bank account owner is not the same as the individual or institution onboarded with Paxos. This means Paxos allows wire transfers involving third-party bank accounts, subject to applicable compliance and regulatory checks.
* Fund your Paxos corporate account or withdraw your funds to an external bank account.
* Enable your users to directly fund their account or withdraw their funds to an external bank account.
## How do I get the Identity ID required in requests?
* Paxos will send you the Identity ID for your corporate account.
* For user-based funding, Integrate the [Identity API](/api-reference/endpoints/identity) and use the corresponding endpoints.
## How do I input the routing number (ABA) for US wires (Fedwire)?
Use `routing_number_type` = `ABA`. For US domestic wires, set `fiat_network` = `WIRE` and `routing_number_type` = `ABA`.
## How do I input the SWIFT/BIC code for SWIFT wires?
Use `routing_number_type` = `SWIFT`. For SWIFT wires, set `fiat_network` = `WIRE` and `routing_number_type` = `SWIFT`.
## Do I need JWS request signing?
It is recommended to have [JWS request signing](/guides/developer/request-signing) for fiat withdrawals.
JWS request signing uses a public-key cryptography with a client-controlled private key.
It adds an additional layer of security to withdrawals.
It can prevent malicious withdrawals even if the API key secret is compromised.
When used, all API calls with this key will require a JWS signature.
## How do I retrieve fiat account information?
Use [Get Fiat Account](/api-reference/endpoints/fiat-transfers/get-fiat-account) to get complete details of the fiat account.
[List Fiat Account](/api-reference/endpoints/fiat-transfers/list-fiat-accounts) excludes beneficiary name and address details and only includes the last four (4) digits of the account number.
## Are there fees associated with fiat transfers?
For withdrawals, fees are in addition to the requested amount.
For deposits, fees are deducted from the received amount.
See [Deposit & Withdrawal Fees](https://help.paxos.com/hc/en-us/articles/360042321231) for the current fee structure.
# Overview
Source: https://docs.sandbox.paxos.com/guides/developer/fiat-transfers/index
Move USD on and off the Paxos Platform via wire transfer or CUBIX.
To move USD onto the platform, first use [Create Fiat Deposit Instructions](/api-reference/endpoints/fiat-transfers/create-fiat-deposit-instructions) to retrieve the Paxos banking information and specify which [Profile](/api-reference/endpoints/profiles) balance to credit.
Then, use the returned banking information, found in `fiat_network_instructions` object, along with the `memo_id`, to transfer funds to Paxos.
To move USD off the Platform, first use [Create Fiat Account](/api-reference/endpoints/fiat-transfers/create-fiat-account) to let Paxos know where to transfer the funds.
Then, use the returned Fiat Account `id` with [Create Fiat Withdrawal](/api-reference/endpoints/fiat-transfers/create-fiat-withdrawal) to transfer funds to the external account.
* Use [Get Fiat Deposit Instructions](/api-reference/endpoints/fiat-transfers/get-fiat-deposit-instructions) to check the status of the instructions before initiating a deposit.
* Before initiating a withdrawal, use [Get Fiat Account](/api-reference/endpoints/fiat-transfers/get-fiat-account) to ensure the account status is `APPROVED`.
* When transferring funds, use [List Transfers](/api-reference/endpoints/transfers/list-transfers) and [Get Profile Balance](/api-reference/endpoints/profiles/get-profile-balance) to check on the transfer status and Profile balance changes.
## Fiat Deposits and Withdrawals
Paxos credits your USD wire deposit as soon as it is received by our bank.
Domestic wire withdrawals are processed via the FedWire system and may take 1-3 business days to settle. International wire withdrawals may take 1-5 days to reach the beneficiary bank.
Paxos can accept wires from or send wires to a bank account, even if the bank account owner is not the same as the individual or institution onboarded with Paxos.
This means Paxos allows wire transfers involving third-party bank accounts, subject to applicable compliance and regulatory checks.
CUBIX USD transfers are processed 24/7; however, longer processing time may occasionally be required.
CUBIX deposits are not subject to any limits.
* Deposits with missing or incorrect information will be returned.
* USD wire transfers are not processed on weekends and on US banking holidays. CUBIX transfers are processed 24/7.
# Fiat Transfers Quickstart
Source: https://docs.sandbox.paxos.com/guides/developer/fiat-transfers/quickstart
Set up fiat funding and withdraw flows in the Sandbox environment.
This guides walks you through the steps to [send fiat to the Paxos Platform](#funding) as well as [move money to an external bank account](#withdrawal) using the [Fiat Transfers](/api-reference/endpoints/fiat-transfers), [Transfers](/api-reference/endpoints/transfers) and [Profiles](/api-reference/endpoints/profiles) APIs.
Once completed, similar workflows can be implemented in Production.
If you already have a [Sandbox Account](https://dashboard.sandbox.paxos.com), this guide should take less than one hour to complete.
## Authenticate in Sandbox
Both the [funding](#funding) and [withdrawal](#withdrawal) flows require the same scopes, so for simplicity one authentication call should be all you need to complete both flows.
> When [creating API credentials](/guides/developer/credentials) via the Dashboard, the `transfer:write_sandbox_fiat_deposit` scope may not appear in the UI.
> Including the scope when [authenticating](/guides/developer/authenticate) may result in an `invalid_scope` error.
> Contact [Support](https://support.paxos.com) if you run into any issues using this scope.
Add the `transfer:read_fiat_account`, `transfer:write_fiat_account`, `transfer:read_fiat_deposit_instructions`, `transfer:write_fiat_deposit_instructions`, `transfer:write_fiat_withdrawal`, `transfer:write_sandbox_fiat_deposit`, `transfer:read_transfer` and `funding:read_profile` scopes to your [Sandbox Account](https://dashboard.sandbox.paxos.com)
under the [API Management](https://dashboard.sandbox.paxos.com/admin/api) setting and then authenticate in Sandbox using the scopes.
```shell highlight={5}
curl --location 'https://oauth.sandbox.paxos.com/oauth2/token' \
--form grant_type=client_credentials \
--form client_id={paxos_client_id} \
--form client_secret={paxos_secret} \
--form scope='transfer:read_fiat_account transfer:write_fiat_account transfer:read_fiat_deposit_instructions transfer:write_fiat_deposit_instructions transfer:write_fiat_withdrawal transfer:write_sandbox_fiat_deposit transfer:read_transfer funding:read_profile'
```
Confirm the response includes requisite scopes and save the `access_token` to use in the request authorization header
throughout this guide.
```json highlight={3-4}
{
"access_token": "{access_token}",
"expires_in": 3599, // Seconds (59 Minutes and 59 Seconds)
"scope": "transfer:read_fiat_account transfer:write_fiat_account transfer:read_fiat_deposit_instructions transfer:write_fiat_deposit_instructions transfer:write_fiat_withdrawal transfer:write_sandbox_fiat_deposit transfer:read_transfer funding:read_profile",
"token_type": "bearer"
}
```
You must include the Authorization header with your bearer token on all API requests `-H "Authorization: Bearer $TOKEN"`.
## Funding Flow
To move USD onto the platform, first use [Create Fiat Deposit Instructions](/api-reference/endpoints/fiat-transfers/create-fiat-deposit-instructions) to retrieve the Paxos banking information and specify which [Profile](/api-reference/endpoints/profiles) balance to credit.
Then, use the returned banking information, found in `fiat_network_instructions` object, along with the `memo_id`, to transfer funds to Paxos.
We'll be following the recommended fiat deposit workflow:
* [Authenticate in Sandbox](#authenticate).
* Get instructions from Paxos on how to deposit fiat using [Create Fiat Deposit Instructions](/api-reference/endpoints/fiat-transfers/create-fiat-deposit-instructions).
* Send a wire (SWIFT, Fedwire) or CUBIX transfer to Paxos, referencing the `memo_id` provided in the deposit instructions.
* Check the status of the deposit using [List Transfers](/api-reference/endpoints/transfers/list-transfers).
* View updated balances using [Get Profile Balance](/api-reference/endpoints/profiles/get-profile-balance).
### ➊ Create Fiat Deposit Instructions
Get instructions from Paxos on how to deposit fiat using [Create Fiat Deposit Instructions](/api-reference/endpoints/fiat-transfers/create-fiat-deposit-instructions).
* For wires, use `fiat_network` “WIRE”. Specify international (SWIFT) or US (Fedwire) by setting `routing_number_type`
to “ABA” (for Fedwire) or “SWIFT” (for SWIFT).
* For CUBIX, use `fiat_network` CUBIX. Do not use `routing_number_type`.
### Corporate Funding
Retrieve the `profile_id` and `identity_id` (optioinal) from your records. Use your omnibus `profile_id` and optionally your corporate `identity_id` created for you by Paxos.
Create deposit instructions for international wires. Include the following body parameters in the request:
```shell highlight={5,7}
curl --location 'https://api.sandbox.paxos.com/v2/transfer/fiat-deposit-instructions' \
--request 'POST' \
--header 'Authorization: Bearer {access_token}' \
--data '{
"profile_id": "5fc6d191-193c-4e28-94fa-656bbdbdfaad",
"fiat_network": "WIRE",
"identity_id": "8a398cb6-4e3b-4868-9cea-a1c567856e68", // Optional.
"ref_id": "idempotence_id",
"routing_number_type": "SWIFT",
"metadata": {
"my_id": "4024ee50-eefb-4f2e-85c7-e7899c0b7da5"
}
}'
```
Upon successful request, the acknowledgment response confirms your request has been received.
```json highlight={8}
{
"id": "f190b163-208f-4d73-8deb-4fb8b24add00",
"profile_id": "5fc6d191-193c-4e28-94fa-656bbdbdfaad",
"identity_id": "8a398cb6-4e3b-4868-9cea-a1c567856e68", // Optional.
"created_at": "2024-01-28T04:23:11.738801Z",
"ref_id": "idempotence_id",
"status": "VALID",
"memo_id": "9CFXQSCMSPLFHXLZ",
"fiat_network_instructions": {
"wire": {
"account_number": "7339119",
"fiat_account_owner_address": {
"country": "US",
"address1": "450 Lexington Ave. #3952",
"city": "New York",
"province": "NY",
"zip_code": "10163"
},
"routing_details": {
"routing_number_type": "SWIFT",
"routing_number": "031302971",
"bank_name": "Customers Bank",
"bank_address": {
"country": "USA",
"address1": "701 Reading Avenue",
"city": "West Reading",
"province": "PA",
"zip_code": "19611"
}
}
},
"fiat_account_owner": {
"institution_details": {
"name": "Paxos Trust Company, LLC"
}
},
"metadata": {
"my_id": "4024ee50-eefb-4f2e-85c7-e7899c0b7da5"
}
}
}
```
You will need the `memo_id` from the response on the next step in order to fund the Profile.
### End User Funding
Retrieve the user’s `profile_id`, `identity_id` and `account_id` from your records.
Create deposit instructions for international wires (SWIFT) for end user funding.
Include the following body parameters in the request:
```shell
curl --location 'https://api.sandbox.paxos.com/v2/transfer/fiat-deposit-instructions' \
--request 'POST' \
--header 'Authorization: Bearer {access_token}' \
--data '{
"profile_id": "5fc6d191-193c-4e28-94fa-656bbdbdfaad",
"fiat_network": "WIRE",
"identity_id": "8a398cb6-4e3b-4868-9cea-a1c567856e68",
"account_id": "91f91384-30d4-46c2-9118-7f3cec676a2c",
"ref_id": "idempotence_id",
"routing_number_type": "SWIFT",
"metadata":
{
"my_id": "4024ee50-eefb-4f2e-85c7-e7899c0b7da5"
}
}'
```
Upon successful request, the acknowledgment response confirms your request has been received.
```json
{
"id": "f190b163-208f-4d73-8deb-4fb8b24add00",
"profile_id": "5fc6d191-193c-4e28-94fa-656bbdbdfaad",
"identity_id": "8a398cb6-4e3b-4868-9cea-a1c567856e68",
"account_id": "91f91384-30d4-46c2-9118-7f3cec676a2c",
"created_at": "2024-01-28T04:23:11.738801Z",
"ref_id": "idempotence_id",
"status": "VALID",
"memo_id": "9CFXQSCMSPLFHXLY",
"fiat_network_instructions": {
"wire": {
"account_number": "7339119",
"fiat_account_owner_address": {
"country": "US",
"address1": "450 Lexington Ave. #3952",
"city": "New York",
"province": "NY",
"zip_code": "10163"
},
"routing_details": {
"routing_number_type": "SWIFT",
"routing_number": "031302971",
"bank_name": "Customers Bank",
"bank_address": {
"country": "USA",
"address1": "701 Reading Avenue",
"city": "West Reading",
"province": "PA",
"zip_code": "19611"
}
}
},
"fiat_account_owner": {
"institution_details": {
"name": "Paxos Trust Company, LLC"
}
},
"metadata": {
"my_id": "4024ee50-eefb-4f2e-85c7-e7899c0b7da5"
}
}
}
```
You will need the `memo_id` from the response to fund the Profile.
### ➋ Send Fiat to Paxos
Send a wire (SWIFT, Fedwire) or CUBIX transfer to Paxos, referencing the `memo_id` to fund your Profile.
For Sandbox environment emulate the wire deposit using [Initiate Sandbox Fiat Deposit](/api-reference/endpoints/sandbox-fiat-transfers/initiate-sandbox-fiat-deposit).
```shell
curl --location 'https://api.sandbox.paxos.com/v2/sandbox/fiat-deposits' \
--request 'POST' \
--header 'Authorization: Bearer {access_token}' \
--data '{
"amount": "150.33",
"asset": "USD",
"memo_id": "9CFXQSCMSPLFHXLZ",
"fiat_network_instructions": {
"wire": {
"account_number": "1234567",
"fiat_account_owner_address": {
"country": "US",
"address1": "456 Main Street",
"city": "New York",
"province": "NY",
"zip_code": "10101"
},
"routing_details": {
"routing_number_type": "SWIFT",
"routing_number": "031302971",
"bank_name": "Customers Bank",
"bank_address": {
"country": "USA",
"address1": "123 Bank Street",
"city": "New York",
"province": "NY",
"zip_code": "10101"
}
}
}
},
"fiat_account_owner": {
"institution_details": {
"name": "Paxos Trust Company, LLC"
}
}
}'
```
You should get an empty response with `200` status code.
It can take a minute to process the deposit on the backend.
In production, send a real wire (SWIFT, Fedwire) or CUBIX transfer to Paxos, referencing the production `memo_id` (not sandbox) to fund your Profile.
### ➌ Check Status of Deposit
Find the deposit using [List Transfers](/api-reference/endpoints/transfers/list-transfers).
### Via Profile ID
Include the `profile_id` query parameter to filter out transfers to all other Profiles.
```shell
curl --location 'https://api.sandbox.paxos.com/v2/transfer/transfers?order=DESC&type=WIRE_DEPOSIT&limit=2&profile_ids=5fc6d191-193c-4e28-94fa-656bbdbdfaad&limit=1' \
--request 'GET' \
--header 'Authorization: Bearer {access_token}'
```
Response:
```json
{ "items": [
{ "account_id": "91f91384-30d4-46c2-9118-7f3cec676a2c",
"amount": "150.33",
"asset": "USD",
"auto_conversion": {},
"balance_asset": "USD",
"created_at": "2024-01-28T00:48:00.222744Z",
"customer_id": "4eaffe58-df0e-4559-8dec-fdae231684e9",
"direction": "CREDIT",
"fee": "30",
"id": "cca46bf3-2dab-4ab5-a4f1-7b1b75956a29",
"identity_id": "8a398cb6-4e3b-4868-9cea-a1c567856e68",
"profile_id": "5fc6d191-193c-4e28-94fa-656bbdbdfaad",
"status": "COMPLETED",
"total": "120.33",
"type": "WIRE_DEPOSIT",
"updated_at": "2024-01-28T00:48:00.332602Z"
}
],
"next_page_cursor": "TAISDAiA-9qtBhCQtcyeARjCwa8M"
}
```
### Via Identity ID
Include the `identity_id` query parameter to filter out transfers to all other Identities.
```shell
curl --location 'https://api.sandbox.paxos.com/v2/transfer/transfers?order=DESC&type=WIRE_DEPOSIT&identity_ids=8a398cb6-4e3b-4868-9cea-a1c567856e68&limit=1' \
--request 'GET' \
--header 'Authorization: Bearer {access_token}'
```
Response:
```json
{ "items": [
{ "account_id": "91f91384-30d4-46c2-9118-7f3cec676a2c",
"amount": "150.33",
"asset": "USD",
"auto_conversion": {},
"balance_asset": "USD",
"created_at": "2024-01-28T00:48:00.222744Z",
"customer_id": "4eaffe58-df0e-4559-8dec-fdae231684e9",
"direction": "CREDIT",
"fee": "30",
"id": "cca46bf3-2dab-4ab5-a4f1-7b1b75956a29",
"identity_id": "8a398cb6-4e3b-4868-9cea-a1c567856e68",
"profile_id": "5fc6d191-193c-4e28-94fa-656bbdbdfaad",
"status": "COMPLETED",
"total": "120.33",
"type": "WIRE_DEPOSIT",
"updated_at": "2024-01-28T00:48:00.332602Z"
}
],
"next_page_cursor": "TAISDAiA-9qtBhCQtcyeARjCwa8Q"
}
```
### ➍ View Updated Balances
View updated balances using [Get Profile Balance](/api-reference/endpoints/profiles/get-profile-balance).
```shell
curl --location 'https://api.sandbox.paxos.com/v2/profiles/5fc6d191-193c-4e28-94fa-656bbdbdfaad/balances/USD' \
--request 'GET' \
--header 'Authorization: Bearer {access_token}'
```
Response:
```json
{
"asset": "USD",
"available": "120.33",
"trading": "0"
}
```
## Withdrawal Flow
To move USD off the Platform, first use [Create Fiat Account](/api-reference/endpoints/fiat-transfers/create-fiat-account) to let Paxos know where to transfer the funds.
Then, use the returned Fiat Account `id` with [Create Fiat Withdrawal](/api-reference/endpoints/fiat-transfers/create-fiat-withdrawal) to transfer funds to the external account.
We'll be following the recommended fiat withdrawal workflow:
* [Authenticate in Sandbox](#authenticate).
* Save your external bank account information on Paxos using [Create Fiat Account](/api-reference/endpoints/fiat-transfers/create-fiat-account). If needed, you can update bank account information using [Update Fiat Account](/api-reference/endpoints/fiat-transfers/update-fiat-account).
* Confirm sufficient funds in the associated Profile to process the withdrawal using [Get Profile Balance](/api-reference/endpoints/profiles/get-profile-balance).
* Retrieve the ID for your external bank account using [List Fiat Accounts](/api-reference/endpoints/fiat-transfers/list-fiat-accounts).
* Initiate a fiat withdrawal from Paxos into your external bank account using [Create Fiat Withdrawal](/api-reference/endpoints/fiat-transfers/create-fiat-withdrawal).
* Check the status of the withdrawal using [List Transfers](/api-reference/endpoints/transfers/list-transfers).
* View updated balances using [Get Profile Balance](/api-reference/endpoints/profiles/get-profile-balance).
### ➊ Create Fiat Account
Save your external bank account information on Paxos using [Create Fiat Account](/api-reference/endpoints/fiat-transfers/create-fiat-account).
For CUBIX, the `wallet_address` on `fiat_network_instructions` is not a crypto wallet address, it is a Customers Bank
account wallet address.
### Corporate Funding
Include the following body parameters in your request to create fiat accounts for US domestic wires:
```shell
curl --location 'https://api.sandbox.paxos.com/v2/transfer/fiat-accounts' \
--request 'POST' \
--header 'Authorization: Bearer {access_token}' \
--data '{
"ref_id": "idempotence_id",
"identity_id": "8a398cb6-4e3b-4868-9cea-a1c567856e68", // Optional.
"fiat_account_owner": {
"institution_details": {
"name": "Company"
}
},
"fiat_network_instructions": {
"wire": {
"account_number": "74600021314512",
"fiat_account_owner_address": {
"country": "USA",
"address1": "456 Main Street, NY",
"city": "New York",
"province": "NY",
"zip_code": "10101"
},
"routing_details": {
"routing_number_type": "ABA",
"routing_number": "031302971",
"bank_name": "Customers Bank",
"bank_address": {
"country": "USA",
"address1": "123 Bank Street",
"city": "New York",
"province": "NY",
"zip_code": "10101"
}
}
}
},
"metadata": {
"test_ref_id": "47aa7538-e2d2-47b3-8600-44a7965dd357",
"key_2": "2"
}
}'
```
Upon successful request, the acknowledgment response confirms your request has been received.
```json highlight={2,34}
{
"id": "cc1b6606-a8a3-4a8f-8b9b-5456d96448bf",
"ref_id": "idempotence_id",
"identity_id": "8a398cb6-4e3b-4868-9cea-a1c567856e68", // Optional.
"fiat_account_owner": {
"person_details": {
"name": "Company"
},
"fiat_network_instructions": {
"wire": {
"account_number": "74600021314512",
"fiat_account_owner_address": {
"country": "USA",
"address1": "456 Main Street, NY",
"city": "New York",
"province": "NY",
"zip_code": "10101"
},
"routing_details": {
"routing_number_type": "ABA",
"routing_number": "031302971",
"bank_name": "Customers Bank",
"bank_address": {
"country": "USA",
"address1": "123 Bank Street",
"city": "New York",
"province": "NY",
"zip_code": "10101"
}
}
}
}
},
"status": "PENDING",
"metadata": {
"test_ref_id": "47aa7538-e2d2-47b3-8600-44a7965dd357",
"key_2": "2"
},
"created_at": "2024-01-28T22:14:25.731494Z"
}
```
Note the `id` in the response, it will be required to check the Account status in the next steps.
### End User Funding
Include the following body parameters in your request to create fiat accounts for SWIFT (international) wires:
```shell
curl --location 'https://api.sandbox.paxos.com/v2/transfer/fiat-accounts' \
--request 'POST' \
--header 'Authorization: Bearer {access_token}' \
--data '{
"ref_id": "idempotence_id",
"identity_id": "8a398cb6-4e3b-4868-9cea-a1c567856e68",
"account_id": "91f91384-30d4-46c2-9118-7f3cec676a2c",
"fiat_account_owner": {
"person_details": {
"first_name": "Megan",
"last_name": "Snow"
}
},
"fiat_network_instructions": {
"wire": {
"account_number": "74600021314512",
"fiat_account_owner_address": {
"country": "USA",
"address1": "2600 Tully St",
"city": "Washington",
"province": "DC",
"zip_code": "10010"
},
"routing_details": {
"routing_number_type": "SWIFT",
"routing_number": "JINABVU1773",
"bank_name": "First Bank",
"bank_address": {
"country": "Brazil",
"address1": "Awesome ct",
"city": "Sao Paulo",
"province": "Sao Paulo",
"zip_code": "33445"
}
},
"intermediary_routing_details": {
"routing_number_type": "ABA",
"routing_number": "123456789",
"bank_name": "Ubium Bank",
"bank_address": {
"country": "USA",
"address1": "Great str",
"city": "Walnut Creek",
"province": "CA",
"zip_code": "59610"
}
}
}
},
"metadata": {
"key_1": "1",
"key_2": "two"
}
}'
```
Upon successful request, the acknowledgment response confirms your request has been received.
```json highlight={2,48}
{
"id": "cc1b6606-a8a3-4a8f-8b9b-5456d96448bf",
"ref_id": "idempotence_id",
"identity_id": "8f22e593-5f51-40cc-8bb0-5245d051c1da",
"account_id": "38fc5a41-12a5-43f4-a2de-4733dcd1dee6",
"fiat_account_owner": {
"person_details": {
"first_name": "Megan",
"last_name": "Snow"
}
},
"fiat_network_instructions": {
"wire": {
"account_number": "XXXXXXXXXX4512",
"fiat_account_owner_address": {
"country": "USA",
"address1": "2600 Tully St",
"city": "Washington",
"province": "DC",
"zip_code": "10010"
},
"routing_details": {
"routing_number_type": "SWIFT",
"routing_number": "JINABVU1773",
"bank_name": "First Bank",
"bank_address": {
"country": "Brazil",
"address1": "Awesome ct",
"city": "Sao Paulo",
"province": "Sao Paulo",
"zip_code": "33445"
}
},
"intermediary_routing_details": {
"routing_number_type": "ABA",
"routing_number": "123456789",
"bank_name": "Ubium Bank",
"bank_address": {
"country": "USA",
"address1": "Great str",
"city": "Walnut Creek",
"province": "CA",
"zip_code": "59610"
}
}
}
},
"status": "PENDING",
"metadata": {
"key_1": "1",
"key_2": "two"
},
"created_at": "2024-03-13T00:50:08.902618Z"
}
```
Note the `id` in the response, it will be required to check the Account status in the next steps.
### ➋ Confirm Sufficient Funds
Confirm sufficient funds in the profile to process the withdrawal using [Get Profile Balance](/api-reference/endpoints/profiles/get-profile-balance).
```shell
curl --location 'https://api.sandbox.paxos.com/v2/profiles/5fc6d191-193c-4e28-94fa-656bbdbdfaad/balances/USD' \
--request 'GET' \
--header 'Authorization: Bearer {access_token}'
```
Response:
```json
{
"asset": "USD",
"available": "120.33",
"trading": "0"
}
```
### ➌ Retrieve Bank Account Status
Retrieve the status of your external bank account using [Get Fiat Account](/api-reference/endpoints/fiat-transfers/get-fiat-account) and providing the `id`
from the [Create Fiat Account](/api-reference/endpoints/fiat-transfers/create-fiat-account) response.
There are three statuses for Fiat Accounts: "PENDING"`, \"APPROVED"`, "REJECTED"`. While on \"PENDING"`, Paxos is
processing your fiat account. Fiat Account status needs to be "APPROVED"\` before Fiat Account can be used for withdrawals.
Request:
```shell
curl --request 'GET' --location 'https://api.sandbox.paxos.com/v2/transfer/fiat-accounts/cc1b6606-a8a3-4a8f-8b9b-5456d96448bf'
```
Response:
```json highlight={37}
{
"account_id": "91f91384-30d4-46c2-9118-7f3cec676a2c",
"created_at": "2024-01-28T22:14:25.731494Z",
"fiat_account_owner": {
"person_details": {
"name": "Company"
}
},
"fiat_network_instructions": {
"wire": {
"account_number": "74600021314512",
"fiat_account_owner_address": {
"country": "USA",
"address1": "456 Main Street, NY",
"city": "New York",
"province": "NY",
"address2": "",
"zip_code": "10101"
},
"routing_details": {
"routing_number_type": "ABA",
"routing_number": "031302971",
"bank_name": "Customers Bank",
"bank_address": {
"country": "USA",
"address1": "123 Bank Street",
"city": "New York",
"province": "NY",
"zip_code": "10101"
}
}
}
},
"id": "cc1b6606-a8a3-4a8f-8b9b-5456d96448bf",
"identity_id": "8a398cb6-4e3b-4868-9cea-a1c567856e68",
"ref_id": "idempotence_id",
"status": "APPROVED",
"metadata": {
"test_ref_id": "47aa7538-e2d2-47b3-8600-44a7965dd357",
"key_2": "2"
}
}
```
From the response find the `id` of the bank record for the user. It must be in `APPROVED` status.
### ➍ Create Fiat Withdrawal
Initiate a fiat withdrawal from Paxos into your external bank account using [Create Fiat Withdrawal](/api-reference/endpoints/fiat-transfers/create-fiat-withdrawal).
### Corporate Funding
Initiate a CUBIX withdrawal. Specify the `fiat_account_id` of the Fiat Account from the [Create Fiat Account](/api-reference/endpoints/fiat-transfers/create-fiat-account) response.
```shell highlight={8}
curl --location 'https://api.sandbox.paxos.com/v2/transfer/fiat-withdrawals' \
--request 'POST' \
--header 'Authorization: Bearer {access_token}' \
--data '{
"ref_id": "idempotence_id",
"amount": "120",
"asset": "USD",
"fiat_account_id": "cc1b6606-a8a3-4a8f-8b9b-5456d96448bf",
"profile_id": "5fc6d191-193c-4e28-94fa-656bbdbdfaad",
"identity_id": "8a398cb6-4e3b-4868-9cea-a1c567856e68", // Optional.
"metadata": {
"custom_key": "custom_value"
}
}'
```
Response:
```json
{
"amount": "100",
"asset": "USD",
"auto_conversion": {},
"balance_asset": "USD",
"created_at": "2024-01-28T22:39:02.279268Z",
"customer_id": "4eaffe58-df0e-4559-8dec-fdae231684e1",
"direction": "DEBIT",
"fee": "20",
"fiat_account_id": "cc1b6606-a8a3-4a8f-8b9b-5456d96448bf",
"id": "11a6f6e9-4219-4698-9d79-abfc1e346246",
"identity_id": "8a398cb6-4e3b-4868-9cea-a1c567856e68", // Optional.
"metadata": {
"custom_key": "custom_value"
},
"profile_id": "5fc6d191-193c-4e28-94fa-656bbdbdfaad",
"ref_id": "idempotence_id",
"status": "PENDING",
"total": "120",
"type": "CUBIX_WITHDRAWAL",
"updated_at": "2024-01-28T22:39:02.279268Z"
}
```
### End User Funding
Initiate an international wire withdrawal (SWIFT). Specify the `fiat_account_id` from the [Create Fiat Account](/api-reference/endpoints/fiat-transfers/create-fiat-account) response.
```shell highlight={8}
curl --location 'https://api.sandbox.paxos.com/v2/transfer/fiat-withdrawals' \
--request 'POST' \
--header 'Authorization: Bearer {access_token}' \
--data '{
"ref_id": "idempotence_id",
"amount": "120",
"asset": "USD",
"fiat_account_id": "cc1b6606-a8a3-4a8f-8b9b-5456d96448bf",
"profile_id": "5fc6d191-193c-4e28-94fa-656bbdbdfaad",
"identity_id": "8a398cb6-4e3b-4868-9cea-a1c567856e68",
"account_id": "91f91384-30d4-46c2-9118-7f3cec676a2c",
"metadata": {
"custom_key": "custom_value"
}
}'
```
Response:
```json
{
"account_id": "91f91384-30d4-46c2-9118-7f3cec676a2c",
"amount": "100",
"asset": "USD",
"auto_conversion": {},
"balance_asset": "USD",
"created_at": "2024-01-28T22:39:02.279268Z",
"customer_id": "4eaffe58-df0e-4559-8dec-fdae231684e1",
"direction": "DEBIT",
"fee": "20",
"fiat_account_id": "cc1b6606-a8a3-4a8f-8b9b-5456d96448bf",
"id": "11a6f6e9-4219-4698-9d79-abfc1e346246",
"identity_id": "8a398cb6-4e3b-4868-9cea-a1c567856e68",
"metadata": {
"custom_key": "custom_value"
},
"profile_id": "5fc6d191-193c-4e28-94fa-656bbdbdfaad",
"ref_id": "idempotence_id",
"status": "PENDING",
"total": "120",
"type": "WIRE_WITHDRAWAL",
"updated_at": "2024-01-28T22:39:02.279268Z"
}
```
It is recommended to have [JWS request signing](/guides/developer/request-signing) for Fiat Withdrawals.
JWS request signing uses a public-key cryptography with a client-controlled private key.
It adds an additional layer of security to withdrawals.
It can prevent malicious withdrawals even if the API key is compromised.
When used, all API calls with this key will require a JWS signature.
### ➎ Check Status of Withdrawal
Check the status of the withdrawal using [Get Transfer](/api-reference/endpoints/transfers/get-transfer) with the `id` from the previous step.
```shell
curl --location 'https://api.sandbox.paxos.com/v2/transfer/transfers/11a6f6e9-4219-4698-9d79-abfc1e346246' \
--request 'GET' \
--header 'Authorization: Bearer {access_token}'
```
Response:
```json highlight={18}
{ "account_id": "91f91384-30d4-46c2-9118-7f3cec676a2c",
"amount": "100",
"asset": "USD",
"auto_conversion": {},
"balance_asset": "USD",
"created_at": "2024-01-28T22:39:02.279268Z",
"customer_id": "4eaffe58-df0e-4559-8dec-fdae231684e1",
"direction": "DEBIT",
"fee": "20",
"fiat_account_id": "cc1b6606-a8a3-4a8f-8b9b-5456d96448bf",
"id": "11a6f6e9-4219-4698-9d79-abfc1e346246",
"identity_id": "8a398cb6-4e3b-4868-9cea-a1c567856e68",
"metadata": {
"custom_key": "custom_value"
},
"profile_id": "5fc6d191-193c-4e28-94fa-656bbdbdfaad",
"ref_id": "idempotence_id",
"status": "COMPLETE",
"total": "120",
"type": "WIRE_WITHDRAWAL",
"updated_at": "2024-01-28T22:39:05.613881Z"}
```
### ➏ View Updated Balances
View updated balances using [Get Profile Balance](/api-reference/endpoints/profiles/get-profile-balance) and passing the `profile_id` and `USD` asset in the endpoint's path.
```shell
curl --location 'https://api.sandbox.paxos.com/v2/profiles/5fc6d191-193c-4e28-94fa-656bbdbdfaad/balances/USD \'
--request 'GET' \
--header 'Authorization: Bearer {access_token}'
```
Response:
```json
{
"asset": "USD",
"available": "0.33",
"trading": "0"
}
```
# Statuses
Source: https://docs.sandbox.paxos.com/guides/developer/fiat-transfers/statuses
Learn more about Fiat Transfers statuses.
The Fiat Transfers workflow includes five (5) statuses:
* `PENDING`: Initial state. The [Create Fiat Account](/api-reference/endpoints/fiat-transfers/create-fiat-account) or [Create Fiat Withdrawal](/api-reference/endpoints/fiat-transfers/create-fiat-withdrawal) request is under review.
* `APPROVED`: The [Create Fiat Account](/api-reference/endpoints/fiat-transfers/create-fiat-account) request passed internal review. Can be used for withdrawals.
* `REJECTED`: The [Create Fiat Account](/api-reference/endpoints/fiat-transfers/create-fiat-account) request did not pass internal review. Cannot be used for withdrawals.
* `COMPLETED`: For deposits, the corresponding `profile_id` has been credited. For withdrawals, the transfer has been sent to the external bank account.
* `FAILED`: The deposit or withdrawal did not pass internal requirements.
- Use [Get Fiat Deposit Instructions](/api-reference/endpoints/fiat-transfers/get-fiat-deposit-instructions) to check the status of the instructions before initiating a deposit.
- Before initiating a withdrawal, use [Get Fiat Account](/api-reference/endpoints/fiat-transfers/get-fiat-account) to ensure the account status is `APPROVED`.
- When transferring funds, use [List Transfers](/api-reference/endpoints/transfers/list-transfers) and [Get Profile Balance](/api-reference/endpoints/profiles/get-profile-balance) to check on the transfer status and Profile balance changes.
# Mint
Source: https://docs.sandbox.paxos.com/guides/developer/mint
Deposit USD. Convert or convert-and-transfer in one API call.

Minting a [Paxos-issued stablecoin](/guides/developer/blockchains#stablecoins) starts by depositing USD on the Paxos platform using the [Fiat Transfers APIs](/api-reference/endpoints/fiat-transfers) (**A** in the diagram).
Depending on the use case, you can either convert USD to a stablecoin and keep the asset on the Paxos platform using [Create Stablecoin Conversion](/api-reference/endpoints/stablecoin-conversion/create-stablecoin-conversion) (option **B**) or use [Create Crypto Withdrawal](/api-reference/endpoints/crypto-withdrawals/create-crypto-withdrawal) to convert and transfer with the same API request (**C**).
> If you've already authenticated and have a USD balances in a Profile, skip ahead to the [convert](#mint-hold) or [convert and transfer](#mint-transfer) step.
## ➊ Authenticate
Include the following scopes when [authenticating](/guides/developer/authenticate):
```shell
conversion:read_conversion_stablecoin conversion:write_conversion_stablecoin funding:read_profile transfer:write_crypto_withdrawal
```
> If you don't see all the scopes when [creating or editing API credentials](/guides/developer/credentials), contact [Support](https://support.paxos.com).
## ➋ Deposit USD
Use [Create Sandbox Deposit](/api-reference/endpoints/sandbox-deposits/create-sandbox-deposit) to add USD to the Profile (`profile_id`) you want the minting process to be associated with.
See the [First API Request](/guides/developer/request) guide for help retrieving Profile IDs.
You can also use the [Fiat Transfers funding flow](/api-reference/endpoints/fiat-transfers) if you've already set up a Fiat Account.
```shell highlight={2}
curl --request POST \
--location 'https://api.sandbox.paxos.com/v2/sandbox/profiles/0d3172c5-8840-4bae-bdd4-30688f0268fc/deposit' \
--header 'Authorization: Bearer {access_token}' \
--data '{
"asset": "USD",
"amount": "1000"
}'
```
## ➌ Convert USD to Stablecoin
See the [convert stablecoin](/guides/developer/convert) guide for details on using [Create Stablecoin Conversion](/api-reference/endpoints/stablecoin-conversion/create-stablecoin-conversion) to mint a [Paxos-issued stablecoin](/guides/developer/blockchains#stablecoins).
Once the conversion is [`SETTLED`](/guides/developer/convert#stablecoin-conversion-statuses), use [List Profile Balances](/api-reference/endpoints/profiles/list-profile-balances) to check updated balances.
To check balances of the assets you are interested in, include the `assets` query parameter in the request.
```shell highlight={1}
curl --location 'https://api.sandbox.paxos.com/v2/profiles/0d3172c5-8840-4bae-bdd4-30688f0268fc/balances?assets=USD&assets=PYUSD&assets=USDG' \
--header 'Accept: application/json' \
--header 'Authorization: Bearer {access_token}'
```
The response includes the updated USD and Paxos-issued stablecoin balances.
```json
{
"items": [
{
"asset": "USD",
"available": "600",
"trading": "0"
},
{
"asset": "PYUSD",
"available": "100",
"trading": "0"
},
{
"asset": "USDG",
"available": "100",
"trading": "0"
}
]
}
```
## ➍ Convert and Transfer
Use [Create Crypto Withdrawal](/api-reference/endpoints/crypto-withdrawals/create-crypto-withdrawal) to transfer the Paxos-issued stablecoin to an address off the Paxos platform with a single request.
To automatically convert fiat (USD) to stablecoin and transfer to an external address with a single request, set the `asset` to the stablecoin you want to mint, the `balance_asset` to `USD`, and the `crypto_network` to the desired network.
### USDG on Ethereum
```shell
curl --location 'https://api.sandbox.paxos.com/v2/transfer/crypto-withdrawals' \
--header 'Content-Type: application/json' \
--header 'Accept: application/json' \
--header 'Authorization: Bearer {access_token}' \
--data '{
"profile_id": "0d3172c5-8840-4bae-bdd4-30688f0268fc",
"asset": "USDG",
"destination_address": "0x9acb61E5fcE9B5BdA7B44635d86be19d2790D9a9",
"crypto_network": "ETHEREUM",
"ref_id": "cw_usdg_eth_293a8f7c-bcb6-483f-919b-8661ae65f0e6",
"balance_asset": "USD",
"amount": "100"
}'
```
### PYUSD on Solana
```shell
curl --location 'https://api.sandbox.paxos.com/v2/transfer/crypto-withdrawals' \
--header 'Content-Type: application/json' \
--header 'Accept: application/json' \
--header 'Authorization: Bearer {access_token}' \
--data '{
"profile_id": "0d3172c5-8840-4bae-bdd4-30688f0268fc",
"asset": "PYUSD",
"destination_address": "BtXdwoYSWPprQT88ZCLuQcXuTz4dFHB1AJFYqr5uXoAd",
"crypto_network": "SOLANA",
"ref_id": "cw_pyusd_293a8f7c-bcb6-483f-919b-8661ae65f0e6",
"balance_asset": "USD",
"amount": "100"
}'
```
The request confirmation response has a `status` of `PENDING`, since the on-chain transaction has not yet been confirmed.
### USDG on Ethereum
```json highlight={13}
{
"id": "7c223577-832b-4235-a77e-ebf36dfe9860",
"customer_id": "8cbc1177-d982-4750-a435-3c7f36245452",
"profile_id": "0d3172c5-8840-4bae-bdd4-30688f0268fc",
"ref_id": "cw_usdg_eth_293a8f7c-bcb6-483f-919b-8661ae65f0e6",
"amount": "100",
"total": "126.96",
"fee": "26.96",
"asset": "USDG",
"balance_asset": "USD",
"direction": "DEBIT",
"type": "CRYPTO_WITHDRAWAL",
"status": "PENDING",
...
"destination_address": "0x9acb61E5fcE9B5BdA7B44635d86be19d2790D9a9",
"crypto_network": "ETHEREUM",
"auto_conversion": {}
}
```
### PYUSD on Solana
```json highlight={13}
{
"id": "e655c587-e057-4cf2-88d9-7e19ae13f2ee",
"customer_id": "8cbc1177-d982-4750-a435-3c7f36245452",
"profile_id": "0d3172c5-8840-4bae-bdd4-30688f0268fc",
"ref_id": "cw_pyusd_sol_293a8f7c-bcb6-483f-919b-8661ae65f0e6",
"amount": "100",
"total": "100",
"fee": "0",
"asset": "PYUSD",
"balance_asset": "USD",
"direction": "DEBIT",
"type": "CRYPTO_WITHDRAWAL",
"status": "PENDING",
...
"destination_address": "BtXdwoYSWPprQT88ZCLuQcXuTz4dFHB1AJFYqr5uXoAd",
"crypto_network": "SOLANA",
"auto_conversion": {}
}
```
To check the transaction status on the Paxos platform, use [List Transfers](/api-reference/endpoints/transfers/list-transfers).
You can create a recurring request that look for completed transactions in the Profile.
For example, filter on `type=CRYPTO_WITHDRAWAL` and `status=COMPLETED` parameters to find all the completed transactions.
```shell
curl --location 'https://api.sandbox.paxos.com/v2/transfer/transfers?type=CRYPTO_WITHDRAWAL&status=COMPLETED' \
--header 'Accept: application/json' \
--header 'Authorization: Bearer {access_token}'
```
By default, the response includes transactions from newest to oldest.
```json highlight={15,33}
{
"items": [
{
"id": "7c223577-832b-4235-a77e-ebf36dfe9860",
"customer_id": "8cbc1177-d982-4750-a435-3c7f36245452",
"profile_id": "0d3172c5-8840-4bae-bdd4-30688f0268fc",
"ref_id": "cw_usdg_eth_293a8f7c-bcb6-483f-919b-8661ae65f0e6",
"amount": "100",
"total": "126.96",
"fee": "26.96",
"asset": "USDG",
"balance_asset": "USD",
"direction": "DEBIT",
"type": "CRYPTO_WITHDRAWAL",
"status": "COMPLETED",
...
"destination_address": "0x9acb61E5fcE9B5BdA7B44635d86be19d2790D9a9",
"crypto_network": "ETHEREUM",
"crypto_tx_hash": "0x2a0bac30de037b62502540c18ac22b6d75312cd1508c1df3eb6e38f8b7503f1a",
"auto_conversion": {}
},{
"id": "e655c587-e057-4cf2-88d9-7e19ae13f2ee",
"customer_id": "8cbc1177-d982-4750-a435-3c7f36245452",
"profile_id": "0d3172c5-8840-4bae-bdd4-30688f0268fc",
"ref_id": "cw_pyusd_293a8f7c-bcb6-483f-919b-8661ae65f0e6",
"amount": "100",
"total": "100",
"fee": "0",
"asset": "PYUSD",
"balance_asset": "USD",
"direction": "DEBIT",
"type": "CRYPTO_WITHDRAWAL",
"status": "COMPLETED",
...
"destination_address": "BtXdwoYSWPprQT88ZCLuQcXuTz4dFHB1AJFYqr5uXoAd",
"crypto_network": "SOLANA",
"crypto_tx_hash": "3ShgmRdcuj2usV3tmLvb3BUrEvhAXNWbUseYgRt24Muyv1tiPkohn8ZQAAdS5KeYNLKR6PhmwUta6CW2ZCAuxHt5",
"crypto_tx_index": "0",
"auto_conversion": {}
},
],
"next_page_cursor": "CAESCwiP-OazBhDgzZYyGLSOkw0"
}
```
# Rate Limits
Source: https://docs.sandbox.paxos.com/guides/developer/rate-limits
Review REST, WebSocket and FIX limits.
Paxos implements REST and WebSocket limits to help ensure platform stability.
All integrations should observe the stated rate limits to prevent disruptions.
## REST Limits
Paxos sets rate limits per endpoint and IP address, based on the average number of requests per second during a five (5) minute window.
If you hit a rate limit on a specific endpoint, you will receive a `429` response status code. All requests from the offending IP are then throttled for five (5) minutes.
| API Path | Limit |
| --------------------------------------------------------------------------------------------------------------------------------------------- | ----- |
| /register\* /signup\* /create-new-user\* /login\* /oauth2/token\* | 1 |
| /wallets\* /v2/markets/\*/order-book /v2/markets/\*/recent-executions /v2/profiles/\*/quote-executions /v2/identities/\*/ | 10 |
| /v2/transfer/internal /v2/transfer/crypto-withdrawals | 20 |
| All other endpoints | 50 |
Minimally, Paxos recommends gracefully handling limits by watching for `429` status codes and building retry functionality.
The retry mechanism should include a backoff schedule that takes volume into consideration.
There are a number of open source tools available to help handle rate limits.
## WebSocket Limits
Market and execution data services have a rate limit of one (1) subscription per second from the same IP address.
If the rate limit is exceeded, no error message is sent.
Rather, each client must wait one (1) second before receiving data.
For example, if 20 new clients connect from the same IP address, it will take about 20 seconds for all the clients to receive data.
> When connecting a large number of clients, some may fail and close the connection before receiving a response from the server.
Paxos recommends all clients implement a single `wss://` connection at the server level (multiplexing).
Multiple connections can create logistical and update issues without providing appreciable performance gains.
To support integration and platform stability and maintenance, each implementation should:
* Ensure all application clients can easily rollout platform updates to users through a single mechanism.
* Have a centralized reconnection mechanism to recover from any feed disruptions.
* Have a reconnection mechanism in case of server disconnection.
* Observe the WebSocket rate limits.
Paxos support may reach out to you if your client does not implement this guidance.
## FIX Limits
Maximum 150 messages per second, per session.
# Redeem
Source: https://docs.sandbox.paxos.com/guides/developer/redeem
Deposit stablecoin and convert to USD in one API call. Transfer USD to your bank.
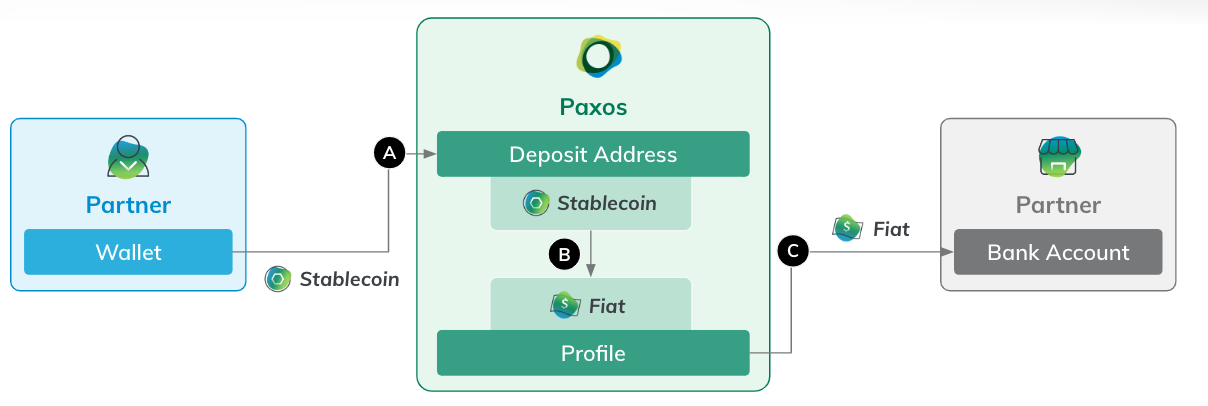
To redeem a [Paxos-issued stablecoin](/guides/developer/blockchains#stablecoins), use [Create Deposit Address](/api-reference/endpoints/deposit-addresses/create-deposit-address) to add the appropriate address on the Paxos platform. Next, initiate a stablecoin transfer from your external address (**A** in the diagram).
If you set `conversion_target_asset` to `USD` when creating the address, Paxos automatically credits your USD balance once the on-chain transfer is confirmed (**B**).
Then, use [Create Fiat Withdrawal](/api-reference/endpoints/fiat-transfers/create-fiat-withdrawal) to send USD to your bank account (**C**).
* To redeem stablecoins you already hold on the Paxos platform, you can use [Create Stablecoin Conversion](/api-reference/endpoints/stablecoin-conversion/create-stablecoin-conversion) to easily convert to USD. See the [conversion guide](/guides/developer/convert) for details.
* To send USD to your bank account, you'll need to first save your external banking information on the Paxos platform. See the [fiat withdrawal guide](/guides/developer/fiat-transfers/quickstart#withdrawal) for details.
## ➊ Authenticate
Include the following scopes when [authenticating](/guides/developer/authenticate):
```shell
funding:read_profile transfer:read_deposit_address transfer:read_transfer transfer:write_deposit_address
```
> If you don't see all the scopes when [creating or editing API credentials](/guides/developer/credentials), contact [Support](https://support.paxos.com).
## ➋ Create Deposit Address
Use [Create Deposit Address](/api-reference/endpoints/deposit-addresses/create-deposit-address) to add a wallet address to the designated Profile.
Include the appropriate `crypto_network` for the source stablecoin.
Set `conversion_target_asset` to `USD` to automatically convert the stablecoin to USD when the transaction is complete.
### USDG on Ethereum
```shell
curl --location 'https://api.sandbox.paxos.com/v2/transfer/deposit-addresses' \
--header 'Content-Type: application/json' \
--header 'Accept: application/json' \
--header 'Authorization: Bearer {access_token} \
--data '{
"profile_id": "0d3172c5-8840-4bae-bdd4-30688f0268fc",
"crypto_network": "ETHEREUM",
"ref_id": "r_usdg_8f91a9c5-0a6e-46dc-ad68-17bc8fb4eafb",
"conversion_target_asset": "USD"
}'
```
### PYUSD on Solana
```shell
curl --location 'https://api.sandbox.paxos.com/v2/transfer/deposit-addresses' \
--header 'Content-Type: application/json' \
--header 'Accept: application/json' \
--header 'Authorization: Bearer {access_token}' \
--data '{
"profile_id": "0d3172c5-8840-4bae-bdd4-30688f0268fc",
"crypto_network": "SOLANA",
"ref_id": "r_pyusd_8f91a9c5-0a6e-46dc-ad68-17bc8fb4eafb",
"conversion_target_asset": "USD"
}'
```
Capture the `address` and `compatible_crypto_networks` values from the response.
Also store the `id` to use when looking up transactions.
### USDG on Ethereum
```json highlight={2,8,11}
{
"id": "078eb145-1bbc-4e1d-999d-92845dc31df4",
"profile_id": "0d3172c5-8840-4bae-bdd4-30688f0268fc",
"customer_id": "8cbc1177-d982-4750-a435-3c7f36245452",
"crypto_network": "ETHEREUM",
"identity_id": "00000000-0000-0000-0000-000000000000",
"ref_id": "r_usdg_8f91a9c5-0a6e-46dc-ad68-17bc8fb4eafb",
"address": "0xdCB1481afaabf9dAc1B2A8218067252D533Ae1a7",
"account_id": "00000000-0000-0000-0000-000000000000",
"conversion_target_asset": "USD",
"compatible_crypto_networks": [
"ETHEREUM",
"POLYGON_POS",
"ARBITRUM_ONE"
]
}
```
### PYUSD on Solana
```json highlight={2,8,11}
{
"id": "8488990c-2cc0-441f-a26c-24d01c40a402",
"profile_id": "0d3172c5-8840-4bae-bdd4-30688f0268fc",
"customer_id": "8cbc1177-d982-4750-a435-3c7f36245452",
"crypto_network": "SOLANA",
"identity_id": "00000000-0000-0000-0000-000000000000",
"ref_id": "r_pyusd_8f91a9c5-0a6e-46dc-ad68-17bc8fb4eafb",
"address": "AufgJhf3DW83MUKgCKyrMyNjdCzhcy4LrcXcQsCDQRb2",
"account_id": "00000000-0000-0000-0000-000000000000",
"conversion_target_asset": "USD",
"compatible_crypto_networks": [
"SOLANA"
]
}
```
## ➌ Transfer Stablecoin to the Paxos Platform
Initiate an on-chain transfer from your external wallet to the `address` included in the response from the [previous step](#add-deposit-address) or from [List Deposit Addresses](/api-reference/endpoints/deposit-addresses/list-deposit-addresses).
Use [List Transfers](/api-reference/endpoints/transfers/list-transfers) to check the status of transfer on the Paxos platform.
Using the `type=CRYPTO_DEPOSIT` and `status=COMPLETED` query parameters, in conjunction with `crypto_tx_hashes`, filters the results.
### USDG on Ethereum
```shell
curl --location 'https://api.sandbox.paxos.com/v2/transfer/transfers?crypto_tx_hashes=0x768ac1e892985165885140c80f08ee0197ff6e175f9a9ed4b7f1b09c3b49baca' \
--header 'Accept: application/json' \
--header 'Authorization: Bearer {access_token}'
```
### PYUSD on Solana
```shell
curl --location 'https://api.sandbox.paxos.com/v2/transfer/transfers?crypto_tx_hashes=3LnaTGt2hmLGFwRkZyh7bGPj8UyYFjJauTS2c4PZ6YQfqwBqTmN8Z6j3LhFrqgTRX7ZcyJrF2NrrJxztAX3n3uL9' \
--header 'Accept: application/json' \
--header 'Authorization: Bearer {access_token}'
```
Depending on the network, it may take some time for the transaction to update on the Paxos platform.
Once the status is `COMPLETED`, the USD balance updates.
### USDG on Ethereum
```json
{
"items": [
{
"id": "d72363d9-52bb-4acd-ba35-b5b1e212ac26",
"customer_id": "8cbc1177-d982-4750-a435-3c7f36245452",
"profile_id": "0d3172c5-8840-4bae-bdd4-30688f0268fc",
"amount": "100",
"total": "100",
"fee": "0",
"asset": "USDG",
"balance_asset": "USD",
"direction": "CREDIT",
"type": "CRYPTO_DEPOSIT",
"status": "COMPLETED",
...
"destination_address": "0xdCB1481afaabf9dAc1B2A8218067252D533Ae1a7",
"crypto_network": "ETHEREUM",
"crypto_tx_hash": "0x768ac1e892985165885140c80f08ee0197ff6e175f9a9ed4b7f1b09c3b49baca",
"crypto_tx_index": "132",
"auto_conversion": {}
}
],
"next_page_cursor": "CAESDAjJq_a3BhCI9LaXAhjwhN8N"
}
```
### PYUSD on Solana
```json
{
"items": [
{
"id": "54235f7e-585c-4c08-b170-15bb10f74c1e",
"customer_id": "8cbc1177-d982-4750-a435-3c7f36245452",
"profile_id": "0d3172c5-8840-4bae-bdd4-30688f0268fc",
"amount": "100",
"total": "100",
"fee": "0",
"asset": "PYUSD",
"balance_asset": "USD",
"direction": "CREDIT",
"type": "CRYPTO_DEPOSIT",
"status": "COMPLETED",
...
"destination_address": "AufgJhf3DW83MUKgCKyrMyNjdCzhcy4LrcXcQsCDQRb2",
"crypto_network": "SOLANA",
"crypto_tx_hash": "3LnaTGt2hmLGFwRkZyh7bGPj8UyYFjJauTS2c4PZ6YQfqwBqTmN8Z6j3LhFrqgTRX7ZcyJrF2NrrJxztAX3n3uL9",
"crypto_tx_index": "4",
"auto_conversion": {}
}
],
"next_page_cursor": "CAESDAi7n_a3BhCIkuKsAxisgt8N"
}
```
## ➍ Transfer USD to Bank Account
Use [Create Fiat Withdrawal](/api-reference/endpoints/fiat-transfers/create-fiat-withdrawal) to send USD to your bank account.
You'll need to first save your external banking information on the Paxos platform.
See the [fiat withdrawal guide](/guides/developer/fiat-transfers/quickstart#withdrawal) for details.
# Reports
Source: https://docs.sandbox.paxos.com/guides/developer/reports
View monthly balances and download daily balance and transaction reconciliation reports.
Go to [Admin > Reports](https://dashboard.paxos.com/admin/reports) to [activate](#activate), view and download daily reconciliation reports as CSV or PDF.
The [Profile Transactions Report](#ProfileTransactionReport) lists every transaction during a 24 hour period, including the full list and definition of transaction types and transaction metadata.
The [Profile Balances Report](#ProfileBalancesReport) provides the asset start and ending balances for every Profile during a 24 hour period.
> Migrating to the Dashboard? Existing legacy reconciliation reports are available in the Dashboard.
> The historical reconciliation reports match the files on the SFTP server, where they continue to be available.
In the reports, the Profile's starting balance is impacted by any associated Profile Transaction, and results in the corresponding Profile end balance.
* If a Profile has ever held a given asset at any point in the past, zero balances will be explicitly printed. For example, if Profile 1 held Bitcoin in the past, but not today, Profile Balances will appear as “BTC: 0”.
* If a Profile has never held an asset at any point in the past, zero balances will not be explicitly printed. For example, if Profile 1 has never held Bitcoin in the past, Profile Balances will not appear for the BTC asset at all.
Reports are in UTC 0 time, and have an exact hour cutoff for the UTC timezone indicated when [activating reporting](#activate).
Paxos delivers reports one time per day and does not support multiple cutoff times or changes to the pre-configured cutoff time.
## Onboard to Reporting
To start receiving daily reports, fill out the form on [Admin > Reports](https://dashboard.paxos.com/admin/reports).
Once submitted, you should start receiving reports in about five business days.
Reports are delivered on a go-forward basis, starting the first day reporting is activated.
> Contact [Support](https://support.paxos.com) for help obtaining older reports.
## Reporting Data Dictionary
This data dictionary provides a full list and definition of balance types.
### Profile Balances Report Fields
The following fields are provided on each row of the Profile Balances Report.
| Field | Data Type | Example/Description |
| ----------- | --------- | ----------------------------------------------------------------------- |
| Asset | String | USD, BTC, ETH, BCH, LTC, PAXG |
| Balance | String | 9977417.21588054 |
| BalanceType | Enum | See [BalanceType Value and Definitions](#BalanceTypeValuesDefinitions). |
| ProfileID | UUID | 7927d51a-a465-49b9-ab0e-1ca17b3a7c5b |
| Timestamp | Datetime | 2020-01-17T00:00:00.000Z |
### Profile Transactions Report Fields
The following fields are provided on each row of the Profile Transactions report.
| Field | Data Type | Always Returns Data | Example/Description |
| -------------------- | :-------: | :-----------------: | ---------------------------------------------------------------------------------------------------------------------------------------------------------------------------------------------------------------------------------- |
| AccountID | UUID | No | 1ab15e4f-6389-4a52-b908-62c3525b0da2 |
| Amount | String | Yes | 90.12345678 |
| Assets | String | Yes | USD, ETH, BTC, PAXG, BCH, LTC |
| BalanceType | Enum | Yes | See [BalanceType Values and Definitions](#BalanceTypeValuesDefinitions). |
| BaseAmount | String | No | `10.017` The amount in the base asset for this trade, currently only supported for QuoteExecutions. |
| Direction | String | Yes | CREDIT, DEBIT |
| ExternalID | String | No | Contains the transaction hash for a crypto deposit. Returns empty when no data is available. |
| Fee | String | No | `0.017` The fee for this interaction. Currently only supported for Transfers. |
| GroupID | UUID | No | Link for the debit and credit legs of an Internal Transfer. |
| IdentityID | UUID | No | 1ab15e4f-6389-4a52-b908-62c3525b0da2 |
| Market | String | No | ETHUSD, XBTUSD, PAXGUSD, BCHUSD, LTCUSD |
| Metadata | String | No | `{"key_1":"value_11","key_2":"value_23"}` Contains the customer specified metadata during a transaction on platform (withdrawal, transfer, quote execution) in json-string format. Returns empty when no data is available. |
| OrchestrationID | UUID | No | 7f716105-d501-40e8-a82f-309fffacd6d8 A unique identifier that links all related transactions within a single logical flow. For example, all balance updates during a deposit process. |
| OrchestrationRuleID | UUID | No | 9e124f3d-7c88-4b36-b54a-e389f6c398b2 The unique identifier of the automation rule that triggered this transaction set. |
| OrderType | String | No | LIMIT, MARKET, POSTONLYLIMIT, STOPMARKET, STOPLIMIT, HRQ |
| Price | String | No | 100.23 |
| ProfileID | UUID | Yes | 7927d51a-a465-49b9-ab0e-1ca17b3a7c5b |
| QuoteAmount | String | No | `10.50` The amount in the quote asset for this trade, currently only supported for QuoteExecutions. |
| Resource | Enum | Yes | See [Resource Values and Definitions](#ResourceValuesDefinitions). |
| ResourceID | UUID | Yes | ID of the Resource in question. For example, Order ID, Execution ID, Transfer ID. |
| ResourceRefID | String | No | Custom string specified in Create Order request as `ref_id`. |
| ResourceTimestamp | Datetime | No | The timestamp when the Resource was generated. For example, the time for an Order or an Execution. |
| RecourceTransferType | Enum | No | See [ResourceTransferType Values and Definitions](#ResourceTransferTypeValuesDefinitions). |
| Side | String | No | SELL, BUY |
| Timestamp | Datetime | Yes | The record timestamp. For example: 2024-01-17T18:36:31.345Z |
| TransactionType | Enum | Yes | See [TransactionType Values and Definitions](#TransactionTypeValuesDefinitions). |
| UniqueTxID | String | Yes | Unique identifier for a Profile transaction. Use with direction to guarantee unique line-item. |
### BalanceType Values and Definitions
The BalanceType field indicates which specific balance the row is referring to.
It provides a way to precisely follow movement of funds as transactions complete in the [Profile Transaction Report](#ProfileTransactionReport), and identify the volume of funds held in reserve or in pending transactions at the end of each day in the [Profile Balances Report](#ProfileBalancesReport).
| BalanceType Enum Value | Description |
| ---------------------- | ------------------------------------------------------------------------------------------------------------------------------- |
| AVAILABLE | Balance that is currently available to trade or transfer. |
| PENDING\_DEBIT | Balance that is currently reserved for pending debits. For example, an outgoing transfer has been requested but not completed. |
| TRADING | Balance that is currently reserved for trading. For example, a limit order has been placed but not filled. |
| PENDING\_CREDIT | Balance that is currently reserved for pending credits. For example, an incoming transfer has been requested but not completed. |
### Resource Values and Definitions
The Resource field denotes the category of transaction being recorded on each row of the [Profile Transactions Report](#ProfileTransactionReport).
| Resource Enum Value | Description |
| ------------------------ | ------------------------------------------------------------------------------------------- |
| CONVERSION | Stablecoin conversion transaction. |
| EXECUTION | An execution of an order on the order book. There can be multiple executions for one order. |
| ORDER | A market or limit order placed for trading. Using either FIX or the v2 Order service. |
| QUOTE\_EXECUTION | A Held Rate Quote transaction. |
| TRANSFER | A transfer on or off the Paxos platform. For example, a wire withdrawal or crypto deposit. |
| WIRE\_WITHDRAWAL\_UPLOAD | A manually created wire withdrawal. |
### ResourceTransferType Values and Definitions
The ResourceTransferType identifies the direction of each transfer and whether it was a movement of fiat into or out of the Paxos Platform (WIRE\_, SEN\_), a movement of crypto asset into or out of Paxos (CRYPTO\_), or a movement of crypto or fiat between profiles within the Paxos platform (PROFILE\_TRANSFER).
| Resource | TransferType | Description |
| -------- | -------------------------- | ------------------------------------------------------------------------------------------------------------- |
| TRANSFER | CRYPTO\_DEPOSIT | A crypto deposit into Paxos. |
| TRANSFER | CRYPTO\_WITHDRAWAL | A crypto withdrawal out of Paxos. |
| TRANSFER | INTERNAL\_TRANSFER\_CREDIT | Transfer received from another Profile. |
| TRANSFER | INTERNAL\_TRANSFER\_DEBIT | Transfer sent to another Profile. |
| TRANSFER | PAXOS\_TRANSFER\_CREDIT | Transfer received from another Peer. |
| TRANSFER | PAXOS\_TRANSFER\_DEBIT | Transfer sent to another Peer. |
| TRANSFER | SEN\_DEPOSIT | Deprecated. Does not appear in new reports. A deposit into Paxos platform on the Silvergate Exchange Network. |
| TRANSFER | SEN\_WITHDRAWAL | Deprecated. Does not appear in new reports. A withdrawal out of Paxos on the Silvergate Exchange Network . |
| TRANSFER | WIRE\_DEPOSIT | A wire deposit into Paxos. |
| TRANSFER | WIRE\_WITHDRAWAL | A wire withdrawal out of Paxos. |
### TransactionType Values and Definitions
The values of the TransactionType vary depending on the Resource.
The TransactionType denotes the specific purpose of the transaction.
| Resource | TransactionType | Description |
| ---------------- | ------------------------ | ------------------------------------------------------------------------------------------------------------------------------------------------------------------------------------------- |
| CONVERSION | CONVERSION\_CANCELLATION | A transaction to unreserve funds for a created stablecoin conversion. |
| CONVERSION | CONVERSION\_CREATION | A transaction to reserve funds for a stablecoin conversion. |
| CONVERSION | CONVERSION\_SETTLEMENT | Settlement of the stablecoin conversion transaction. |
| EXECUTION | COMMISSION | A transaction to collect commission from an executed trade. |
| EXECUTION | SETTLE\_BASE | Settlement of the base (crypto) side of the trade to/from the counterparty. |
| EXECUTION | SETTLE\_QUOTE | Settlement of the quote (cash) side of the trade to/from the counterparty For example, a SELL order has been executed. |
| EXECUTION | SETTLE\_UNRESERVE | A transaction to unreserve funds for trading because of a BUY side price improvement on an executed order. For example, a limit order used a BUY price of $50,000 but executed at $49,000). |
| ORDER | RESERVE | A transaction to reserve funds for trading. For example, a limit order has been placed. |
| ORDER | UNRESERVE | A transaction to unreserve funds for trading. For example, a limit order has been canceled. |
| QUOTE\_EXECUTION | COLLECT\_FROM\_EXECUTOR | A record of transaction indicating a credit of the account. |
| QUOTE\_EXECUTION | FUND\_EXECUTOR | A record of transaction indicating a debit of the account. |
| TRANSFER | DEPOSIT\_COMPLETION | A transaction to complete a deposit, resulting in funds being credited. |
| TRANSFER | DEPOSIT\_CREATION | A transaction to deposit funds into the Paxos platform. |
| TRANSFER | DEPOSIT\_FAILURE | A transaction to reserve the funds of a failed deposit into pending debit where they can move off the Paxos platform back to their source. |
| TRANSFER | FEE\_DEBIT | A transaction to debit the fees upon completion of the transfer. |
| TRANSFER | FEE\_ENCUMBERMENT | A transaction to reserve the transfer fee. |
| TRANSFER | INTERNAL\_TRANSFER | A book transfer of funds to another profile under the same customer account. |
| TRANSFER | PAXOS\_TRANSFER | A book transfer of funds to another Paxos customer. |
| TRANSFER | WITHDRAWAL\_COMPLETION | A transaction to complete a withdrawal, resulting in the transfer of funds off the Paxos platform. |
| TRANSFER | WITHDRAWAL\_CREATION | A transaction to initiate a withdrawal typically reserving the debit amount. For example, a wire withdrawal or crypto withdrawal. |
| TRANSFER | WITHDRAWAL\_FAILURE | A transaction to return funds previously reserved for a failed withdrawal. |
# Make First API Request
Source: https://docs.sandbox.paxos.com/guides/developer/request
Use the access token to retrieve a list of Profiles.
Since every account has a `DEFAULT` [Profile](/api-reference/endpoints/profiles), sending a request using [List Profiles](/api-reference/endpoints/profiles/list-profiles) will always return a result, assuming the `funding:read_profile` scope was included when [adding scopes](/guides/developer/authenticate#scopes) to the client.
Include the [access token](/guides/developer/authenticate#token) from the authentication request in the authorization header.
### Sandbox
```shell highlight={3}
curl --location 'https://api.sandbox.paxos.com/v2/profiles?order=ASC&order_by=CREATED_AT' \
--header 'Accept: application/json' \
--header 'Authorization: Bearer {access_token}'
```
### Production
```shell highlight={3}
curl --location 'https://api.paxos.com/v2/profiles?order=ASC&order_by=CREATED_AT' \
--header 'Accept: application/json' \
--header 'Authorization: Bearer {access_token}'
```
A successful response includes all Profiles the client has access to.
Using the `?order=ASC&order_by=CREATED_AT` parameters ensures the `DEFAULT` Profile is first in the list.
```json highlight={3-7}
{
"items": [
{
"id": "0d3172c5-8840-4bae-bdd4-30688f0268fc",
"nickname": "default",
"type": "DEFAULT"
},
{
"id": "7437da4d-c114-4a1f-8659-ceeaf868a1eb",
"nickname": "Mint",
"type": "NORMAL"
},
{
"id": "4bdfed80-ed0d-461b-bfee-0ff5011a9db5",
"nickname": "Redeem",
"type": "NORMAL"
},
]
}
```
If you get an error, run through the [credentials](/guides/developer/credentials) and [authentication](/guides/developer/authenticate) guides and ensure your setup is correct.
If things are still not working, contact [Support](https://support.paxos.com).
# Request Signing
Source: https://docs.sandbox.paxos.com/guides/developer/request-signing
Use JWS to add an additional layer of security to every request.
Request signing adds an additional layer of security to every request you send to Paxos, and can help protect your account should your Paxos API Client ID and Secret become compromised.
Once request signing is enabled on your account, Paxos rejects all unsigned requests to authenticated endpoints.
> Request signing must be activated by Paxos. Contact [Support](https://support.paxos.com) to get started.
Signed requests use your own private key, similar to [mTLS](https://www.cloudflare.com/learning/access-management/what-is-mutual-tls/) or [SSH](https://www.ssh.com/academy/ssh/public-key-authentication) public authentication, and then attach the signature to the request as the `Paxos-Signature HTTP header`, using the JSON Web Signature (JWS) format.
## Set Up Signed Request
To get started, you will need to have the **Client ID** and **Secret** available for constructing the payload.
Additionally, install the JOSE/JWS library in the language of your choice, for example [PyJWT](https://pypi.org/project/PyJWT/) which includes support for crypto.
> Never share your private keys with anyone, especially for Production deployments.
> Using an HSM, secrets manager, or key-management service may provide an additional layer of protection.
### ➊ Generate Key Pair
Generate the JWS signature with your private key using a combination of the base64url encoded header and payload, using either the EdDSA (ed25519) or the ES256 algorithm.
> To use the EdDSA (ed25519) algorithm when generating key pairs, install [OpenSSL 3](https://openssl-library.org/) using the package manager of your choice.
> Older versions of OpenSSL do not support the EdDSA (ed25519) algorithm.
To generate a new ES256 private key using the terminal:
1. Ensure OpenSSL 3 is installed: `openssl version`
2. Create a new ES256 private key in the current working directory: `openssl ecparam -name prime256v1 -genkey -noout -out my-private-ec.pem`
3. Generate the public key in the current working directory: `openssl ec -in my-private-ec.pem -pubout > my-public-ec.pem`
The process for EdDSA (ed25519) keys is similar:
1. Ensure OpenSSL 3 is installed: `openssl version`
2. `openssl genpkey -algorithm ed25519 -outform PEM -out my-private-key.pem`
3. `openssl pkey -in my-private-key.pem -pubout > my-public-key.pem`
> Never share your private keys with anyone, especially for Production deployments.
> Using an HSM, secrets manager, or key-management service may provide an additional layer of protection.
### ➋ Add Public Key to Your Paxos Account
Go to **Admin > API** in either \[Sandbox]\[admin-api-sandbox] or \[Production]\[admin-api-production] and find the **API Credentials** that require request signing.
Go to \*\* Admin > API\*\* in either [Sandbox](https://dashboard.sandbox.paxos.com/admin/api) or [Production](https://dashboard.paxos.com/admin/api) and find the **API Credentials** that require request signing.
> Request signing must be activated by Paxos. Contact [Support](https://support.paxos.com) to get started.
Scroll down and use **Edit API Credentials** to make changes.
Switch **Request Signing** to open the edit dialogue and add your *Public Key*.
Once you **Save Changes**, contact [Support](https://support.paxos.com) to get started.
### ➌ Generate Signed Request
Use a JOSE/JWS library such as [PyJWT](https://pypi.org/project/PyJWT/) to generate the signature.
#### Construct Header
The header must include the following:
| Header Item | Description |
| ---------------------------- | ---------------------------------------------------------------------------------------------------------------------------------------- |
| **kid** | The Key ID of the configured Public Key. Retrieve from Admin > API > API Cretentials. |
| **alg** | The algorithm used to generate the Key. The value must be: EdDSA or ES256. Retrieve from Admin > API > API Cretentials. |
| **paxos.com/timestamp** | The current timestamp in UNIX time format. Signatures remain valid for 30 minutes after the specified timestamp. |
| **paxos.com/request-method** | The POST and PUT methods also require the JWS payload in the body bytes. |
| **paxos.com/request-path** | The endpoint path, including query parameters. |
Putting it together, your header should look similar to the following:
```json
{
"kid" : "5498f424-78aa-414b-a515-13929e6951db",
"alg" : "ES256",
"paxos.com/timestamp" : "1645503272",
"paxos.com/request-method" : "POST",
"paxos.com/request-path" : "/v2/transfer/deposit-addresses"
}
```
When using a `POST` or `PUT` method, include the JWS payload in the body bytes:
```json
{"profile_id":"42bb1a2e-a68e-44d7-b5f1-59ccc5c13e91","crypto_network":"ETHEREUM"}
```
#### Create Signature
Use a library such as [PyJWT](https://pypi.org/project/PyJWT/) to generate the request signature.
First, install the library and start a new session.
For example:
```shell
pip3 install "pyjwt[crypto]" && python3
```
Then generate the JWT signature:
```py
>>> import jwt
>>> payload = b'{"profile_id":"42bb1a2e-a68e-44d7-b5f1-59ccc5c13e91","crypto_network":"ETHEREUM"}'
>>> with open('./my-private-ec.pem', 'rb') as f: key = f.read()
...
>>> alg = "ES256" if key.find('BEGIN EC PRIVATE'.encode('ascii')) > 0 else "EdDSA"
>>> headers = {"kid": "5498f424-78aa-414b-a515-13929e6951db", "alg": alg,
"paxos.com/timestamp": "1645503272",
"paxos.com/request-method" : "POST",
"paxos.com/request-path": "/v2/transfer/deposit-addresses"}
>>> signature = jwt.api_jws.encode(payload=payload, key=key, headers=headers,algorithm=alg)
>>> print(signature)
eyJ0eXAiOiJKV1QiLCJhbGciOiJFUzI1NiIsImtpZCI6IjU0OThmNDI0LTc4YWEtNDE0Yi1hNTE1LTEzO
TI5ZTY5NTFkYiIsInBheG9zLmNvbS90aW1lc3RhbXAiOiIxNjQ1NTAzMjcyIiwicGF4b3MuY29tL3JlcX
Vlc3QtbWV0aG9kIjoiUE9TVCIsInBheG9zLmNvbS9yZXF1ZXN0LXBhdGgiOiIvdjIvdHJhbnNmZXIvZGV
wb3NpdC1hZGRyZXNzZXMifQ.eyJwcm9maWxlX2lkIjoiNDJiYjFhMmUtYTY4ZS00NGQ3LWI1ZjEtNTljY
2M1YzEzZTkxIiwiY3J5cHRvX25ldHdvcmsiOiJFVEhFUkVVTSJ9.7x8b_4j1dFMd1XWcmpGaf5OiyU0lo
2fbGlbe8epuiAJFpFziwxhhKHbc7-DaqKMV9MTTARX8VM3d2YSugPEAow
>>> exit()
```
### ➍ Send Signed Request
Use the generated signature to send a signed request to Paxos.
First, authenticate with the APIs.
For example:
```shell
curl https://oauth.sandbox.paxos.com/oauth2/token \
-F grant_type=client_credentials \
-F client_id={client_id} \
-F client_secret={secret} \
-F scope="transfer:write_deposit_address"
```
Then send the signed API request:
```shell
curl -X POST https://api.sandbox.paxos.com/v2/transfer/deposit-addresses
-H "Authorization: Bearer {access_token}"
-H "Paxos-Signature: eyJ0eXAiOiJKV1QiLCJhbGciOiJFUzI1NiIsImtpZCI6IjU0OThmNDI0LTc4Y
WEtNDE0Yi1hNTE1LTEzOTI5ZTY5NTFkYiIsInBheG9zLmNvbS90aW1lc3RhbXAiOiIxNjQ1NTAzMjcyIiw
icGF4b3MuY29tL3JlcXVlc3QtbWV0aG9kIjoiUE9TVCIsInBheG9zLmNvbS9yZXF1ZXN0LXBhdGgiOiIvd
jIvdHJhbnNmZXIvZGVwb3NpdC1hZGRyZXNzZXMifQ.eyJwcm9maWxlX2lkIjoiNDJiYjFhMmUtYTY4ZS00
NGQ3LWI1ZjEtNTljY2M1YzEzZTkxIiwiY3J5cHRvX25ldHdvcmsiOiJFVEhFUkVVTSJ9.7x8b_4j1dFMd1
XWcmpGaf5OiyU0lo2fbGlbe8epuiAJFpFziwxhhKHbc7-DaqKMV9MTTARX8VM3d2YSugPEAow"
-d '{"profile_id":"42bb1a2e-a68e-44d7-b5f1-59ccc5c13e91","crypto_network":"ETHEREUM"}'
```
## Manage Signed Requests
For Production environments, you may want to create multiple API Credentials with different permissions and authentication.
For example, you may want to sign all order and identity requests but not requests for historical data.
To do this, you can create multiple API Credentials and then enable request signing for only those users or applications dealing with sensitive information.
* **Use Multiple Request Signing Keys**. It is also possible for you to simultaneously use multiple request signing keys with a single API Credential. Once you add an additional request signing key, it is immediately available for use, along with any existing key, for the API Credential. Used in this way, you can assign different request signing keys to different users or applications that use the same API Credential. This can come in handy if you need to revoke access for an application or user with a specific key: The API Credentials remain active, along with the other keys.
* **Rotate API Credentials**. If your API Credentials needs to be changed, the Rotate Credentials option regenerates a new Secret, leaving the Client ID unchanged. When you rotate credentials, you will need to update any implementation that uses the Client ID. Once that is done, your request signing keys work with the new Secret.
# Sandbox
Source: https://docs.sandbox.paxos.com/guides/developer/sandbox
Use the Sandbox environment to mock flows, execute transfers and test integrations.
The Developer Sandbox replicates core [v2 API](/api-reference) functionality with an automated system that uses test fund to simulate normal activities, including a few Sandbox-only endpoints.
> To start using the Sandbox environment, [create a Developer account](https://dashboard.sandbox.paxos.com/).
## Sandbox Testnets and Devnets
When you use [Create Sandbox Deposit](/api-reference/endpoints/sandbox-deposits/create-sandbox-deposit) to fund a Profile, the platform creates the asset on the testing network.
The asset can then be [transferred](/api-reference/endpoints/crypto-withdrawals/create-crypto-withdrawal) to any off-platform address that supports the test network.
Similarly, when using [create a deposit address](/api-reference/endpoints/deposit-addresses/create-deposit-address) in Sandbox, the generated address can be used to transfer test assets to the Paxos platform.
| Crypto Network | Supported Testnet/Devnet |
| -------------- | ------------------------ |
| Arbitrum One | Sepolia |
| Bitcoin | Testnet3 |
| Bitcoin Cash | Testnet |
| Ethereum | Sepolia |
| Litecoin | Testnet |
| Polygon POS | Sepolia |
| Solana | Devnet |
## Sandbox Identity Testing
When testing the [Identity APIs](/api-reference/endpoints/identity) in Sandbox, you may be blocked by a verification process.
If this is the case, use [Sandbox Set Identity Status](/api-reference/endpoints/sandbox-identity/sandbox-set-identity-status) to change `id_verification_status` and `sanctions_verification_status` to "APPROVED"`and enable an individual identity to transact during Sandbox testing.
To enable the Institution to transact during Sandbox testing, set `sanctions\_verification\_status` to \"APPROVED"`.
## Sandbox Fiat Transfer Testing
To test [Fiat Transfers API](/api-reference/endpoints/fiat-transfers) in Sandbox, the [Initiate Sandbox Fiat Deposit](/api-reference/endpoints/sandbox-fiat-transfers) endpoint starts test fiat deposit that will be processed based on the `memo_id` from a previous [Fiat Deposit Instructions](/api-reference/endpoints/fiat-transfers/list-fiat-deposit-instructions) response.
Learn more in the [Fiat Transfer Guide](/guides/developer/fiat-transfers/quickstart#2-send-fiat-to-paxos).
> When [creating API credentials](/guides/developer/credentials) via the Dashboard, the `transfer:write_sandbox_fiat_deposit` scope may not appear in the UI.
> Including the scope when [authenticating](/guides/developer/authenticate) may result in an `invalid_scope` error.
> Contact [Support](https://support.paxos.com) if you run into any issues using this scope.
# Enhanced Due Diligence
Source: https://docs.sandbox.paxos.com/guides/identity/edd
Manage the enhanced due diligence of an Identity on the Paxos Platform.
To ensure that Paxos meets regulatory requirements, when an identity is deemed high risk according to Paxos risk rating methodology, Paxos initiates a process called Enhanced Due Diligence (EDD).
This can occur during onboarding, or during the lifecycle of an active identity (for example, if identity information changes that impacts risk rating; if suspicious transaction patterns occur on the account).
When an identity enters the EDD process, Paxos requires the collection of documentary evidence supporting the initial KYC information provided.
Paxos streamlines the collection of EDD information using a webhook-based or polling-based approach, which leverages [Paxos Webhooks](/guides/webhooks), [Events API](/api-reference/events) and [Document Upload API](/api-reference/endpoints/identity-documents/document-upload).
## Webhook-based Approach
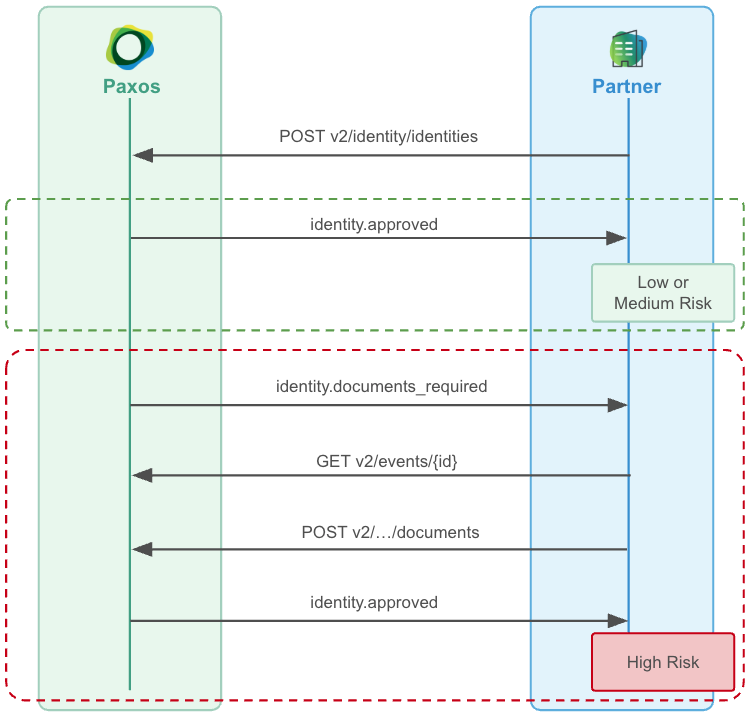
### ➊ Consume Documents Required Events
Setup a [Webhook Consumer](/guides/webhooks/quickstart) to receive `identity.documents_required` [events](/api-reference/events) for your end users.
### ➋ Fetch Required Documents
Call [Get Event](/api-reference/endpoints/events/get-event) to fetch the event's `identity_documents_required` object, which will allow you to understand which documents are required.
### ➌ Upload the Required Documents
For the event's associated `identity_id`, call [Document Upload](/api-reference/endpoints/identity-documents/document-upload) to upload the required documents, either synchronously if you already have the documents, or asynchronously if you need to reach back out to your customer for them to provide.
### ➍ Wait for Approval or Denial
This will be followed by an `identity.approved` or `identity.denied` event based on the onboarding decision for that end user (this might take up to 1 full business day to complete).
## Polling-based Approach
### ➊ Poll for Documents Required Events
Poll [List Events](/api-reference/endpoints/events/list-events), offsetting the `created_at.gt` filter for each subsequent poll, fetching all `identity.documents_required` events.
Paxos recommends you keep track of the [Event](/api-reference/events) ids you've processed in order to idempotently process the event.
### ➋ Upload the Required Documents
For the event's associated `identity_id`, call [Document Upload](/api-reference/endpoints/identity-documents/document-upload) to upload the required documents, either synchronously if you already have the documents, or asynchronously if you need to reach back out to your customer for them to provide.
# Overview
Source: https://docs.sandbox.paxos.com/guides/identity/index
Onboard users directly to the Paxos Platform to accelerate speed to market and outsource your compliance needs.
## Get Started
Onboard a Person for Crypto Brokerage
Onboard an Institution for Crypto Brokerage
Discover what details are required for identities
## Manage Lifecycle
Automate document collection to unblock onboarding high risk identities
Automate periodic kyc refresh to prevent users from losing access to trade
# Onboarding an Institution for Crypto Brokerage
Source: https://docs.sandbox.paxos.com/guides/identity/institution-crypto-brokerage
Create an Institution Identity, Account and Profile to provide Buy, Hold and Sell Crypto Brokerage for Institutions
This guide walks through setting up a [Fiat and Crypto Subledger](/guides/crypto-brokerage/ledger-type#fiat-and-crypto-subledger) crypto brokerage integration for institutions,
creating an Institution [Identity](/api-reference/endpoints/identity) and a related [Account](/api-reference/endpoints/accounts) and [Profile](/api-reference/endpoints/profiles) to book orders using the [Order API](/api-reference/endpoints/orders). First, we will
create an [Identity](/api-reference/endpoints/identity) to represent the institution's KYC information on the Paxos Platform. Then we will create an [Account](/api-reference/endpoints/accounts) which sets
up the structure of the brokerage account. Then we will create a [Profile](/api-reference/endpoints/profiles) that represents the institution's fiat and crypto asset holdings. Then we will integrate with the [Order](/api-reference/endpoints/orders) API to
set up a simple Buy, Hold and Sell integration. This guide should take around 30 minutes.
## Prerequisites
* Sign up to the [Paxos Dashboard](/guides/dashboard/account) in Sandbox
* Reach out to [Support](https://support.paxos.com) to provision access to the [Identity API](/api-reference/endpoints/identity)
## Authenticate in Sandbox
Create an [API Key](/guides/dashboard/admin/api) on the Sandbox [Paxos Dashboard](/guides/dashboard/account) with the following scopes to access the [Identity](/api-reference/endpoints/identity),
[Account](/api-reference/endpoints/accounts) and [Order](/api-reference/endpoints/orders) APIs needed for this guide
* `identity:read_identity`
* `identity:read_account`
* `identity:write_identity`
* `identity:write_account`
* `funding:read_profile`
* `funding:write_profile`
* `exchange:read_order`
* `exchange:write_order`
Run below to get the `access_token` from OAuth:
```shell
curl --location 'https://oauth.sandbox.paxos.com/oauth2/token' \
--form grant_type=client_credentials \
--form client_id={paxos_client_id} \
--form client_secret={paxos_secret} \
--form scope='identity:read_identity identity:read_account identity:write_identity identity:write_account funding:read_profile funding:write_profile exchange:read_order exchange:write_order'
```
Confirm the response includes requisite scopes and save the `access_token` to use in the request authorization header
throughout this guide.
```json
{
"access_token": "{access_token}",
"expires_in": 3599,
"scope": "identity:read_identity identity:read_account identity:write_identity identity:write_account funding:read_profile funding:write_profile exchange:read_order exchange:write_order",
"token_type": "bearer"
}
```
Include the Authorization header with the bearer token on all API requests `-H "Authorization: Bearer $TOKEN"`.
## Creating an Institution Identity and Account
Institution identities are used to represent all non-person entities. Details for institution identity type are recorded in institution\_details. An institution identity also has institution\_members associated with it. This defines persons or other entities that have some relationship to the institution.
For detailed information about institution types, subtypes, and required fields, please refer to the [Institution Required Details](/guides/identity/required-details#required-institution-details) documentation.
### ➊ Creating Person Identities for Institution Members
Before creating an institution identity, you need to create person identities that will be associated with the [institution as members](/guides/identity/institution-types#member-roles) (e.g.
beneficial owners, authorized users, management control persons, etc.).
You'll need to create at least one person identity, but typically you'll create multiple identities for different roles within the institution.
The required fields for each [institution member role](/guides/identity/institution-types#member-roles) are different. Please reach out to [Support](https://support.paxos.com) for more information.
```shell
# Create a person identity
curl --location "https://api.sandbox.paxos.com/v2/identity/identities" \
--header "Authorization: Bearer {access_token}" \
--header "Content-Type: application/json" \
--data '{
"ref_id": "{your_end_user_ref_id}",
"person_details": {
"verifier_type": "PASSTHROUGH",
"passthrough_verifier_type": "JUMIO",
"passthrough_verified_at": "2021-06-16T09:28:14Z",
"passthrough_verification_id": "775300ef-4edb-47b9-8ec4-f45fe3cbf41f",
"passthrough_verification_status": "APPROVED",
"passthrough_verification_fields": ["FULL_LEGAL_NAME", "DATE_OF_BIRTH"],
"first_name": "Billy",
"last_name": "Duncan",
"date_of_birth": "1980-01-01",
"nationality": "USA",
"address": {
"address1": "123 Main St",
"city": "New York",
"province": "NY",
"country": "USA",
"zip_code": "10001"
},
"cip_id": "073-05-1127",
"cip_id_type": "SSN",
"cip_id_country": "USA",
"phone_number": "+1 555 678 1234",
"email": "example@somemail.org"
},
"customer_due_diligence": {
"estimated_yearly_income": "INCOME_50K_TO_100K",
"expected_transfer_value": "TRANSFER_VALUE_25K_TO_50K",
"source_of_wealth": "EMPLOYMENT_INCOME",
"employment_status": "FULL_TIME",
"employment_industry_sector": "ARTS_ENTERTAINMENT_RECREATION"
}
}'
```
Check the response to find the `identity_id` of the newly created person identity. You'll need this ID when creating the institution identity.
```json
{
"id": "{person_identity_id}",
"status": "PENDING",
"created_at": "2021-06-16T09:28:14Z",
"updated_at": "2021-06-16T09:28:14Z",
"ref_id": "{your_end_user_ref_id}",
"person_details": {
// ...
}
}
```
### ➋ Creating an Institution Identity
To create an institution identity, you'll need to provide:
* The details of the institution according to the [Institution Required Details](/guides/identity/required-details#required-institution-details)
* Information about institution members and their roles
Here's an example of creating a institution (see API documentation for full request details):
```shell
# Example API call to create an institution identity
curl --location "https://api.sandbox.paxos.com/v2/identity/identities" \
--header "Authorization: Bearer {access_token}" \
--header "Content-Type: application/json" \
--data '{
"institution_members": [
{
"identity_id": "{person_identity_id}",
"roles": ["BENEFICIAL_OWNER", "AUTHORIZED_USER", "MANAGEMENT_CONTROL_PERSON"]
}
],
"institution_details": {
"name": "Foogle",
"business_address": {
"country": "United States",
"address1": "1 Example St",
"city": "New York",
"province": "NY",
"zip_code": "10001"
},
"email": "johndoe@foogle.com",
"institution_type": "CORPORATION",
"institution_sub_type": "HEDGE_FUND",
"cip_id": "12-3456789",
"cip_id_type": "EIN",
"cip_id_country": "USA",
"govt_registration_date": "2021-04-14T00:00:00Z",
"incorporation_address": {
"country": "United States",
"address1": "1 Example St",
"city": "New York",
"province": "NY",
"zip_code": "10001"
},
"regulation_status": "US_REGULATED",
"trading_type": "PUBLIC",
"listed_exchange": "NASDAQ",
"ticker_symbol": "FOOG",
"regulator_name": "SEC",
"regulator_jurisdiction": "USA",
"regulator_register_number": "12-3456789",
"business_description": "Foo"
},
"ref_id": "{your_inst_end_user_ref_id}"
}'
```
The above example is a simplified version. For production use, you'll need to provide additional details based on your institution type. Refer to the [Institution Required Details](/guides/identity/required-details#required-institution-details) documentation for complete requirements.
The `cip_id` of an [Identity](/api-reference/endpoints/identity) is required to be unique. If a `409 duplicate cip_id` error occurs,
handle it by either:
* Refusing to support crypto brokerage services for institutions that have a duplicate `cip_id`
* If they are confirmed to be the same [Identity](/api-reference/endpoints/identity), create a new [Account](/api-reference/endpoints/accounts) to represent each institution account.
Check the response to find the `identity_id` of the newly created [Identity](/api-reference/endpoints/identity) and notice the status of the [Identity](/api-reference/endpoints/identity) is `PENDING`.
Paxos will make an [Onboarding Decision](/guides/identity/statuses#onboarding-decision) and asynchronously update the status to either `DENIED` or `APPROVED`.
```json
{
"id": "{institution_identity_id}",
"status": "PENDING",
"created_at": "2021-06-16T09:28:14Z",
"updated_at": "2021-06-16T09:28:14Z",
"ref_id": "{your_inst_end_user_ref_id}",
"institution_details": {
// ...
}
}
```
An [Identity](/api-reference/endpoints/identity) might stay in `PENDING` due to being deemed high risk by Paxos. This [Identity](/api-reference/endpoints/identity) will be
required to undergo [Enhanced Due Diligence](/guides/identity/edd). See [how to automate document collection](/guides/identity/edd) to
allow `HIGH` risk customers to onboard to Paxos.
### ➌ Wait for the Identity to be Approved
You'll need to reach out to [Support](https://support.paxos.com) as by default the institution will be stuck in `PENDING` due to
waiting for document verification, depending on your integration type document verification may not be required - but it
is by default.
You can check the status of the institution identity by calling the [Get Identity](/api-reference/endpoints/identity/get-identity) endpoint:
```shell
# Check identity status
curl --location "https://api.sandbox.paxos.com/v2/identity/identities/{institution_identity_id}" \
--header "Authorization: Bearer {access_token}"
```
* Use a [Webhook](/guides/webhooks) integration to asynchronously process [`identity.approved`](/api-reference/webhooks) and [`identity.denied`](/api-reference/webhooks)
events to notify users when they have been onboarded to Paxos.
### ➍ Creating an Account and Profile
Now we are ready to make an [Account](/api-reference/endpoints/accounts) and [Profile](/api-reference/endpoints/profiles) for the institution [Identity](/api-reference/endpoints/identity). An [Account](/api-reference/endpoints/accounts) logically relates to an institution's brokerage account,
an [Identity](/api-reference/endpoints/identity) therefore can have one or many [Accounts](/api-reference/endpoints/accounts).
```shell
# Create account and profile
curl --location "https://api.sandbox.paxos.com/v2/identity/accounts" \
--header "Authorization: Bearer {access_token}" \
--header "Content-Type: application/json" \
--data '{
"create_profile": true,
"account": {
"identity_id": "{institution_identity_id}",
"name": "Institution Brokerage Account",
"type": "CRYPTO_BROKERAGE"
}
}'
```
When you create an account, a profile is automatically created and associated with it. You'll need the profile ID to book orders, so you should retrieve it after creating the account:
```shell
# Get the profile ID associated with the account
curl --location "https://api.sandbox.paxos.com/v2/profiles?account_id={account_id}" \
--header "Authorization: Bearer {access_token}"
```
## Booking an Order
We will use the [Order](/api-reference/endpoints/orders) API to create buy and sell orders. We recommend also
taking a look at the [FIX](/guides/crypto-brokerage/fix) and [WebSocket](/api-reference/websockets/overview) solutions and using the best combination of APIs
for the specific use case.
### ➊ Fund the Account
In a complete integration, follow the [Fiat Transfers Funding Flow](/guides/developer/fiat-transfers/quickstart) guide to learn how to fund institution assets using
a [Fiat Deposit](/api-reference/endpoints/fiat-transfers).
For this guide, we will use the sandbox-only Test Funds feature in [Dashboard](https://dashboard.sandbox.paxos.com/) to fund the [Identity](/api-reference/endpoints/identity) with \$10,000 USD. First,
navigate to the [Dashboard Landing Page](https://dashboard.sandbox.paxos.com/) and locate the `Fund` button.
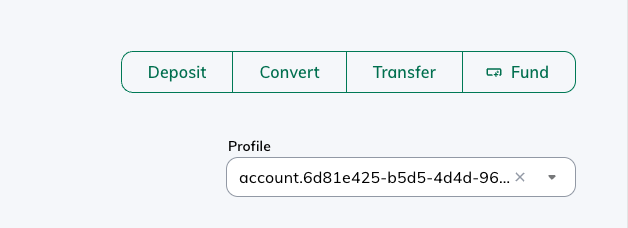
Then select the [Profile](/api-reference/endpoints/profiles) related to the [Account](/api-reference/endpoints/accounts) created and fund for \$10,000 USD
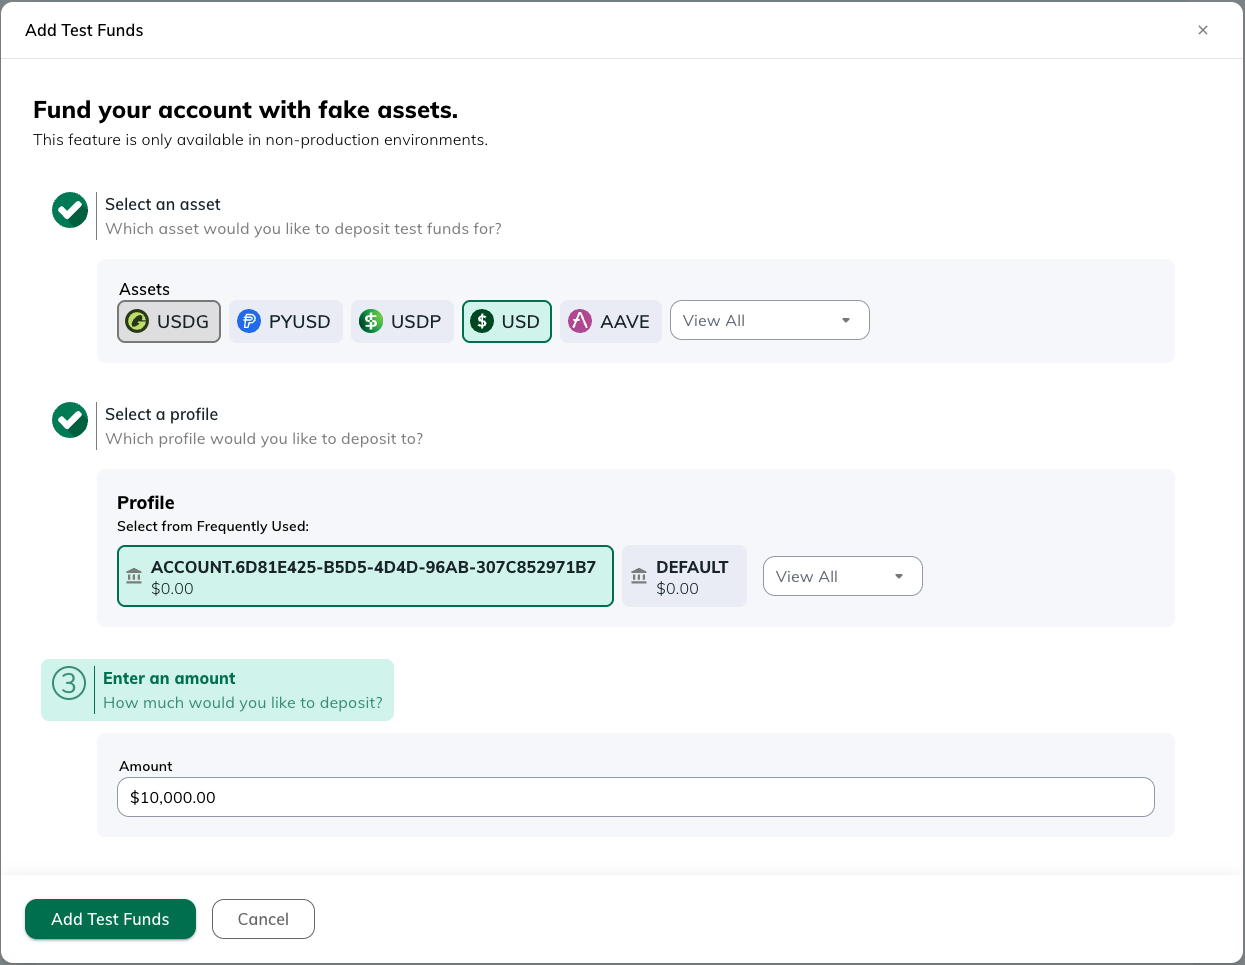
### ➋ Creating an Order
To book an order, specify the `profile_id` which is linked to the `account_id` created above *(if one
exists, else the omnibus `profile_id`)*.
### Buy
```shell
curl --location "https://api.sandbox.paxos.com/v2/profiles/{profile_id}/orders" \
--request "POST" \
--header "Authorization: Bearer {access_token}" \
--data '{
"side": "BUY",
"market": "ETHUSD",
"type": "LIMIT",
"price": "1814.8",
"base_amount": "1",
"identity_id": "{institution_identity_id}",
"identity_account_id": "{account_id}"
}'
```
### Sell
```shell
curl --location "https://api.sandbox.paxos.com/v2/profiles/{profile_id}/orders" \
--request "POST" \
--header "Authorization: Bearer {access_token}" \
--data '{
"side": "SELL",
"market": "ETHUSD",
"type": "LIMIT",
"price": "1804.2",
"base_amount": "1",
"identity_id": "{institution_identity_id}",
"identity_account_id": "{account_id}"
}'
```
You can check the status of the order by calling
```shell
curl --location "https://api.sandbox.paxos.com/v2/profiles/{profile_id}/orders/{order_id}" \
--request "GET" \
--header "Authorization: Bearer {access_token}"
```
And that is it, congratulations on completing your first end-to-end crypto brokerage integration for institutions with Paxos!
# Institution Types and Members
Source: https://docs.sandbox.paxos.com/guides/identity/institution-types
Learn about institution types, member roles, and requirements
## Institution Types
### Institution Type
Institution type (`institution_type`) is the primary legal structure of the institution, which can be one of the following:
| Institution Type | Description |
| ---------------- | ------------------------------------------------------------------------------------------------------- |
| `CORPORATION` | A legal entity that is separate and distinct from its owners |
| `LLC` | Limited Liability Company, a business structure that combines elements of partnerships and corporations |
| `TRUST` | A legal entity created to hold and manage assets for beneficiaries |
| `PARTNERSHIP` | A business relationship between two or more individuals who share management and profits |
### Institution Subtypes
Institution subtype (`institution_sub_type`) is the primary area of business activity of the institution,
work with your Paxos Partner to understand the mapping from your institution subtypes to ours.
Paxos prohibits certain types of business activity ("Prohibited Businesses") in accordance with its Compliance policies.
The following non-exhaustive list is representative of the type of activity that Paxos prohibits on its platform. By creating a Paxos Identity, Paxos customers agree not to use Paxos services in connection with any of the following Prohibited Businesses.
* `ADULT_ENTERTAINMENT`
* `DRUGS`
* `RANSOMWARE`
* `SHELL_BANK`
* `WEAPONS`
### Creating Financially Regulated Institutions
Please refer to the following table for creating institutions which are financially regulated.
| Regulation Status | Description |
| ----------------- | ------------------------------------------------------------ |
| `US_REGULATED` | Institution financially regulated in the US |
| `INTL_REGULATED` | Institution financially regulated by an international entity |
| `NON_REGULATED` | Non-financially regulated institution |
Note that each category of `regulation_status` then has additional validations tied to `trading_type` and other required fields.
| Regulation Status | Trading Type | Fields Required | Notes |
| ----------------- | ---------------------------- | -------------------------------------------------------------------------------------------------------------------------------------- | --------------------------------------- |
| `US_REGULATED` | `PRIVATE` | `regulator_name`, `regulator_jurisdiction`, `regulator_register_number` | Not publicly traded |
| `US_REGULATED` | `PUBLIC` | `listed_exchange`, `ticker_symbol`, `regulator_name`, `regulator_jurisdiction`, `regulator_register_number` | Publicly traded |
| `US_REGULATED` | `PUBLICLY_TRADED_SUBSIDIARY` | `listed_exchange`, `ticker_symbol`, `regulator_name`, `regulator_jurisdiction`, `regulator_register_number`, `parent_institution_name` | Subsidiary of a publicly traded company |
| `INTL_REGULATED` | `PRIVATE` | `regulator_name`, `regulator_jurisdiction`, `regulator_register_number` | Not publicly traded |
| `INTL_REGULATED` | `PUBLIC` | `listed_exchange`, `ticker_symbol`, `regulator_name`, `regulator_jurisdiction`, `regulator_register_number` | Publicly traded |
| `INTL_REGULATED` | `PUBLICLY_TRADED_SUBSIDIARY` | `listed_exchange`, `ticker_symbol`, `regulator_name`, `regulator_jurisdiction`, `regulator_register_number`, `parent_institution_name` | Subsidiary of a publicly traded company |
| `NON_REGULATED` | `PRIVATE` | None | Not publicly traded |
| `NON_REGULATED` | `PUBLIC` | `listed_exchange`, `ticker_symbol` | Publicly traded |
Note: `NON_REGULATED` only supports `PRIVATE` and `PUBLIC` trading types. `PUBLICLY_TRADED_SUBSIDIARY` is not supported for `NON_REGULATED` institutions.
## Institution Members
### Member Roles
Institution members can have one or more roles that define their relationship with the institution. Each role has specific requirements and applicability depending on the institution type:
| Role | Description |
| --------------------------- | ------------------------------------------------------------------------------------------------ |
| `BENEFICIAL_OWNER` | Person who owns 25% or more of the institution. |
| `ACCOUNT_OPENER` | Person who opened the account on behalf of the institution. |
| `AUTHORIZED_USER` | Person authorized to transact on behalf of the institution. |
| `MANAGEMENT_CONTROL_PERSON` | Person with significant management control over the institution (e.g., CEO, CFO, COO). |
| `TRUSTEE` | Person who manages assets in a trust for beneficiaries and is legally responsible for the trust. |
| `GRANTOR` | Person who creates a trust by donating assets. |
| `BENEFICIARY` | Person who receives benefits from a trust. |
### Role Compatibility by Institution Type
The following grid shows which roles are applicable for each institution type:
| Role | Trust | Corporation | LLC | Partnership |
| --------------------------- | :----------------: | :----------------------: | :--------------: | :----------------------: |
| `BENEFICIAL_OWNER` | ✅ | ✅ | ✅ | ✅ |
| `AUTHORIZED_USER` | -- | ✅ | ✅ | ✅ |
| `MANAGEMENT_CONTROL_PERSON` | -- | ✅ | ✅ | ✅ |
| `TRUSTEE` | ✅ | -- | -- | -- |
| `GRANTOR` | ✅ | -- | -- | -- |
| `BENEFICIARY` | ✅ | -- | -- | -- |
* **Trusts**: A trust institution must have members that collectively have the roles of BENEFICIARY, TRUSTEE, and GRANTOR. A member cannot have both BENEFICIAL\_OWNER and BENEFICIARY roles.
* **Corporations, LLCs, Partnerships**: These institutions typically require at least one BENEFICIAL\_OWNER and one MANAGEMENT\_CONTROL\_PERSON.
* For all institution types, members must be Identity objects already created in the system.
# Periodic KYC Refresh
Source: https://docs.sandbox.paxos.com/guides/identity/kyc-refresh
Manage the periodic KYC refresh of an Identity on the Paxos Platform in an automated, compliant way.
To ensure that Paxos meets regulatory requirements, KYC information of end user identities that are directly onboarded
to Paxos must be periodically refreshed (every 1-3 years).
All customers that integrate with Paxos [Identity APIs](/api-reference/endpoints/identity) are subject to this process, and must integrate with the automated workflow outlined below to support it.
Paxos streamlines KYC Refresh using a webhook-based or polling-based approach, which leverages [Paxos Webhooks](/guides/webhooks/quickstart), [Events API](/api-reference/events) and [Identity API](/api-reference/endpoints/identity).
## Webhook-based Approach
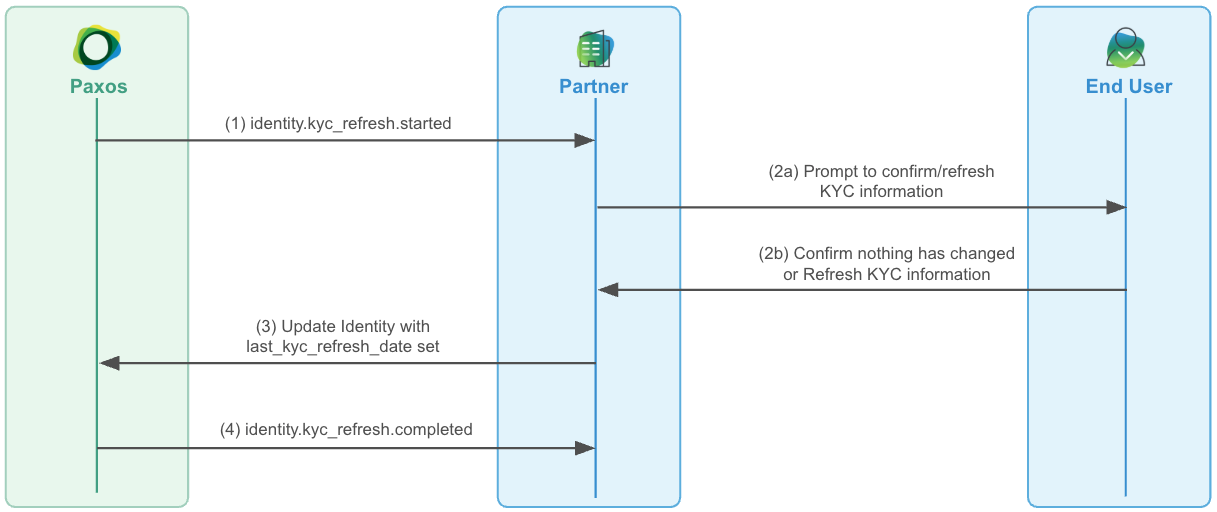
### ➊ Consume KYC Refresh Events
Setup a [Webhook Consumer](/guides/webhooks/quickstart#consumer) to receive the following KYC refresh events for your end users:
* [`identity.kyc_refresh.started`](/api-reference/events)
* [`identity.kyc_refresh.completed`](/api-reference/events)
Use [Get Event](/api-reference/endpoints/events/get-event) to get additional information about the KYC refresh event (`last_kyc_refresh_date`, `next_kyc_refresh_date`, etc.).
### ➋ Prompt End User about Periodic Refresh
When an [`identity.kyc_refresh.started`](/api-reference/events) is received for your end user, prompt the user presenting their current KYC information indicating they should refresh their information if anything has changed, or continue without changes if everything is still accurate.
### ➌ Inform Paxos about the Refresh
When an end user indicates everything is still accurate, call [update-identity](/api-reference/endpoints/identity/update-identity) with the `identity_id` specified in the request, setting the `last_kyc_refresh_date` to the timestamp the user confirmed their information is still accurate.
If an end user refreshed their information, call [update-identity](/api-reference/endpoints/identity/update-identity) as specified above, but also include any changes the end user has made to their information.
Calling [update-identity](/api-reference/endpoints/identity/update-identity) with only `last_kyc_refresh_date` and no other changes is considered by Paxos to be confirmation
no information has changed, therefore a completed KYC refresh.
The next KYC refresh date will be updated accordingly (1-3 years from the provided `last_kyc_refresh_date`).
### ➍ Wait for Completion
Once KYC refresh is complete, a [`identity.kyc_refresh.completed`](/api-reference/events) will be received for the end user in question.
## Polling-based Approach
### ➊ Poll for KYC Refresh Started Events
Poll [List Events](/api-reference/endpoints/events/list-events), offsetting the `created_at.gt` for each subsequent poll, fetching [`identity.kyc_refresh.started`](/api-reference/events) events.
We recommend you keep track of the [Event](/api-reference/events) ids you've processed in order to idempotently process the event.
### ➋ Prompt End User about Periodic Refresh
As described [above](#-prompt-end-user-about-periodic-refresh) in the webhook-based approach.
### ➌ Inform Paxos about the Refresh
As described [above](#-inform-paxos-about-the-refresh) in the webhook-based approach.
### ➍ Poll for Completed Refreshes
Poll [List Events](/api-reference/endpoints/events/list-events), offsetting the `created_at.gt` for each subsequent poll, fetching [`identity.kyc_refresh.completed`](/api-reference/events) events.
## Advanced
### Handling Expired Refreshes
If an [`identity.kyc_refresh.expired`](/api-reference/events) is received, it means Paxos did not receive an [update-identity](/api-reference/endpoints/identity/update-identity) request in the designated window to complete the KYC refresh process *(typically 30 days)*.
If this occurs, several outcomes could be experienced:
* Paxos will restart the KYC refresh process, and a new [`identity.kyc_refresh.started`](/api-reference/events) event will be posted
* The Identity could be disabled (meaning the end user will only be able to Liquidate assets and withdraw fiat off platform)
### Refreshes in Compliance Review
In some cases, the Paxos compliance team might need to review the changes received from the end user as part of the
KYC refresh process.
In this case, the [`identity.kyc_refresh.completed`](/api-reference/events) event could experience a meaningful delay in being received.
### Backdating the Last KYC Refresh Date
If a historical record is known for the last KYC refresh dates of your end users **or** you've experienced an issue processing KYC refresh for an end-user then you can directly call [update-identity](/api-reference/endpoints/identity/update-identity) setting the `last_kyc_refresh_date` to the known date in the past, and Paxos will accept this as the date KYC refresh was performed for the end user.
Setting this date beyond the 1-3 year refresh period for an end user will cause an immediate [`identity.kyc_refresh.started`](/api-reference/events) to be triggered for the end user.
# Onboarding a Person for Crypto Brokerage
Source: https://docs.sandbox.paxos.com/guides/identity/person-crypto-brokerage
Create an Identity, Account and Profile to provide Buy, Hold and Sell Crypto Brokerage for Users
This guide walks through setting up a [Fiat and Crypto Subledger](/guides/crypto-brokerage/ledger-type#fiat-and-crypto-subledger) crypto brokerage integration,
creating a Person [Identity](/api-reference/endpoints/identity) and a related [Account](/api-reference/endpoints/accounts) and [Profile](/api-reference/endpoints/profiles) to book orders using the [Order API](/api-reference/endpoints/orders). First, we will
create an [Identity](/api-reference/endpoints/identity) to represent the user's kyc information on the Paxos Platform. Then we will create an [Account](/api-reference/endpoints/accounts) which sets
up the structure of the brokerage account. Then we will create a [Profile](/api-reference/endpoints/profiles) that represents the users fiat and crypto asset holdings. Then we will integrate with the [Order](/api-reference/endpoints/orders) API to
set up a simple Buy, Hold and Sell integration. This guide should take around 30 minutes.
## Prerequisites
* Sign up to the [Paxos Dashboard](/guides/dashboard/account) in Sandbox
* Reach out to [Support](https://support.paxos.com) to provision access to the [Identity API](/api-reference/endpoints/identity)
## Authenticate in Sandbox
Create an [API Key](/guides/dashboard/admin/api) on the Sandbox [Paxos Dashboard](/guides/dashboard/account) with the following scopes to access the [Identity](/api-reference/endpoints/identity),
[Account](/api-reference/endpoints/accounts) and [Order](/api-reference/endpoints/orders) APIs needed for this guide
* `identity:read_identity`
* `identity:read_account`
* `identity:write_identity`
* `identity:write_account`
* `funding:read_profile`
* `funding:write_profile`
* `exchange:read_order`
* `exchange:write_order`
Run below to get the `access_token` from OAuth
```shell
curl --location 'https://oauth.sandbox.paxos.com/oauth2/token' \
--form grant_type=client_credentials \
--form client_id={paxos_client_id} \
--form client_secret={paxos_secret} \
--form scope='identity:read_identity identity:read_account identity:write_identity identity:write_account funding:read_profile funding:write_profile exchange:read_order exchange:write_order'
```
Confirm the response includes requisite scopes and save the `access_token` to use in the request authorization header
throughout this guide.
```json
{
"access_token": "{access_token}",
"expires_in": 3599,
"scope": "identity:read_identity identity:read_account identity:write_identity identity:write_account funding:read_profile funding:write_profile exchange:read_order exchange:write_order",
"token_type": "bearer"
}
```
Include the Authorization header with the bearer token on all API requests `-H "Authorization: Bearer $TOKEN"`.
## Creating a Person Identity and Account
### ➊ Creating an Identity with Passthrough Verification
To create a person identity, Paxos requires both
* The details of the person according to the [Person Required Details Grid](/guides/identity/required-details#required-person-details)
* Data on who has completed identity verification (IDV) of the person.
### Passthrough
Set `verifier_type` to `PASSTHROUGH` and then provide details about how and when IDV was conducted for this user by setting:
* `passthrough_verifier_type` - the company of the IDV provider
* `passthrough_verified_at` - when IDV was completed for the user
* `passthrough_verification_id` - external id for the IDV record in the IDV provider's system
* `passthrough_verification_status` - the current status of IDV, `APPROVED` if verified
* `passthrough_verification_fields` - the set of fields used to verify the user during IDV
All above attributes are required when `verifier_type` is set to `PASSTHROUGH`.
```shell
curl --location "https://api.sandbox.paxos.com/v2/identity/identities" \
--request "POST" \
--header "Authorization: Bearer {access_token}" \
--data '{
"ref_id": "{your_end_user_ref_id}",
"person_details": {
"verifier_type": "PASSTHROUGH",
"passthrough_verifier_type": "JUMIO",
"passthrough_verified_at": "2021-06-16T09:28:14Z",
"passthrough_verification_id": "775300ef-4edb-47b9-8ec4-f45fe3cbf41f",
"passthrough_verification_status": "APPROVED",
"passthrough_verification_fields": ["FULL_LEGAL_NAME", "DATE_OF_BIRTH"],
"first_name": "Billy",
"last_name": "Duncan",
"date_of_birth": "1960-01-01",
"address": {
"address1": "123 Main St",
"city": "New York",
"province": "NY",
"country": "USA",
"zip_code": "10001"
},
"nationality": "USA",
"cip_id": "073-05-1120",
"cip_id_type": "SSN",
"cip_id_country": "USA",
"phone_number": "+1 555 678 1234",
"email": "example@somemail.org"
},
"customer_due_diligence": {
"estimated_yearly_income": "INCOME_50K_TO_100K",
"expected_transfer_value": "TRANSFER_VALUE_25K_TO_50K",
"source_of_wealth": "EMPLOYMENT_INCOME",
"employment_status": "FULL_TIME",
"employment_industry_sector": "ARTS_ENTERTAINMENT_RECREATION"
}
}'
```
The `cip_id` of an [Identity](/api-reference/endpoints/identity) is required to be unique. If a `409 duplicate cip_id` error occurs,
handle it by either:
* Refusing to support crypto brokerage services for customers who have a duplicate `cip_id`
* If they are confirmed to be the same [Identity](/api-reference/endpoints/identity), create a new [Account](/api-reference/endpoints/accounts) to represent each user account.
Check the response to find the `identity_id` of the newly created [Identity](/api-reference/endpoints/identity) and notice the status of the [Identity](/api-reference/endpoints/identity) is `PENDING`.
Paxos will make an [Onboarding Decision](/guides/identity/statuses#onboarding-decision) and asynchronously update the status to either `DENIED` or `APPROVED`.
```json
{
"id": "{identity_id}",
"status": "PENDING",
"created_at": "2021-06-16T09:28:14Z",
"updated_at": "2021-06-16T09:28:14Z",
"ref_id": "{your_end_user_ref_id}",
"person_details": {
// ...
}
}
```
An [Identity](/api-reference/endpoints/identity) might stay in `PENDING` due to being deemed high risk by Paxos. This [Identity](/api-reference/endpoints/identity) will be
required to undergo [Enhanced Due Diligence](/guides/identity/edd). See [how to automate document collection](/guides/identity/edd) to
allow `HIGH` risk customers to onboard to Paxos.
### ➋ Wait for the Identity to be Approved
Using the above details should result in auto-approval of the [Identity](/api-reference/endpoints/identity). You can immediately call the [Get Identity](/api-reference/endpoints/identity/get-identity) endpoint
and see the `summary_status` is `APPROVED`.
```shell
curl --location "https://api.sandbox.paxos.com/v2/identity/identities/{identity_id}" \
--request "GET" \
--header "Authorization: Bearer {access_token}"
```
* If the [Identity](/api-reference/endpoints/identity) is stuck in `PENDING`, read the [Identity Status](/guides/identity/statuses) guide to help pinpoint why. If you have further questions, you can reach out to [Support](https://support.paxos.com).
* Use a [Webhook](/guides/webhooks) integration to asynchronously process [`identity.approved`](/api-reference/webhooks) and [`identity.denied`](/api-reference/webhooks)
events to notify users when they have been onboarded to Paxos.
### ➌ Creating an Account and Profile
Now we are ready to make an [Account](/api-reference/endpoints/accounts) and [Profile](/api-reference/endpoints/profiles) for the [Identity](/api-reference/endpoints/identity). An [Account](/api-reference/endpoints/accounts) logically relates to a user's brokerage account,
an [Identity](/api-reference/endpoints/identity) therefore can have one or many [Accounts](/api-reference/endpoints/accounts).
### Single Owner Account
The `create_profile` flag must be set to `true`, this will ensure a [Profile](/api-reference/endpoints/profiles) is created for the [Account](/api-reference/endpoints/accounts). This is how to
create accounts and profiles for a [Fiat and Crypto Subledger](/guides/crypto-brokerage/ledger-type#fiat-and-crypto-subledger) integration.
```shell
curl --location "https://api.sandbox.paxos.com/v2/identity/accounts" \
--request "POST" \
--header "Authorization: Bearer {access_token}" \
--data '{
"create_profile": true,
"account": {
"identity_id": "{identity_id}",
"ref_id": "{your_account_ref}",
"type": "BROKERAGE",
"description": "Brokerage account for Billy Duncan"
}
}'
```
### Joint Accounts
For accounts with more than one owner, for example a joint brokerage account, both owners are required to have an [Identity](/api-reference/endpoints/identity) created on the Paxos
Platform. An [Account](/api-reference/endpoints/accounts) and [Profile](/api-reference/endpoints/profiles) is then created for a designated primary account owner with any additional owners being set in `members` with the
`BENEFICIAL_OWNER` role.
[Identities](/api-reference/endpoints/identity) can be added or removed from an [Account](/api-reference/endpoints/accounts) after creation using the [Add Account Members](/api-reference/endpoints/account-members/add-account-members) and [Delete Account Member](/api-reference/endpoints/account-members/remove-account-member) endpoints respectively
```shell
curl --location "https://api.sandbox.paxos.com/v2/identity/accounts" \
--request "POST" \
--header "Authorization: Bearer {access_token}" \
--data '{
"create_profile": true,
"account": {
"identity_id": "{billy_duncan_identity_id}",
"ref_id": "{your_account_ref_id}",
"type": "BROKERAGE",
"description": "Brokerage account for Billy and Sarah Duncan",
"members": [{
"identity_id": "{sarah_duncan_identity_id}",
"roles": ["BENEFICIAL_OWNER"]
}]
}
}'
```
## Booking an Order
We will use the [Order](/api-reference/endpoints/orders) API to create buy and sell orders. We recommend also
taking a look at the [FIX](/guides/crypto-brokerage/fix) and [WebSocket](/api-reference/websockets/overview) solutions and using the best combination of APIs
for the specific use case.
### ➊ Fund the Account
In a complete integration, follow the [Fiat Transfers Funding Flow](/guides/developer/fiat-transfers/quickstart) guide to learn how to fund user assets using
a [Fiat Deposit](/api-reference/endpoints/fiat-transfers).
For this guide, we will use the sandbox-only Test Funds feature in [Dashboard](https://dashboard.sandbox.paxos.com/) to fund the [Identity](/api-reference/endpoints/identity) with \$10,000 USD. First,
navigate to the [Dashboard Landing Page](https://dashboard.sandbox.paxos.com/) and locate the `Fund` button

Then select the [Profile](/api-reference/endpoints/profiles) related to the [Account](/api-reference/endpoints/accounts) created and fund for \$10,000 USD

### ➋ Creating a Order
To book an order, specify the `profile_id` which is linked to the `account_id` created above *(if one
exists, else the omnibus `profile_id`)*.
### Buy
```shell
curl --location "https://api.sandbox.paxos.com/v2/profiles/{profile_id}/orders" \
--request "POST" \
--header "Authorization: Bearer {access_token}" \
--data '{
"side": "BUY",
"market": "ETHUSD",
"type": "LIMIT",
"price": "1814.8",
"base_amount": "1",
"identity_id": "{identity_id}",
"identity_account_id": "{account_id}"
}'
```
### Sell
```shell
curl --location "https://api.sandbox.paxos.com/v2/profiles/{profile_id}/orders" \
--request "POST" \
--header "Authorization: Bearer {access_token}" \
--data '{
"side": "SELL",
"market": "ETHUSD",
"type": "LIMIT",
"price": "1804.2",
"base_amount": "1",
"identity_id": "{identity_id}",
"identity_account_id": "{account_id}"
}'
```
You can check the status of the order by calling
```shell
curl --location "https://api.sandbox.paxos.com/v2/profiles/{profile_id}/orders/{order_id}" \
--request "GET" \
--header "Authorization: Bearer {access_token}"
```
And that is it, congratulations on completing your first end-to-end crypto brokerage integration with Paxos!
# Required Details
Source: https://docs.sandbox.paxos.com/guides/identity/required-details
Learn more about what details are required when creating an Identity
## Key
| Value | Description |
| ----- | :------------------------------------------------------------------------------------------------------------------------- |
| ✅ | Required field |
| 🟡 |
Best effort optional field * (providing details here ensures less friction during onboarding)*
|
| -- | Not applicable |
## Required Person Details
The required details for persons being onboarded as [Identities](/api-reference/endpoints/identity) depend on the
licensing arrangement and solution. See the table below:
| Field | Paxos Trust Company Licensing (Crypto Brokerage) |
| -------------------------------- | :----------------------------------------------------------------: |
| `first_name` | ✅ |
| `last_name` | ✅ |
| `date_of_birth` | ✅ |
| `address` | ✅ |
| `nationality` | ✅ |
| `cip_id` | ✅ |
| `cip_id_type` | ✅ |
| `cip_id_country` | ✅ |
| `cdd.estimated_yearly_income` | ✅ |
| `cdd.expected_transfer_value` | ✅ |
| `cdd.source_of_wealth` | ✅ |
| `cdd.employment_status` | ✅ |
| `cdd.employment_industry_sector` | ✅ |
| `middle_name` | 🟡 |
| `phone_number` | 🟡 |
| `email` | 🟡 |
| `profession` | -- |
| `country_of_birth` | -- |
| `cdd.aliases` | -- |
| `cdd.estimated_net_worth` | -- |
| `cdd.customer_regions` | -- |
| `cdd.source_of_funds` | -- |
| `cdd.purpose_of_account` | -- |
## Required Institution Details
Institution identities are used to represent all non-person entities. Details for institution identity type are recorded in `institution_details`. An institution identity also has `institution_members` associated with it. These define persons that have some relationship to the institution.
### Required Fields for Institution Types
The required fields for institutions being onboarded as [Identities](/api-reference/endpoints/identity) depend on the institution type. See the table below:
| Field | Trust | Corporation, LLC, Partnership | Registered Investment Advisor (RIA) |
| ------------------------------------ | :-------------------------------------------------: | :------------------------------------------------------------------------------------------------------------: | :------------------------------------------------------------------------------------------------------------: |
| `name` | ✅ | ✅ | ✅ |
| `business_address` | ✅ | ✅ | ✅ |
| `phone_number` | 🟡 | 🟡 | 🟡 |
| `email` | 🟡 | 🟡 | 🟡 |
| `institution_type` | ✅ | ✅ | ✅ |
| `institution_sub_type` | ✅ | ✅ | ✅ |
| `cip_id` | ✅ | ✅ | ✅ |
| `cip_id_type` | ✅ | ✅ | ✅ |
| `cip_id_country` | ✅ | ✅ | ✅ |
| `govt_registration_date` | ✅ | ✅ | ✅ |
| `incorporation_address` | 🟡 | ✅ | ✅ |
| `regulation_status` | 🟡 | ✅ | ✅ |
| `trading_type` | 🟡 | ✅ | ✅ |
| `listed_exchange` | 🟡 | Depends on [regulation status](/guides/identity/institution-types#creating-financially-regulated-institutions) | Depends on [regulation status](/guides/identity/institution-types#creating-financially-regulated-institutions) |
| `ticker_symbol` | 🟡 | Depends on [regulation status](/guides/identity/institution-types#creating-financially-regulated-institutions) | Depends on [regulation status](/guides/identity/institution-types#creating-financially-regulated-institutions) |
| `parent_institution_name` | 🟡 | Depends on [regulation status](/guides/identity/institution-types#creating-financially-regulated-institutions) | Depends on [regulation status](/guides/identity/institution-types#creating-financially-regulated-institutions) |
| `regulator_name` | 🟡 | Depends on [regulation status](/guides/identity/institution-types#creating-financially-regulated-institutions) | Depends on [regulation status](/guides/identity/institution-types#creating-financially-regulated-institutions) |
| `regulator_jurisdiction` | 🟡 | Depends on [regulation status](/guides/identity/institution-types#creating-financially-regulated-institutions) | Depends on [regulation status](/guides/identity/institution-types#creating-financially-regulated-institutions) |
| `regulator_register_number` | 🟡 | Depends on [regulation status](/guides/identity/institution-types#creating-financially-regulated-institutions) | Depends on [regulation status](/guides/identity/institution-types#creating-financially-regulated-institutions) |
| `doing_business_as` | 🟡 | 🟡 | 🟡 |
| `business_description` | 🟡 | ✅ | 🟡 |
| `tax_details` | Auto-populated if cip\_id\_type is SSN, ITIN or EIN | Auto-populated if cip\_id\_type is SSN, ITIN or EIN | Auto-populated if cip\_id\_type is SSN, ITIN or EIN |
| `tax_details_not_required` | Can be set for non-US institutions | Can be set for non-US institutions | Can be set for non-US institutions |
| `metadata` | 🟡 | 🟡 | 🟡 |
| `ref_id` | 🟡 | 🟡 | 🟡 |
| `cdd.aliases` | 🟡 | 🟡 | 🟡 |
| `cdd.source_of_wealth` | 🟡 | ✅ | 🟡 |
| `cdd.source_of_funds` | 🟡 | ✅ | 🟡 |
| `cdd.industry_sector` | 🟡 | ✅ | 🟡 |
| `cdd.has_underlying_trust_structure` | 🟡 | ✅ | 🟡 |
| `cdd.has_nominee_shareholders` | 🟡 | ✅ | 🟡 |
| `cdd.is_publicly_traded` | 🟡 | 🟡 | 🟡 |
| `cdd.merchant_funding_source` | Only for payments integrations | Only for payments integrations | Only for payments integrations |
| `cdd.customer_regions` | Only for payments integrations | Only for payments integrations | Only for payments integrations |
**Notes:**
* For Trusts: `institution_type` must be set to `TRUST`. `institution_sub_type` must be set to `INVESTMENT`. `incorporation_address` is required for Trusts where their `cip_id_type` is not `SSN` or `ITIN`.
* For RIAs: Usage of this sub-type requires prior authorization and approval from Paxos. `institution_sub_type` must be set to `REGISTERED_INVESTMENT_ADVISOR`.
* For `regulation_status`: Additional validations are tied to `trading_type` and other required fields. See [Institution Types and Members](/guides/identity/institution-types) for details.
For more information about institution types, member roles and requirements, please refer to [Institution Types and Members](/guides/identity/institution-types).
# Statuses
Source: https://docs.sandbox.paxos.com/guides/identity/statuses
Learn more about Identity statuses and sub-statuses
## Summary Status
An [Identity](/api-reference/endpoints/identity/create-identity) has five (5) statuses:
* `PENDING`: Initial state. The [Identity](/api-reference/endpoints/identity/create-identity) is waiting for an [Onboarding Decision](/guides/identity/statuses#onboarding-decision) and is under review.
* `APPROVED`: The [Identity](/api-reference/endpoints/identity/create-identity) passed internal review. It can be used with integrations, for example, creating orders.
* `DENIED`: The [Identity](/api-reference/endpoints/identity/create-identity) failed internal review. It cannot be used with integrations.
* `DISABLED`: The [Identity](/api-reference/endpoints/identity/create-identity) was `APPROVED` but has been off-boarded. It can only perform sell operations.
* `ERROR`: The [Identity](/api-reference/endpoints/identity/create-identity) has been frozen for compliance reasons. It cannot be used with integrations.
This status drives what actions the identity can perform across the platform according to the grid below:
| Status | Hold Assets | Create Buy Orders | Create Sell Orders | Execute Open Orders | Create Crypto Deposit Address | Create Crypto Withdrawal | Receive Crypto Deposits |
| ---------- | ----------- | ----------------- | ------------------ | ------------------- | ----------------------------- | ------------------------ | ----------------------- |
| `PENDING` | ❌ | ❌ | ❌ | ❌ | ❌ | ❌ | ❌ |
| `DENIED` | ❌ | ❌ | ❌ | ❌ | ❌ | ❌ | ❌ |
| `APPROVED` | ✅ | ✅ | ✅ | ✅ | ✅ | ✅ | ✅ |
| `DISABLED` | ✅ | ❌ | ✅ | ✅ | ❌ | ❌ | ❌\* |
| `ERROR` | ✅ | ❌ | ❌ | ✅ | ❌ | ❌ | ❌\* |
*\*Crypto deposits received to identities in disabled or error status will be held for review.*
## Sub Statuses
The following sub-statuses are returned in identity responses and can be used to help explain why an [Identity](/api-reference/endpoints/identity/create-identity) is in a given summary status.
### Sanctions Verification Status (Persons & Institutions)
* **Field**: `sanctions_verification_status`
* **`PENDING`**: Sanctions check in progress.
* **`DENIED`**: Sanctions hit found, cannot proceed.
* **`APPROVED`**: No sanctions hit found, cleared to proceed.
* **`ERROR`**: Possible sanctions hit, held for manual review.
### Additional Screening Status (Persons & Institutions)
* **Field**: `additional_screening_status`
* **`PENDING`**: Additional screening checks are in progress.
* **`DENIED`**: Failed additional screening checks.
* **`APPROVED`**: Passed all additional screening checks.
* **`ERROR`**: Possible screening hit, held for manual review.
Additional screening includes checking for negative news or politically exposed persons, but explicitly excludes any sanctions checks (covered by the above `sanctions_verification_status`).
### ID Verification Status (Persons Only)
* **Field**: `id_verification_status`
* **`PENDING`**: Verification is in progress. Checking the identity of the person.
* **`DENIED`**: Verification failed. Unable to verify the identity of the person.
* **`APPROVED`**: Verification successful. The identity of the person is confirmed.
When using passthrough IDV, the `id_verification_status` will reflect the `passthrough_verification_status` that was set. Note
that `passthrough_verification_status` can only ever be set to a terminal IDV status of `APPROVED` or `DENIED`.
## Onboarding Decision
The onboarding decision is made based on the identities risk rating and the set of verifications (as exposed in sub-statuses above).
Once there is sufficient information to make a decision, the [Identity](/api-reference/endpoints/identity/create-identity) will be `APPROVED` and able to trade or `DENIED` and rejected services.
In the happy path where an [Identity](/api-reference/endpoints/identity/create-identity) is `LOW`
# Payments FAQ
Source: https://docs.sandbox.paxos.com/guides/payments/faq
Get answers to common questions about payments.
The easiest way to get started with the Paxos Platform is to [contact the payments team](https://support.paxos.com/hc/en-us).
Seller onboarding requirements are determined based on the type of business, transaction volume, and compliance needs. The requirements include business verification, financial information, and regulatory compliance documentation.
> Contact [Support](https://support.paxos.com/hc/en-us) to help determine the best onboarding approach.
By default, all payment workflows support USD and Paxos-issued stablecoins on Ethereum and Solana, including PYUSD and USDP.
USDC on Ethereum, Solana or Polygon can also be used. [Contact us](https://support.paxos.com/hc/en-us) for details.
# Overview
Source: https://docs.sandbox.paxos.com/guides/payments/index
Accept stablecoin pay-ins with real-time settlement. Issue on-chain refunds.
## Get Started
Accept stablecoin pay-ins with real-time settlement. Issue on-chain refunds.
Learn more about payment statuses.
Get answers to common questions about payments.
Use the Paxos APIs to effortlessly integrate stablecoin payment acceptance into your platform.
Features include:
* Accept PYUSD, USDC and USDP payments via on-chain transfers.
* Automatically convert the stablecoin to fiat, or opt to hold balances in stablecoin.
* Reconcile transactions on the Paxos Platform.
* Settle USD directly to your bank account.
* Issue refunds to the original Buyer via stablecoin on-chain transfers.
In the documentation, a payment is considered to be the total amount processed, including both the incoming payment (pay-in) and returned payment (refund).
## Pay-ins Workflow
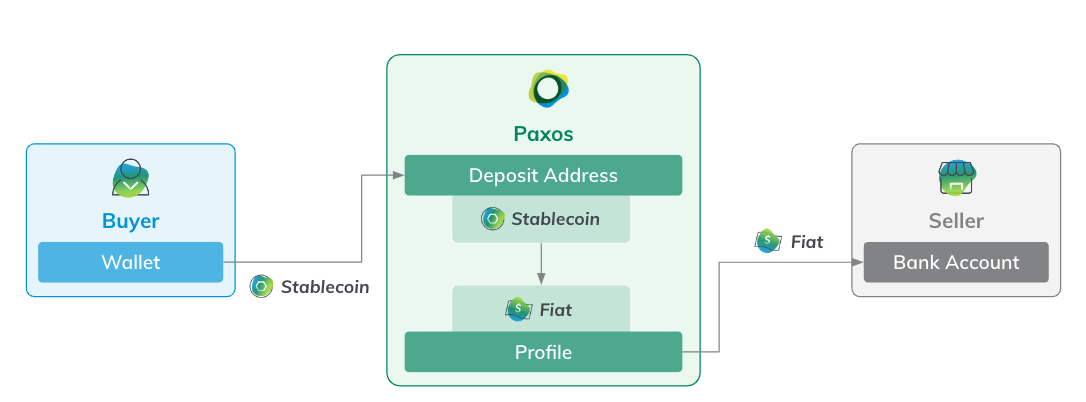
The pay-ins workflow involves two key personas: a Buyer purchasing goods or services using stablecoins and a Seller.
The Seller represents either a merchant that provides goods or services, or a payment processor acting as the intermediary to facilitate the transaction.
Most pay-in integrations follow a similar workflow for the Seller:
1. [Add a crypto deposit address](/guides/payments/quickstart#pay-in-add-deposit-address) for a designated Profile, using one of the [supported blockchains](/guides/payments/faq#supported-assets).
2. To [use stablecoins for pay-ins](/guides/payments/quickstart#receive-payment), share the crypto deposit address with Buyers as a checkout option.
Using a wallet connector or displaying a QR code in the Buyer interface helps to ensure that Buyers send the correct amount and avoid errors.
1. Configure a [pay-in monitoring and reconciliation](/guides/payments/quickstart#pay-in-monitor-reconcile) request to confirm Pay-in transactions on the Paxos Platform.
2. [Withdraw USD](/guides/payments/quickstart#pay-in-withdraw-fiat) to a bank account.
## Refunds Workflow
Issuing a refund is similar to pay-ins, except the funding flow is reversed: USD is first moved onto the Paxos Platform and then the stablecoin refund is sent to the Buyer's designated wallet.
Most refund integrations follow a similar workflow for the Seller:
1. [Send USD](/guides/payments/quickstart#refund-fund-account) to a designated refund account.
2. [Initiate a crypto withdrawal](/guides/payments/quickstart#refund-initiate) to the Buyer's designated wallet address, using one of the [supported blockchains](/guides/payments/faq#supported-assets).
3. Configure a [refund monitoring and reconciliation](/guides/payments/quickstart#refund-monitor-reconcile) request to confirm Pay-in transactions on the Paxos Platform.
# Stablecoin Pay-ins Quickstart
Source: https://docs.sandbox.paxos.com/guides/payments/quickstart
Accept stablecoin pay-ins with real-time settlement. Issue on-chain refunds.
This guides walks you through the steps to set up a basic payments workflow using the Paxos Platform, including [configuring a stablecoin pay-in workflow](/guides/payments/quickstart#payment-workflow) and [setting up a refund workflow](/guides/payments/quickstart#refunds).
Once completed, similar, more robust, workflows can be implemented in production.
If you already have sandbox access, this guide should take less than one hour to complete.
## Before You Begin
* Paxos may need to enable some API functionality described in the payments guides. Contact [Support](https://support.paxos.com) with any access issues.
* If you need a developer sandbox account, [contact us](https://support.paxos.com/hc/en-us) before continuing.
* The API endpoints require authentication with a **Client ID** and **Secret**.
* Each **Client ID** has a specific set of allowed scopes to access API endpoints.
[Log in](https://dashboard.sandbox.paxos.com) to your sandbox account and go to [**Settings** > **API Management**](https://dashboard.sandbox.paxos.com/admin/api).
Either select an existing **Client ID** or create a new one.
**Best Practice**
Always store the **Client ID** and **Client Secret** in a safe place.
The secret must be reset if forgotten.
To complete the steps in this guide, ensure the following scopes are enabled for the client (scopes may be updated at any time):
```
funding:read_profile \
funding:write_profile \
transfer:read_transfer \
transfer:write_crypto_withdrawal \
transfer:write_deposit_address
```
Include the client (`client_id`) and secret (`client_secret`) in the authentication request to [https://oauth.sandbox.paxos.com/oauth2/token](https://oauth.sandbox.paxos.com/oauth2/token):
```shell
curl --location "https://oauth.sandbox.paxos.com/oauth2/token" \
--form grant_type=client_credentials \
--form client_id={client_id} \
--form client_secret={client_secret} \
--form scope="funding:read_profile funding:write_profile transfer:read_transfer transfer:write_crypto_withdrawal transfer:write_deposit_address"
```
Confirm the response includes the requisite scopes and save the `access_token` to use in the request authorization header (`-H "Authorization: Bearer access_token"`).
```json
{
"access_token": "access_token",
"expires_in": 3599,
"scope": "funding:read_profile funding:write_profile transfer:read_transfer transfer:write_crypto_withdrawal transfer:write_deposit_address",
"token_type": "bearer"
}
```
* To follow along with this guide, [create a new Profile](/api-reference/endpoints/profiles/create-profile) to represent the Seller.
However, any existing Profile can be used when setting up simple [pay-in](/guides/payments/quickstart#payment-workflow) and [refund](/guides/payments/quickstart#refunds) workflows.
Learn more about [user onboarding requirements](/guides/payments/faq#seller-onboarding).
Use [Create Profile](/api-reference/endpoints/profiles/create-profile) to represent the seller.
```shell
curl --location 'https://api.sandbox.paxos.com/v2/profiles' \
--header 'Content-Type: application/json' \
--header 'Accept: application/json' \
--header 'Authorization: Bearer {access_token}' \
--data '{
"nickname": "Seller A",
"description": "Stablecoin Pay-in and Refunds."
}'
```
Save the `id` (`profile_id`) from the response, it will be used throughout this guide.
```json
{
"id": "eb1dbb95-8e22-471b-9ded-40bbfe309037",
"nickname": "Seller A",
"type": "NORMAL"
}
```
Use [List Profiles](/api-reference/endpoints/profiles/list-profiles) to retrieve the Profile ID when needed.
* To represent the Buyer in this guide, send enough testnet tokens to pay network fees, along with one of the [supported testnet stablecoins](/guides/payments/faq#supported-assets), to an off-platform wallet.
We [airdropped Solana Devnet](https://faucet.solana.com/) to a self-custody wallet.
We also used the [Paxos Testnet Faucet](https://faucet.paxos.com/) to transfer some [PYUSD on Solana Devnet](/guides/stablecoin/pyusd) to the Buyer's wallet.
The same Buyer wallet is used to simulate a purchase as well as a refund.
## Set Up Stablecoin Pay-in Workflow
To accept a pay-in on the Paxos Platform, first use [Create Deposit Address](/api-reference/endpoints/deposit-addresses/create-deposit-address) to add a new wallet address on the public blockchain.
Then add the deposit address as a stablecoin payment option for Buyers, typically at checkout.
Using a wallet connector or displaying a QR code in the Buyer interface helps to ensure that Buyers send the correct amount and avoid errors.
Once a Buyer completes a purchase, the transaction shows up in the [List Transfers](/api-reference/endpoints/transfers/list-transfers) monitoring and reconciliation polling request.
### 1. Add Seller Stablecoin Deposit Address
Use [Create Deposit Address](/api-reference/endpoints/deposit-addresses/create-deposit-address) to add a wallet address to the Profile designated for the Seller.
The request must include one of [supported stablecoins](/guides/payments/faq#supported-assets) networks.
Set `conversion_target_asset` to `USD` to automatically convert stablecoin pay-ins to USD on the Paxos Platform.
**Best Practice**
Whenever possible, include your own unique identifier in the request using `ref_id`.
Doing so helps to protect against submitting the same request twice, as the second request with the same `ref_id` will be rejected with `409 already exists`.
The `ref_id` can also be used in many query parameters.
The example uses `SOLANA` as the `crypto_network`.
If needed, use either `ETHEREUM` or `POLYGON_POS` for `crypto_network`.
```shell
curl --location 'https://api.sandbox.paxos.com/v2/transfer/deposit-addresses' \
--header 'Content-Type: application/json' \
--header 'Accept: application/json' \
--header 'Authorization: Bearer {access_token}' \
--data '{
"profile_id": "eb1dbb95-8e22-471b-9ded-40bbfe309037",
"crypto_network": "SOLANA",
"ref_id": "da_73bcbb08-db06-4308-b0c2-2a6398012f8b",
"conversion_target_asset": "USD"
{/* highlight-end */}
}'
```
Capture the `address` and `compatible_crypto_networks` values for distribution to potential Buyers.
Also store the `id` to use when [looking up pay-ins](/guides/payments/quickstart/#pay-in-monitor-reconcile).
```json highlight={8,12}
{
"id": "2d3b2366-c432-4098-ba16-83ca418c6f00",
"profile_id": "eb1dbb95-8e22-471b-9ded-40bbfe309037",
"customer_id": "8cbc1177-d982-4750-a435-3c7f36245452",
"crypto_network": "SOLANA",
"identity_id": "00000000-0000-0000-0000-000000000000",
"ref_id": "da_73bcbb08-db06-4308-b0c2-2a6398012f8b",
"address": "7iR1TfsaZ3f1PmbsoRuPYDbV7iujxZmuHaZDDU1Uv4YX",
"account_id": "00000000-0000-0000-0000-000000000000",
"conversion_target_asset": "USD",
"compatible_crypto_networks": [
"SOLANA"
]
}
```
Since the designated Profile has not gone through the Identity onboarding process, the default `identity_id` and `account_id` values appear in the response.
> Onboarding Questions?
> See the [onboarding FAQ](/guides/payments/faq#seller-onboarding) for details about user Identity and Account requirements.
> Contact [Support](https://support.paxos.com/hc/en-us) to help determine the best onboarding approach.
### 2. Receive Stablecoin Payment
Off the Paxos Platform, share the [deposit address](/guides/payments/quickstart#pay-in-add-deposit-address) with Buyers, typically on the checkout page, and start accepting stablecoin pay-ins.
Once a Buyer completes a pay-in transaction, Paxos credits the designated Profile with either stablecoin or USD, based on the deposit address configuration.
We [airdropped Solana Devnet](https://faucet.solana.com/) to a self-custody wallet.
We also used the [Paxos Testnet Faucet](https://faucet.paxos.com/) to transfer some [PYUSD on Solana Devnet](/guides/stablecoin/pyusd) to the Buyer's wallet.
The same Buyer wallet is used to simulate a purchase as well as a refund.
For this guide, all received pay-ins are automatically converted to USD on the Paxos Platform because we used "conversion\_target\_asset": "USD"\` when [creating the deposit address](/guides/payments/quickstart#pay-in-add-deposit-address).
### 3. Add Pay-in Monitoring and Reconciliation Request
Using [List Transfers](/api-reference/endpoints/transfers/list-transfers), create a recurring request that looks for completed transactions in the Seller's Profile.
Retrieve the status for payments received in the [deposit address](/guides/payments/quickstart#pay-in-add-deposit-address) using the `profile_id`, filtered by on the `CRYPTO_DEPOSIT` type and `updated_at.gte` parameters.
Best Practice
We recommend to poll [List Transfers](/api-reference/endpoints/transfers/list-transfers) globally at a set cadence (for example, at 1 second intervals), using slightly behind the last processed `updated_at.gte` as a synchronization checkpoint.
```shell
curl --location 'https://api.sandbox.paxos.com/v2/transfer/transfers?profile_ids=eb1dbb95-8e22-471b-9ded-40bbfe309037&updated_at.gte=2024-06-24T15%3A44%3A54.383141Z&type=CRYPTO_DEPOSIT' \
--header 'Accept: application/json' \
--header 'Authorization: Bearer {access_token}'
```
The response confirms that a `total` of `7.06` PYUSD (`asset`) was converted to USD (`balance_asset`) when the pay-in reached the Paxos Platform.
```json
{
"items": [
{
"id": "9d93693f-5157-49f4-ae44-4a7a8eae3d73",
"customer_id": "8cbc1177-d982-4750-a435-3c7f36245452",
"profile_id": "eb1dbb95-8e22-471b-9ded-40bbfe309037",
"amount": "7.06",
"total": "7.06",
"fee": "0",
"asset": "PYUSD",
"balance_asset": "USD",
{/* highlight-end */}
"direction": "CREDIT",
"type": "CRYPTO_DEPOSIT",
"status": "COMPLETED",
"created_at": "2024-06-24T15:44:48.724648Z",
"updated_at": "2024-06-24T15:44:55.383141Z",
"destination_address": "7iR1TfsaZ3f1PmbsoRuPYDbV7iujxZmuHaZDDU1Uv4YX",
"crypto_network": "SOLANA",
"crypto_tx_hash": "4ex3dQ1bkoxQyyWKsk5UfVwNzzi2HXBcDb2Xv1BzxKLhRKZaVmfAJyM2hWochXTqTRDMsrpcfvoaFTMZrBsaaJPx",
"crypto_tx_index": "4",
"auto_conversion": {}
}
],
"next_page_cursor": "CAISDAj3qOazBhCIidm2ARijg5MN"
}
```
### 4. Move USD to Bank Account
To manage on-platform cash balances, use the [Fiat Transfers](/api-reference/endpoints/fiat-transfers) APIs to batch withdraw USD to any designated bank account as needed.
Learn more in the [fiat transfers guide](/guides/developer/fiat-transfers).
> If you need to [create a fiat account](/api-reference/endpoints/fiat-transfers/create-fiat-account) Paxos may need to enable some API functionality.
> C> ontact [Support](https://support.paxos.com/hc/en-us) for assistance.
## Set Up a Refund Workflow
To process stablecoin refunds on the Paxos Platform, first [fund your account with USD](/guides/payments/quickstart#refund-fund-account) then use [Create Crypto Withdrawal](/api-reference/endpoints/crypto-withdrawals/create-crypto-withdrawal) to initiate a stablecoin refund to the Buyer.
Once a refund is complete, the transaction shows up in the [List Transfers](/api-reference/endpoints/transfers/list-transfers) monitoring and reconciliation polling request.
### 1. Add USD to a Refund Account
Production implementations can use the [Fiat Transfers](/api-reference/endpoints/fiat-transfers) APIs to send USD to a destination on the Paxos Platform, which is out of scope for this guide.
The [fiat transfers guide](/guides/developer/fiat-transfers) provides step-by-step instructions on setting up fiat movements.
> If you need to [create a fiat account](/api-reference/endpoints/fiat-transfers/create-fiat-account) Paxos may need to enable some API functionality.
> Contact [Support](https://support.paxos.com/hc/en-us) for assistance.
For simplicity, this guide uses [Create Sandbox Deposit](/api-reference/endpoints/sandbox-deposits/create-sandbox-deposit) to simulate funding the designated Seller Profile with USD.
Include the Seller's Profile ID (`profile_id`) as a path parameter, as well as the deposit `asset` and `amount` as query parameters.
```shell
curl --location 'https://api.sandbox.paxos.com/v2/sandbox/profiles/eb1dbb95-8e22-471b-9ded-40bbfe309037/deposit' \
--header 'Content-Type: application/json' \
--header 'Accept: application/json' \
--header 'Authorization: Bearer {access_token} \
--data '{
"asset": "USD",
"amount": "100"
}'
```
A successful response only includes the system-generated `activity_id`.
```json
{
"activity_id": "a457f3b2-8897-4118-bc9b-216541cfc5a7"
}
```
### 1.1 Sandbox Only: Check USD Deposit
To confirm the USD deposit, use [List Profile Balances](/api-reference/endpoints/profiles/list-profile-balances).
```shell
curl --location 'https://api.sandbox.paxos.com/v2/profiles/eb1dbb95-8e22-471b-9ded-40bbfe309037/balances?assets=USD' \
--header 'Accept: application/json' \
--header 'Authorization: Bearer {access_token}'
```
The Profile USD balance is now `107.06`, reflecting both the previously received pay-in and the current USD deposit.
```json
{
"items": [
{
//highlight-start
"asset": "USD",
"available": "107.06",
{/* highlight-end */}
"trading": "0"
}
]
}
```
### 2. Initiate a Stablecoin Refund
Use [Create Crypto Withdrawal](/api-reference/endpoints/crypto-withdrawals/create-crypto-withdrawal) to send stablecoin to the Buyer's designated wallet address.
The request must include one of [supported stablecoins](/guides/payments/faq#supported-assets) networks.
Set `balance_asset` to `USD` to automatically convert fiat to stablecoin and issue a refund in a single request.
For this guide, the refund is issued to the Buyer's original wallet address (`destination_address`) using the same /guides/stablecoin/network pair:
* The `asset` is `PYUSD`, the `balance_asset` is `USD`, and the `crypto_network` is `SOLANA`.
The funding source is the Seller's Profile (`profile_id`) used earlier.
**Best Practice**
Whenever possible, include your own unique identifier in the request using `ref_id`.
Doing so helps to protect against submitting the same request twice, as the second request with the same `ref_id` will be rejected with `409 already exists`.
The `ref_id` can also be used in many query parameters.
```shell
curl --location 'https://api.sandbox.paxos.com/v2/transfer/crypto-withdrawals' \
--header 'Content-Type: application/json' \
--header 'Accept: application/json' \
--header 'Authorization: Bearer {access_token}' \
--data '{
"profile_id": "eb1dbb95-8e22-471b-9ded-40bbfe309037",
"asset": "PYUSD",
"destination_address": "BtXdwoYSWPprQT88ZCLuQcXuTz4dFHB1AJFYqr5uXoAd",
"crypto_network": "SOLANA",
"ref_id": "cw_293a8f7c-bcb6-483f-919b-8661ae65f0e6",
"balance_asset": "USD",
"amount": "7.06"
}'
```
The initial response has a `status` of `PENDING`, since the on-chain transaction has not yet been confirmed.
Create a [refund monitoring request](/guides/payments/quickstart#refund-monitor-reconcile) to check that the refund was successful.
```json
{
"id": "c327d8b7-0c1a-4125-b73f-318924373d37",
"customer_id": "8cbc1177-d982-4750-a435-3c7f36245452",
"profile_id": "eb1dbb95-8e22-471b-9ded-40bbfe309037",
"ref_id": "cw_293a8f7c-bcb6-483f-919b-8661ae65f0e6",
"amount": "7.06",
"total": "7.06",
"fee": "0",
"asset": "PYUSD",
"balance_asset": "USD",
"direction": "DEBIT",
"type": "CRYPTO_WITHDRAWAL",
"status": "PENDING",
"created_at": "2024-06-24T18:33:51.087868Z",
"updated_at": "2024-06-24T18:33:51.087868Z",
"destination_address": "BtXdwoYSWPprQT88ZCLuQcXuTz4dFHB1AJFYqr5uXoAd",
"crypto_network": "SOLANA",
"auto_conversion": {}
}
```
### 3. Add Refund Monitoring and Reconciliation Request
Using [List Transfers](/api-reference/endpoints/transfers/list-transfers), create a recurring request that looks for completed transactions in the Seller's Profile.
Retrieve the status for refunds sent by using the `profile_id`, filtering by on the `CRYPTO_WITHDRAWAL` type and `updated_at.gte` parameters.
Best Practice
We recommend to poll [List Transfers](/api-reference/endpoints/transfers/list-transfers) globally at a set cadence (for example, at 1 second intervals), using slightly behind the last processed `updated_at.gte` as a synchronization checkpoint.
```shell
curl --location 'https://api.sandbox.paxos.com/v2/transfer/transfers?profile_ids=eb1dbb95-8e22-471b-9ded-40bbfe309037&updated_at.gte=2024-06-24T15%3A44%3A54.383141Z&type=CRYPTO_WITHDRAWAL' \
--header 'Accept: application/json' \
--header 'Authorization: Bearer {access_token}'
```
The response confirms that a `total` of `7.06` PYUSD (`asset`) was sent to the Buyer's wallet address.
```json
{
"items": [
{
"id": "c327d8b7-0c1a-4125-b73f-318924373d37",
"customer_id": "8cbc1177-d982-4750-a435-3c7f36245452",
"profile_id": "eb1dbb95-8e22-471b-9ded-40bbfe309037",
"ref_id": "cw_293a8f7c-bcb6-483f-919b-8661ae65f0e6",
//highlight-start
"amount": "7.06",
"total": "7.06",
"fee": "0",
"asset": "PYUSD",
"balance_asset": "USD",
"direction": "DEBIT",
"type": "CRYPTO_WITHDRAWAL",
"status": "COMPLETED",
{/* highlight-end */}
"created_at": "2024-06-24T18:33:51.105228Z",
"updated_at": "2024-06-24T18:34:24.976618Z",
"destination_address": "BtXdwoYSWPprQT88ZCLuQcXuTz4dFHB1AJFYqr5uXoAd",
"crypto_network": "SOLANA",
"crypto_tx_hash": "4xo8doZQ58W6WCrzmyjd3vyrv2SPMRjHiz4v6w8mEuCCWbAyiXjzbFADia7St6XF3jTNyQmrDmpSNH84TXdDujFU",
"crypto_tx_index": "0",
"auto_conversion": {}
}
],
"next_page_cursor": "CAISDAiw-OazBhCQhNjRAxi0jpMN"
}
```
### 3.1 Sandbox Only: Check USD Withdrawal
To confirm USD was used to fund the crypto withdrawal, use [List Profile Balances](/api-reference/endpoints/profiles/list-profile-balances).
```shell
curl --location 'https://api.sandbox.paxos.com/v2/profiles/eb1dbb95-8e22-471b-9ded-40bbfe309037/balances?assets=USD' \
--header 'Accept: application/json' \
--header 'Authorization: Bearer {access_token}'
```
The Profile USD balance is now `100.00`, where previously it was `7.06`.
```json
{
"items": [
{
//highlight-start
"asset": "USD",
"available": "100.00",
{/* highlight-end */}
"trading": "0"
}
]
}
```
# Statuses
Source: https://docs.sandbox.paxos.com/guides/payments/status
Learn more about payment statuses.
## Pay-ins
* [List Transfers](/api-reference/endpoints/transfers/list-transfers): When [monitoring a pay-in](/guides/payments/quickstart#pay-in-monitor-reconcile), a `PENDING` transaction is being confirmed. Depending on the network, confirmation can take from seconds to minutes. Transactions with a `COMPLETED` status have received sufficient confirmations. The `FAILED` status means the transaction was denied.
* [Create Fiat Withdrawal](/api-reference/endpoints/fiat-transfers/create-fiat-withdrawal): When [withdrawing USD to a bank account](/guides/payments/quickstart#pay-in-withdraw-fiat), the `PENDING` status means the request has been made and is being processes. Depending on the withdrawal type, it can take up to a few days for the transaction to complete. When the transfer to the bank account is successful, the status changes to `COMPLETED`.
## Refunds
* [List Transfers](/api-reference/endpoints/transfers/list-transfers): When [funding a USD account for refunds](/guides/payments/quickstart#refund-fund-account), the transfer has an initial status of `PENDING`, meaning the USD deposit has been detected and is being confirmed. The `COMPLETED` status means the USD funds have been credited to the given Profile.
* [Create Crypto Withdrawal](/api-reference/endpoints/crypto-withdrawals/create-crypto-withdrawal): When [issuing a crypto refund](/guides/payments/quickstart#refunds), the withdrawal has an initial status of `PENDING`, meaning Paxos has received the request and is processing the transaction. Depending on the network, confirmation can take from seconds to minutes. The `COMPLETED` status indicates the transaction has been broadcasted to the blockchain and received the required number of confirmations.
### Onboarding
* [Create Identity](/api-reference/endpoints/identity/create-identity) (if applicable): When onboarding an Identity, the initial response includes the `PENDING` status while screening takes place. If the screenings fail, the identity may be `DENIED`.
> To minimize the occurrence of denied identities, contact [Support](https://support.paxos.com) when planning an Identity workflow. Learn more about [user onboarding requirements](/guides/payments/faq#seller-onboarding).
# Connect to the WebSocket Stablecoin Price Feed
Source: https://docs.sandbox.paxos.com/guides/payments/websocket
Open a WebSocket connection to the Sandbox USDCUSD feed.
Use the command line to open a WebSocket connection to the Sandbox USDCUSD stablecoin market price feed.
> See the [WebSocket API reference](/api-reference/websockets/overview) for more details.
## ➊ Install WebSocket Client
The quickest way to open a connection is by using [wscat](https://github.com/websockets/wscat), which runs in the terminal.
Using the Python [websocket-client](https://pypi.org/project/websocket-client) package requires a bit of code and the Python shell.
Open the terminal and install [wscat](https://github.com/websockets/wscat) using the `-g` (global) flag.
```shell
npm install -g wscat
```
Ensure [wscat](https://github.com/websockets/wscat) is working. If you see the version number, the module is working:
```shell
wscat --version
```
Open the terminal and install the Python3 [websocket-client](https://pypi.org/project/websocket-client) library.
```shell
pip3 install websocket-client
```
Start the Python3 shell and check that [websocket-client](https://pypi.org/project/websocket-client) was installed correctly.
If you don't see a `ModuleNotFoundError` message, the library is installed.
```py
python3
...
>>> import websocket
>>>
```
Leave the terminal window open.
## ➋ Connect to Sandbox Feed
Open a long-lived connection to the Sandbox USDCUSD stablecoin market price feed.
```shell
wscat --connect wss://ws.sandbox.paxos.com/marketdata/stablecoin/USDCUSD
```
```py
>>> import websocket # From the previous step
>>> def on_message(wsapp, message):
... print(message)
...
>>> wsapp = websocket.WebSocketApp("wss://ws.sandbox.paxos.com/marketdata/stablecoin/USDCUSD", on_message=on_message)
>>> wsapp.run_forever() # Press CTRL+C to quit
```
## ➌ Review Sandbox Feed
If everything worked, USDCUSD the pricing data streams to the terminal.
```json title="Sandbox USDCUSD stablecoin market price feed (wscat)"
Connected (press CTRL+C to quit)
{"market":"USDCUSD","price":"0.9996","timestamp":"2024-11-04T16:12:38.053038191Z"}
{"market":"USDCUSD","price":"0.9996","timestamp":"2024-11-04T16:12:39.080704227Z"}
{"market":"USDCUSD","price":"0.9996","timestamp":"2024-11-04T16:12:40.044403631Z"}
...
```
```json title="Sandbox USDCUSD stablecoin market price feed (websocket-client)"
{"market":"USDCUSD","price":"0.9998","timestamp":"2024-11-04T17:23:50.050471826Z"}
{"market":"USDCUSD","price":"0.9998","timestamp":"2024-11-04T17:23:51.064565343Z"}
{"market":"USDCUSD","price":"1.0001","timestamp":"2024-11-04T17:23:52.05566422Z"}
...
```
# FAQ
Source: https://docs.sandbox.paxos.com/guides/settlements/faq
Get answers to common questions about the Settlements API.
No.
You can create and approve the transaction first and then deposit [assets](/guides/developer/blockchains) when ready.
Settlement only takes place when the transaction is [affirmed](/guides/settlements/status) and all the required assets have been deposited.
Notifications are off by default in Sandbox. Contact [Support](https://support.paxos.com) to turn them on.
You can fund your Sandbox Account with the supported [assets](/guides/developer/blockchains) or those listed in [Create Sandbox Deposit](/api-reference/endpoints/sandbox-deposits/create-sandbox-deposit).
For most setups, use the assets you can trade, transfer or withdraw for testing.
# Overview
Source: https://docs.sandbox.paxos.com/guides/settlements/index
Propose, approve and manage two-way atomic transfers.
Use the Settlements API to facilitate simultaneous exchange of pre-funded assets.
Automate a variety of use cases that require two-party approval, including
net settlement of over-the-counter trades, withdrawal requests for tri-party collateral, payment requests, and bilateral settlement for marketplace end users.
The simple request-and-approval workflow supports both one-directional and bidirectional transactions to allow a user to receive an asset (for example, send USDP) or simultaneously send and receive assets (for example, send USD and receive BTC and ETH).
Only when all parties are in agreement and assets are fully funded does the Settlements API allow for change of custody.
Upon completion, all settled assets are immediately available for trading, transferring, withdrawal or other supported activities.
## Settlement Workflow
The settlement workflow requires two parties to complete: The Source Profile owner who [initiates](/api-reference/endpoints/settlement/create-transaction) the transaction and the Target Profile owner who [approves](/api-reference/endpoints/settlement/affirm-transaction) the transaction.
Most integrations follow a similar workflow:
1. Both parties agree on the transaction details and share counterparty Profile IDs outside of the Paxos Platform (for example, via email, Telegram, or other application).
2. The Source Profile owner [submits the transaction](/api-reference/endpoints/settlement/create-transaction) to the settlement platform.
3. The Target Profile owner receives a [notification](/guides/settlements/notification), reviews the transaction details and [approves the transaction](/api-reference/endpoints/settlement/affirm-transaction).
4. Both parties fund the associated Profiles via deposits if the requisite balances are not already present.
5. Settlement (movement of assets between Profiles) occurs soon after both parties have sufficient assets on the platform.
6. Once the transaction [settles](/guides/settlements/status), both parties can immediately utilize the new balance.
## Get Started
Set up and complete the settlement workflow in the Sandbox environment.
Learn more about settlement statuses.
Understand how settlement notifications work.
Get answers to common questions about the Settlements API.
# Notifications
Source: https://docs.sandbox.paxos.com/guides/settlements/notification
Understand how settlement notifications work.
By default, each Profile owner receives an email notification when a settlement transaction is [created](/api-reference/endpoints/settlement/create-transaction) and upon each [status](/guides/settlements/status) change.
Currently, only email notifications are supported.
Websocket and desktop notifications are being considered for future releases.
> To test email notifications in Sandbox, contact [Support](https://support.paxos.com) to enable notifications.
All settlement email notifications use the same template:
# Quickstart
Source: https://docs.sandbox.paxos.com/guides/settlements/quickstart
Set up and complete the settlement workflow in the Sandbox environment.
The [settlement workflow](/guides/settlements#workflow) requires [two Profiles](#set-up-profiles), referred to in this guide as Source Profile (`source_profile_id`) and Target Profile (`target_profile_id`).
The Profiles are under the same Sandbox Account for simplicity and to allow completion of the steps with a single [authentication](#authenticate).
This guild also [funds](#fund) the Source Profile with BTC and ETH for the `DELIVER` leg and USD in the Target Profile for the `RECEIVE` leg before [creating the transaction request](#propose).
> Contact your [Entity Manager](/guides/dashboard/roles#entity-manager) or [Support](https://support.paxos.com) if you run into any issues or don't have access to a Sandbox Account.
## 1. Authenticate
Add the `settlement:read_transaction` and `settlement:write_transaction` scopes to your [Sandbox Account](https://dashboard.sandbox.paxos.com) under the [API Management](https://dashboard.sandbox.paxos.com/admin/api) setting and then authenticate in Sandbox using the scopes.
Also include `funding:read_profile` and `funding:write_profile` for creating and funding [Profiles](/api-reference/endpoints/profiles).
```shell highlight={5}
curl --location 'https://oauth.sandbox.paxos.com/oauth2/token' \
--form grant_type=client_credentials \
--form client_id={paxos_client_id} \
--form client_secret={paxos_secret} \
--form scope='settlement:read_transaction settlement:write_transaction funding:read_profile funding:write_profile'
```
Confirm the response includes requisite scopes and save the `access_token` to use in the request authorization header throughout this guide.
```json highlight={3,4}
{
"access_token": "{access_token}",
"expires_in": 3599, // Seconds (59 Minutes and 59 Seconds)
"scope": "settlement:read_transaction settlement:write_transaction funding:read_profile funding:write_profile",
"token_type": "bearer"
}
```
## 2. Set Up Profiles
[Create](/api-reference/endpoints/profiles/create-profile) two new Profiles in the Sandbox Account, one with `Source Profile` and the second with `Target Profile` as the `nickname`.
### Create Source Profile
```shell highlight={4}
curl --location 'https://api.sandbox.paxos.com/v2/profiles' \
--header 'Authorization: Bearer {access_token}' \
--data '{
"nickname": "Source Profile"
}'
```
You will need the `id` from the response to [fund the Profile](#fund) and [propose a transaction](#propose).
```json highlight={2}
{
"id": "{profile_id}", // The source_profile_id in the Transaction object
"nickname": "Source Profile",
"type": "NORMAL"
}
```
### Create Target Profile
```shell highlight={4}
curl --location 'https://api.sandbox.paxos.com/v2/profiles' \
--header 'Authorization: Bearer {access_token}' \
--data '{
"nickname": "Target Profile"
}'
```
You will need the `id` from the response to [fund the Profile](#fund) and [propose a transaction](#propose).
```json highlight={2}
{
"id": "{profile_id}", // The target_profile_id in the Transaction object
"nickname": "Target Profile",
"type": "NORMAL"
}
```
## 3. Fund Profiles
Next, use [Create Sandbox Deposit](/api-reference/endpoints/sandbox-deposits/create-sandbox-deposit) to fund the Profiles.
This guide pre-funds all accounts prior to [creating a settlement request](#propose) for simplicity.
However, it is possible to create and approve a settlement request [before the funds are available](/guides/settlements/faq#assets).
### Fund Source Profile
Deposit crypto into the Source Profile.
First, Bitcoin:
```shell
curl --location 'https://api.sandbox.paxos.com/v2/sandbox/profiles/{profile_id}' \
--header 'Authorization: Bearer {access_token}' \
--data '
{
"asset": "BTC",
"amount": "2",
"crypto_network": "BITCOIN"
}'
```
Then add some Ethereum:
```shell
curl --location 'https://api.sandbox.paxos.com/v2/sandbox/profiles/{profile_id}' \
--header 'Authorization: Bearer {access_token}' \
--data '
{
"asset": "ETH",
"amount": "10",
"crypto_network": "ETHEREUM"
}'
```
Use [List Profile Balances](/api-reference/endpoints/profiles/list-profile-balances) to retrieve the Source Profile balance.
Include the `assets` query parameter to filter out all other assets.
```shell
curl --location 'https://api.sandbox.paxos.com/v2/profiles/{profile_id}/balances?assets=BTC&assets=ETH' \
--header 'Authorization: Bearer {access_token}'
```
Confirm the Source Profile has at least 1 BTC and 5 ETH available for trading.
```json highlight={5,10}
{
"items": [
{
"asset": "BTC",
"available": "2",
"trading": "0"
},
{
"asset": "ETH",
"available": "10",
"trading": "0"
}
]
}
```
### Fund Target Profile
Deposit USD into the Target Profile.
```shell
curl --location 'https://api.sandbox.paxos.com/v2/sandbox/profiles/{profile_id}' \
--header 'Authorization: Bearer {access_token}' \
--data '
{
"asset": "USD",
"amount": "100000"
}'
```
Use [Get Profile Balance](/api-reference/endpoints/profiles/get-profile-balance) to retrieve the Target Profile USD balance.
```shell
curl --location 'https://api.sandbox.paxos.com/v2/profiles/{profile_id}/balances/USD' \
--header 'Authorization: Bearer {access_token}'
```
Confirm the Target Profile has at least \$50,000 USD available for trading.
```json highlight={3}
{
"asset": "USD",
"available": "100000",
"trading": "0"
}
```
## 4. Propose Transaction
Using the Source Profile and Target Profile `profile_id` [created earlier](#set-up-profiles), use [Create Transaction](/api-reference/endpoints/settlement/create-transaction) to propose exchanging 1 BTC and 5 ETH (in the Source Profile balance) for \$50,000 USD (in the Target Profile balance). The `ref_id` must be unique. The settlement window defaults apply if `settlement_window_start` and/or `settlement_window_end` are not specified.
```shell highlight={4,5,6}
curl --location 'https://api.sandbox.paxos.com/v2/settlement/transactions' \
--header 'Authorization: Bearer {access_token}' \
--data '{
"ref_id": "required_idempotence_id",
"settlement_window_start": "YYYY-MM-DDT00:00:00Z",
"settlement_window_end": "YYYY-MM-DDT00:00:00Z",
"source_profile_id": "{profile_id}",
"target_profile_id": "{profile_id}",
"legs": [
{
"direction": "DELIVER",
"asset": "BTC",
"amount": "1.00"
},
{
"direction": "DELIVER",
"asset": "ETH",
"amount": "5"
},
{
"direction": "RECEIVE",
"asset": "USD",
"amount": "50000.00"
}
]
}'
```
The acknowledgement response confirms the request has been received and provides the `Transaction` object.
The unique transaction `id` is used to [approve](#approve) and [retrieve](#check-status) the transaction, and the Source Profile owner can use the `id` to [cancel](/api-reference/endpoints/settlement/cancel-transaction) the `PENDING` transaction.
The transaction [status](/guides/settlements/status) can be used by either party to [retrieve a list of filtered transactions](/guides/settlements/status#list-transactions).
```json highlight={2,28}
{
"id": "{unique_transaction_id}",
"ref_id": "required_idempotence_id",
"settlement_window_start": "YYYY-MM-DDT00:00:00Z", // Defaults to current time
"settlement_window_end": "YYYY-MM-DDT00:00:00Z", // Defaults to settlement_window_start plus 24 hours
"source_profile_id": "{profile_id}",
"target_profile_id": "{profile_id}",
"legs": [
{
"id": "{unique_leg_1_id}",
"direction": "DELIVER", // From Source Profile
"asset": "BTC",
"amount": "1"
},
{
"id": "{unique_leg_2_id}",
"direction": "DELIVER", // From Source Profile
"asset": "ETH",
"amount": "5"
},
{
"id": "{unique_leg_3_id}",
"direction": "RECEIVE", // From Target Profile
"asset": "USD",
"amount": "50000"
}
],
"status": "PENDING",
"created_at": "YYYY-MM-DDT00:00:00Z",
"updated_at": "YYYY-MM-DDT00:00:00Z"
}
```
## 5. Approve Transaction
The Target Profile owner [approves (affirms)](/api-reference/endpoints/settlement/affirm-transaction) the transaction.
Since the same Paxos Account is used for both counterparty Profiles in this guide, you can use the same [authentication](#authenticate).
Use the `Transaction.id` from the [propose step](#propose) as the `transaction_id`.
You can also [look up a transaction by status](/guides/settlements/status#list-transactions) to find the `id`.
```shell
curl --location --request PUT 'https://api.sandbox.paxos.com/v2/settlement/transactions/{transaction_id}/affirm' \
--header 'Authorization: Bearer {access_token}'
```
The acknowledgement response includes transaction information and the `AFFIRMED` [status](/guides/settlements/status) and `updated_at` timestamp.
```json highlight={8,10}
{
"id": "{unique_transaction_id}",
"ref_id": "required_idempotence_id",
"settlement_window_start": "YYYY-MM-DDT00:00:00Z",
"settlement_window_end": "YYYY-MM-DDT00:00:00Z",
"source_profile_id": "{profile_id}",
"target_profile_id": "{profile_id}",
"status": "AFFIRMED",
"created_at": "YYYY-MM-DDT00:00:00Z",
"updated_at": "YYYY-MM-DDT00:00:00Z"
}
```
## 6. Check Transaction Status
Settlement of the `AFFIRMED` transaction occurs only when both counterparties fully fund their Profiles.
Since both Profiles in this guide are [pre-funded](#set-up-profiles), the transaction settled within a few seconds.
Either party can use [Get Transaction](/api-reference/endpoints/settlement/get-transaction) to check the [status](/guides/settlements/status).
```shell
curl --location 'https://api.sandbox.paxos.com/v2/settlement/transactions/{transaction_id}' \
--header 'Authorization: Bearer {access_token}'
```
The response includes the complete `Transaction` object.
When the transaction completes, the [status](/guides/settlements/status) and `updated_at` timestamp reflect the most recent activity.
```json highlight={28,30}
{
"id": "{unique_transaction_id}",
"ref_id": "required_idempotence_id",
"settlement_window_start": "YYYY-MM-DDT00:00:00Z",
"settlement_window_end": "YYYY-MM-DDT00:00:00Z",
"source_profile_id": "{profile_id}",
"target_profile_id": "{profile_id}",
"legs": [
{
"id": "{unique_leg_1_id}",
"direction": "DELIVER",
"asset": "BTC",
"amount": "1"
},
{
"id": "{unique_leg_2_id}",
"direction": "DELIVER",
"asset": "ETH",
"amount": "5"
},
{
"id": "{unique_leg_3_id}",
"direction": "RECEIVE",
"asset": "USD",
"amount": "50000"
}
],
"status": "SETTLED",
"created_at": "YYYY-MM-DDT00:00:00Z",
"updated_at": "YYYY-MM-DDT00:00:00Z"
}
```
## Next Steps
* Create a settlement transaction before funding the Profiles.
* Learn more in the Settlements [FAQ](/guides/settlements/faq).
* Explore settlement methods and objects in the [Settlements API](/api-reference/endpoints/settlement).
# Statuses
Source: https://docs.sandbox.paxos.com/guides/settlements/status
Learn more about settlement statuses.
The [settlement workflow](/guides/settlements/index#workflow) includes five statuses:
* `PENDING`: Initial state of a settlement transaction upon creation by the Source Profile owner (`source_profile_id`).
* `AFFIRMED`: The settlement transaction has been approved by the Target Profile owner (`target_profile_id`) and will be eligible for settlement once within the transaction window (`settlement_window_start` → `settlement_window_end`).
* `SETTLED`: The assets in the transaction have successfully been transferred.
* `EXPIRED`: The settlement transaction is no longer eligible for settlement.
* `CANCELED`: The settlement transaction was canceled by the Source Profile owner.
When a settlement transactions is [created](/api-reference/endpoints/settlement/create-transaction), it starts in `PENDING` status.
The assets do not need to be available in the Profiles at this stage.
In the `PENDING` state, two actions can be taken:
* The Source Profile owner [cancels](/api-reference/endpoints/settlement/cancel-transaction) the transaction. Status transitions to `CANCELLED`.
* The Target Profile owner [approves](/api-reference/endpoints/settlement/affirm-transaction) the transaction. Status transitions to `AFFIRMED`.
Once the required asset balances are in the respective Profiles, settlement occurs. Status transactions to `SETTLED` when complete.
```mermaid
flowchart LR
A[PENDING] ==> | Target Profile owner approves | B[AFFIRMED] ==>C[SETTLED]
A --> | Settlement window expires | D[EXPIRED]
A --> | Source Profile owner cancels | E[CANCELLED]
B --> D
```
Transactions in the `PENDING` or `AFFIRMED` state at the end of the settlement window (`settlement_window_end`) automatically transition to `EXPIRED`.
## Find Transactions by Status
Either involved party can use [List Transactions](/api-reference/endpoints/settlement/list-transactions) to retrieve all the transactions they are counterparty to.
Use the `statuses` query parameter to filter based on status.
You must specify the `limit` of items per page or an error returns.
```shell
curl --location 'https://api.sandbox.paxos.com/v2/settlement/transactions?statuses=PENDING&statuses=AFFIRMED&limit=2' \
--header 'Authorization: Bearer {access_token}'
```
Based on the request parameters, the response contains the two most recent open transactions.
```json highlight={30,61,66}
{
"items": [
{
"id": "{unique_transaction_id}",
"ref_id": "required_idempotence_id_1",
"settlement_window_start": "YYYY-MM-DDT00:00:00Z",
"settlement_window_end": "YYYY-MM-DDT00:00:00Z",
"source_profile_id": "{profile_id}",
"target_profile_id": "{profile_id}",
"legs": [
{
"id": "{unique_leg_1_id}",
"direction": "DELIVER",
"asset": "BTC",
"amount": "1"
},
{
"id": "{unique_leg_2_id}",
"direction": "DELIVER",
"asset": "ETH",
"amount": "5"
},
{
"id": "{unique_leg_3_id}",
"direction": "RECEIVE",
"asset": "USD",
"amount": "40000"
}
],
"status": "PENDING",
"created_at": "YYYY-MM-DDT00:00:00Z",
"updated_at": "YYYY-MM-DDT00:00:00Z"
},
{
"id": "{unique_transaction_id}",
"ref_id": "required_idempotence_id",
"settlement_window_start": "YYYY-MM-DDT00:00:00Z",
"settlement_window_end": "YYYY-MM-DDT00:00:00Z",
"source_profile_id": "{profile_id}",
"target_profile_id": "{profile_id}",
"legs": [
{
"id": "{unique_leg_1_id}",
"direction": "DELIVER",
"asset": "BTC",
"amount": "1"
},
{
"id": "{unique_leg_2_id}",
"direction": "DELIVER",
"asset": "ETH",
"amount": "5"
},
{
"id": "{unique_leg_3_id}",
"direction": "RECEIVE",
"asset": "USD",
"amount": "40000"
}
],
"status": "AFFIRMED",
"created_at": "YYYY-MM-DDT00:00:00Z",
"updated_at": "YYYY-MM-DDT00:00:00Z"
}
],
"next_page_cursor": "{page_cursor_value}"
}
```
To view more items, add the `page_cursor` query parameter to the request.
```shell highlight={1}
curl --location 'https://api.sandbox.paxos.com/v2/settlement/transactions?limit=2&page_cursor={page_cursor_value}' \
--header 'Authorization: Bearer {access_token}'
```
# BUSD
Source: https://docs.sandbox.paxos.com/guides/stablecoin/busd
Redeem or convert BUSD on the Paxos platform.
Paxos no longer mints new BUSD, but allows customers to redeem BUSD for USD or convert their BUSD to USDP.
Read the [Paxos statement on BUSD](https://paxos.com/2023/02/13/paxos-will-halt-minting-new-busd-tokens/).
> **Questions?** [Contact the Stablecoin Team](https://support.paxos.com).
# Stablecoins
Source: https://docs.sandbox.paxos.com/guides/stablecoin/index
Use Paxos-issued stablecoins for payments, money movement and more.
Paxos provides regulated, trustworthy stablecoins to make it easy for any blockchain application to add a trusted stablecoin to their product.
> See the [Paxos Developer Guides](/guides/developer) to [mint](/guides/developer/mint), [redeem](/guides/developer/redeem) and [convert](/guides/developer/convert) Paxos-issued stablecoins on the platform. **Questions?** [Contact the Stablecoin Team](https://support.paxos.com).
## Global Dollar (USDG)
[Global Dollar (USDG)](/guides/stablecoin/usdg) is a single-currency stablecoin (SCS) pegged to the US dollar, issued by Paxos Digital Singapore Pte. Ltd. (PDS) and is compliant with the Monetary Authority of Singapore's (MAS) forthcoming stablecoin framework.
Built for payments, settlements and treasury, USDG can be used as an interoperable building block for open-source smart contracts, enabling developers to create new use-cases, products and services with USDG.
All cash and cash equivalent reserve assets are held in segregated accounts to protect user assets.
USDG is available for purchase and fully redeemable from Paxos on a one-to-one basis for US dollars (1 USDG = 1 USD).
## Pax Dollar (USDP)
[Pax Dollar (USDP)](/guides/stablecoin/usdp), issued by Paxos Trust Company, LLC (Paxos), is an open, U.S. dollar-denominated stablecoin.
USDP reserves are held 100% in cash and cash equivalents.
Available on multiple blockchains, USDP offers near-instant global settlements, low to no-cost transactions, and can be integrated with the most widely used exchanges, wallets, and dApps.
USDP is always fully redeemable from Paxos on a one-to-one basis for US dollars (1 USDP = 1 USD).
## PayPal USD (PYUSD)
[PayPal USD (PYUSD)](/guides/stablecoin/pyusd), issued by Paxos Trust Company, LLC (Paxos), is an open, fully backed, U.S. dollar-denominated stablecoin designed for payments.
Available on multiple blockchains, PYUSD offers near-instant global settlements, low to no-cost transactions, and can be integrated with the most widely used exchanges, wallets, and dApps.
The stablecoin is also used to power a number of use cases, including cross-border P2P payments, B2B transfers, global payouts, microtransactions and web3 payments.
## Regulation and Transparency
Paxos is committed to building trust in digital assets with regulated blockchain infrastructure and regulated, fully-backed USD stablecoins.
The monthly reserve reports ensure full transparency and the reliability of our financial data.
Read the [transparency reports](https://paxos.com/regulation-and-transparency/).
# Integrate with PYUSD on Ethereum
Source: https://docs.sandbox.paxos.com/guides/stablecoin/integrate-pyusd
The steps to integrate PYUSD on your platform are similar to executing smart contract functions for other ERC20 tokens.
A minimally viable implementation of PYUSD must:
* Allow the recipient to create an Ethereum wallet address to receive PYUSD tokens.
* Monitor the PYUSD main network address for transfers to the recipient's wallet address.
* Appropriately credit the user's balance upon confirmed transfers.
* Allow the user to transfer PYUSD tokens back to Paxos and PayPal using the contract's `transfer` or `transferFrom` functions.
When using `transferFrom`, we recommend using the `increaseApproval` and `decreaseApproval` functions rather than `approve`.
This avoids a [well known attack vector](https://github.com/ethereum/ercs/blob/master/ERCS/erc-20.md) in the standard `approve` function.
# PYUSD Overview
Source: https://docs.sandbox.paxos.com/guides/stablecoin/pyusd/index
Use PayPal USD as the payments layer to build new services and products on public blockchains.
PayPal USD (PYUSD), issued by Paxos Trust Company, LLC (Paxos), is an open, fully backed, U.S. dollar-denominated stablecoin designed for payments.
Available on multiple blockchains, PYUSD offers near-instant global settlements, low to no-cost transactions, and can be integrated with the most widely used exchanges, wallets, and dApps.
The stablecoin is also used to power a number of use cases, including cross-border P2P payments, B2B transfers, global payouts, microtransactions and web3 payments.
> See the [Paxos Developer Guides](/) to [mint](/guides/developer/mint), [redeem](/guides/developer/redeem) and [convert](/guides/developer/convert) PYUSD on the Paxos platform. **Questions?** [Contact the Stablecoin Team](https://support.paxos.com).
## PYUSD Transparency
PayPal and Paxos are committed to ensuring the public availability of reports on the PYUSD reserve assets.
To ensure transparency on PYUSD reserve assets, Paxos publishes monthly reports on reserve composition as well as attestations reports issued by an independent third-party accounting firm. See the [PYUSD transparency reports](https://paxos.com/pyusd-transparency/).
# PYUSD on Main Networks
Source: https://docs.sandbox.paxos.com/guides/stablecoin/pyusd/mainnet
Get the PYUSD mainnet addresses.
Tokens on mainnet blockchains have financial value.
Never test on mainnet blockchains.
| Network | Token Address |
| ------------------- | --------------------------------------------------------------------------------------------------------------------- |
| Ethereum Mainnet | [0x6c3ea9036406852006290770BEdFcAbA0e23A0e8](https://etherscan.io/token/0x6c3ea9036406852006290770bedfcaba0e23a0e8) |
| Solana Mainnet Beta | [2b1kV6DkPAnxd5ixfnxCpjxmKwqjjaYmCZfHsFu24GXo](https://solscan.io/token/2b1kV6DkPAnxd5ixfnxCpjxmKwqjjaYmCZfHsFu24GXo) |
# PYUSD on Test Networks
Source: https://docs.sandbox.paxos.com/guides/stablecoin/pyusd/testnet
Get the PYUSD testnet addresses.
Testnet tokens have no value! Only use these for testing purposes.
| Test Network | Token Address |
| ------------------------ | ------------------------------------------------------------------------------------------------------------------------------------ |
| Ethereum Sepolia Testnet | [0xCaC524BcA292aaade2DF8A05cC58F0a65B1B3bB9](https://sepolia.etherscan.io/token/0xcac524bca292aaade2df8a05cc58f0a65b1b3bb9) |
| Solana Devnet | [CXk2AMBfi3TwaEL2468s6zP8xq9NxTXjp9gjMgzeUynM](https://solscan.io/token/CXk2AMBfi3TwaEL2468s6zP8xq9NxTXjp9gjMgzeUynM?cluster=devnet) |
# USDG Overview
Source: https://docs.sandbox.paxos.com/guides/stablecoin/usdg/index
Use Global Dollar for payments, settlements, treasury and more.
Global Dollar (USDG) is a single-currency stablecoin (SCS) pegged to the US dollar, issued by Paxos Digital Singapore Pte. Ltd. (PDS) and is compliant with the Monetary Authority of Singapore's (MAS) forthcoming stablecoin framework.
Built for payments, settlements and treasury, USDG can be used as an interoperable building block for open-source smart contracts, enabling developers to create new use-cases, products and services with USDG.
All cash and cash equivalent reserve assets are held in segregated accounts to protect user assets.
USDG is available for purchase and fully redeemable from Paxos on a one-to-one basis for US dollars (1 USDG = 1 USD).
> See the [Paxos Developer Guides](/) to [mint](/guides/developer/mint), [redeem](/guides/developer/redeem) and [convert](/guides/developer/convert) USDG on the Paxos platform. **Questions?** [Contact the Stablecoin Team](https://support.paxos.com).
## USDG Transparency
Paxos is committed to ensuring the public availability of reports on the USDG reserve assets.
To ensure transparency on USDG reserve assets, Paxos publishes monthly reports on reserve composition as well as attestations reports issued by an independent third-party accounting firm. See the [USDG transparency reports](https://paxos.com/usdg-transparency/).
# USDG on Main Networks
Source: https://docs.sandbox.paxos.com/guides/stablecoin/usdg/mainnet
Get the USDG token addresses.
Tokens on mainnet blockchains have financial value.
Never test on mainnet blockchains.
| Network | Token Address |
| ------------------- | --------------------------------------------------------------------------------------------------------------------- |
| Ethereum Mainnet | [0xe343167631d89B6Ffc58B88d6b7fB0228795491D](https://etherscan.io/address/0xe343167631d89B6Ffc58B88d6b7fB0228795491D) |
| Solana Mainnet Beta | [2u1tszSeqZ3qBWF3uNGPFc8TzMk2tdiwknnRMWGWjGWH](https://solscan.io/token/2u1tszSeqZ3qBWF3uNGPFc8TzMk2tdiwknnRMWGWjGWH) |
# Getting Started with USDG (Global Dollar)
Source: https://docs.sandbox.paxos.com/guides/stablecoin/usdg/quickstart
How to Access USDG.
USDG is a regulated, US dollar-backed stablecoin issued by Paxos Digital Singapore (PDS) under the Monetary Authority of Singapore (MAS). Each USDG token is always redeemable 1:1 for USD.
### Key Features
* **Regulated & Transparent:** Issued under the MAS framework, with monthly attestation reports.
* **1:1 USD Backing:** Every token is backed by USD held in segregated accounts.
* **Multi-Chain:** Available on Ethereum and Solana networks.
### Getting Started with USDG
1. Create a Paxos Institutional Account
* Visit [dashboard.paxos.com](https://dashboard.paxos.com/) ([How to sign up](/guides/dashboard/account))
* Click **"Become a partner of the Global Dollar Network"**
* Complete the onboarding process
2. **Submit Required Documentation** ([Onboarding requirements](/guides/dashboard/onboard))
* Organizational documents
* Identification for key personnel
* KYC verification
3. **Start Using USDG** ([How to mint USDG](/guides/dashboard/mint))
* Mint USDG directly from USD via the Paxos Dashboard
* Monitor holdings and transactions in real time
### Need Help?
* Technical Support: [support.paxos.com](https://support.paxos.com)
* Transparency Reports: [paxos.com/usdg-transparency](https://paxos.com/usdg-transparency)
# USDG on Test Networks
Source: https://docs.sandbox.paxos.com/guides/stablecoin/usdg/testnet
Get the USDG token addresses.
Testnet tokens have no value! Only use these for testing purposes.
| Test Network | Token Address |
| ------------------------ | ------------------------------------------------------------------------------------------------------------------------------------ |
| Ethereum Sepolia Testnet | [0xfBb2A78CceEb415b00300925e464C3E44E6e06b0](https://sepolia.etherscan.io/address/0xfBb2A78CceEb415b00300925e464C3E44E6e06b0) |
| Solana Devnet | [4F6PM96JJxngmHnZLBh9n58RH4aTVNWvDs2nuwrT5BP7](https://solscan.io/token/4F6PM96JJxngmHnZLBh9n58RH4aTVNWvDs2nuwrT5BP7?cluster=devnet) |
# USDL Overview
Source: https://docs.sandbox.paxos.com/guides/stablecoin/usdl/index
Use Lift Dollar for payments, settlements and treasury while earning on-chain yield.
[USDL](https://liftdollar.com) is a US dollar-backed stablecoin that distributes yield to its holders every day.
USDL reserves are held in short-term, highly liquid assets.
USDL can always be redeemed at a rate of **1 USDL = 1 US dollar**.
The token is issued by Paxos Issuance MENA Ltd. (Paxos International), which is regulated by the Financial Services Regulatory Authority ([FSRA](https://www.adgm.com/financial-services-regulatory-authority)) of the Abu Dhabi Global Market ([ADGM](https://www.adgm.com/)).
**Restrictions**
Lift Dollar (USDL) exists to open access to US dollars that earn yield safely, but it is not available to residents of the US and certain other countries.
[Please refer to the Terms and Conditions here for more information](https://liftdollar.com/terms-and-conditions/).
> See the [Paxos Developer Guides](/) to [mint](/guides/developer/mint), [redeem](/guides/developer/redeem) and [convert](/guides/developer/convert) USDL on the Paxos platform. **Questions?** [Contact the Stablecoin Team](https://support.paxos.com).
## USDL Transparency
Paxos is committed to ensuring the public availability of reports on the USDL reserve assets.
To ensure transparency on USDL reserve assets, Paxos publishes monthly reports on reserve composition as well as attestations reports issued by an independent third-party accounting firm. See the [USDL transparency reports](https://liftdollar.com/transparency/).
# USDL on Main Networks
Source: https://docs.sandbox.paxos.com/guides/stablecoin/usdl/mainnet
Get the USDL token addresses.
Tokens on mainnet blockchains have financial value.
Never test on mainnet blockchains.
| Network | Token Address |
| -------------------- | ------------------------------------------------------------------------------------------------------------------- |
| Ethereum Mainnet | [0xbdC7c08592Ee4aa51D06C27Ee23D5087D65aDbcD](https://etherscan.io/token/0xbdC7c08592Ee4aa51D06C27Ee23D5087D65aDbcD) |
| Arbitrum One Mainnet | [0x7f850b0ab1988dd17b69ac564c1e2857949e4dee](https://arbiscan.io/token/0x7f850b0ab1988dd17b69ac564c1e2857949e4dee) |
# USDL on Test Networks
Source: https://docs.sandbox.paxos.com/guides/stablecoin/usdl/testnet
Get the USDL token addresses.
Testnet tokens have no value! Only use these for testing purposes.
| Test Network | Token Address |
| ---------------------------- | --------------------------------------------------------------------------------------------------------------------------- |
| Ethereum Sepolia Testnet | [0xB1cedD9786e8E7d47Bbe8dc3689882cc836197Ec](https://sepolia.etherscan.io/token/0xB1cedD9786e8E7d47Bbe8dc3689882cc836197Ec) |
| Arbitrum One Sepolia Testnet | [0xeba9ad3D5811580aA2281Ff88cf5Af4fCF3426Eb](https://sepolia.arbiscan.io/token/0xeba9ad3D5811580aA2281Ff88cf5Af4fCF3426Eb) |
# USDP Overview
Source: https://docs.sandbox.paxos.com/guides/stablecoin/usdp/index
Learn more about the Fully backed, legally protected, always available Pax Dollar.
Pax Dollar (USDP), issued by Paxos Trust Company, LLC (Paxos), is an open, U.S. dollar-denominated stablecoin.
USDP reserves are held 100% in cash and cash equivalents.
Available on multiple blockchains, USDP offers near-instant global settlements, low to no-cost transactions, and can be integrated with the most widely used exchanges, wallets, and dApps.
USDP is always fully redeemable from Paxos on a one-to-one basis for US dollars (1 USDP = 1 USD).
> See the [Paxos Developer Guides](/) to [mint](/guides/developer/mint), [redeem](/guides/developer/redeem) and [convert](/guides/developer/convert) USDP on the Paxos platform. **Questions?** [Contact the Stablecoin Team](https://support.paxos.com).
## USDP Transparency
Paxos is committed to ensuring the public availability of reports on the USDP reserve assets.
Paxos publishes monthly reports on reserve composition as well as attestations reports issued by an independent third-party accounting firm. See the [USDP transparency reports](https://paxos.com/usdp-transparency/).
# USDP on Main Networks
Source: https://docs.sandbox.paxos.com/guides/stablecoin/usdp/mainnet
Get the USDP mainnet addresses.
Tokens on mainnet blockchains have financial value.
Never test on mainnet blockchains.
| Network | Contract Address |
| ------------------- | -------------------------------------------------------------------------------------------------------------------------------- |
| Ethereum Mainnet | [0x8E870D67F660D95d5be530380D0eC0bd388289E1](https://etherscan.io/token/0x8E870D67F660D95d5be530380D0eC0bd388289E1) |
| Solana Mainnet Beta | [HVbpJAQGNpkgBaYBZQBR1t7yFdvaYVp2vCQQfKKEN4tM](https://explorer.solana.com/address/HVbpJAQGNpkgBaYBZQBR1t7yFdvaYVp2vCQQfKKEN4tM) |
# USDP on Test Networks
Source: https://docs.sandbox.paxos.com/guides/stablecoin/usdp/testnet
Get the USDP testnet addresses.
Testnet tokens have no value! Only use these for testing purposes.
| Test Network | Contract Address |
| ------------------------ | ----------------------------------------------------------------------------------------------------------------------------------------------- |
| Ethereum Sepolia Testnet | [0x513421d7fb6A74AE51f3812826Aa2Db99a68F2C9](https://sepolia.etherscan.io/token/0x513421d7fb6A74AE51f3812826Aa2Db99a68F2C9) |
| Solana Devnet | [G8iheDY9bGix5qCXEitCExLcgZzZrEemngk9cbTR3CQs](https://explorer.solana.com/address/G8iheDY9bGix5qCXEitCExLcgZzZrEemngk9cbTR3CQs?cluster=devnet) |
# Webhooks FAQ
Source: https://docs.sandbox.paxos.com/guides/webhooks/faq
Get answers to common questions about webhooks.
The easiest way to test in Sandbox, once registered, is to use the [CreateIdentity](/api-reference/endpoints/identity/create-identity) API to create a new identity.
If your sandbox consumer is registered and setup correctly, you should see an `identity.approved` event. Reach out to
[Support](https://support.paxos.com) if you do not see the message.
If your consumer failed to process a message, Paxos will attempt to retry for up to 24 hours, read the full [retry policy](/guides/webhooks/retries-and-limits#retry-policy) for more information.
After this you can use the [List Events](/api-reference/endpoints/events/list-events) API to fetch undelivered events and process them.
Yes, webhook invocations to your consumer endpoint are rate-limited to 10 per second by default. If you need higher throughput, please contact [Support](https://support.paxos.com) to discuss increasing your rate limits. For more information, see our [rate limits documentation](/guides/webhooks/retries-and-limits#rate-limits).
# Overview
Source: https://docs.sandbox.paxos.com/guides/webhooks/index
Webhooks provide a way for notifications to be delivered to an external web server whenever certain events occur.
Paxos Webhooks allow you to register your own endpoints to receive asynchronous events driven by the Paxos Platform.
Current webhook use-cases are restricted to [Identity Events](/api-reference/events), with more event types to follow. To get started, you will need to:
1. Set up a [webhook consumer](/guides/webhooks/quickstart) for Paxos webhook events, which is an HTTP POST endpoint that accepts and processes [events](/api-reference/events).
2. Test the webhook consumer by sending a test event to your endpoint.
3. Secure the endpoint using either API key or OAuth-based authentication.
4. Contact [Support](https://support.paxos.com) to go through webhook registration, specifying which [events](/api-reference/events) you would like to receive and process.
For information about webhook delivery, retry policies, and rate limits, see the [Retries and Limits](/guides/webhooks/retries-and-limits) guide.
# Get Started with Webhooks
Source: https://docs.sandbox.paxos.com/guides/webhooks/quickstart
Create and register a webhook consumer to start receiving events.
This guide walks you through setting up a webhook consumer that can integrate with Paxos to receive events that occur on
the platform. Once completed you should have a webhook consumer, tested locally, and be ready to integrate and test in sandbox;
this guide should take less than an hour to complete.
## ➊ Create a Webhook Consumer
To receive Paxos events, set up your webhook consumer that receives events as an HTTP/HTTPS POST endpoint using your language and tools of choice.
```go title="paxos_webhook_consumer.go"
http.HandleFunc("/webhook/paxos", func(w http.ResponseWriter, req *http.Request) {
payload, err := io.ReadAll(req.Body)
if err != nil {
fmt.Fprintf(os.Stderr, "error reading request body %v\n", err)
w.WriteHeader(http.StatusServiceUnavailable)
return
}
event := paxos.Event{}
if err = json.Unmarshal(payload, &event); err != nil {
fmt.Fprintf(os.Stderr, "error parsing webhook event: %v\n", err)
w.WriteHeader(http.StatusBadRequest)
return
}
// Unmarshal the event data into an appropriate struct depending on its Type
switch event.Type {
case "identity.approved":
fmt.Printf("received documents required event: %v\n, processing...", event)
// process documents required event
}
})
```
```clike title="WebhookServlet.java"
public class WebhookServlet extends HttpServlet {
private final ObjectMapper objectMapper = new ObjectMapper();
@Override
protected void doPost(HttpServletRequest req, HttpServletResponse resp) throws ServletException, IOException {
try {
PaxosEvent event = objectMapper.readValue(req.getInputStream(), PaxosEvent.class);
// Unmarshal the event data into an appropriate struct depending on its Type
switch (event.type()) {
case "identity.documents_required":
System.out.printf("received documents required event: %s, processing...%n", event);
// process documents required event
break;
default:
System.out.printf("received unknown event type: %s%n", event.type());
break;
}
} catch (IOException e) {
System.err.printf("error reading request body: %s%n", e.getMessage());
resp.setStatus(HttpServletResponse.SC_SERVICE_UNAVAILABLE);
} catch (Exception e) {
System.err.printf("error parsing webhook event: %s%n", e.getMessage());
resp.setStatus(HttpServletResponse.SC_BAD_REQUEST);
}
}
}
```
```python title="paxos_webhook_consumer.py"
# using django
@csrf_exempt
def paxos_webhook(request):
if request.method != 'POST':
return HttpResponse(status=405)
try:
payload = json.loads(request.body)
event_type = payload.get('type')
# Unmarshal the event data into an appropriate struct depending on its Type
if event_type == 'identity.documents_required':
print(f"received documents required event: {payload}, processing...")
# process documents required event
else:
print(f"received unknown event type: {event_type}")
return HttpResponse(status=200)
except json.JSONDecodeError as e:
print(f"error parsing webhook event: {e}")
return HttpResponse(status=400)
except Exception as e:
print(f"error reading request body: {e}")
return HttpResponse(status=503)
```
We are currently working on providing client libraries for the Paxos event object. In the meantime, please directly use the definition below:
```go title="paxos/event.go"
package paxos
type Event struct {
ID string `json:"id"`
Type string `json:"type"`
Source string `json:"source"`
Time time.Time `json:"time"`
Object string `json:"object"`
}
```
```java title="com/paxos/PaxosEvent.java"
package com.paxos;
import java.time.LocalDateTime;
public record PaxosEvent(
String id,
String type,
String source,
LocalDateTime time,
String object
) {}
```
## ➋ Test the Consumer Locally
While we work on a CLI for testing your consumer locally, please directly test with the provided sample event payload below and
reach out to [Support](https://support.paxos.com) should you require any further assistance setting up your consumer.
The below curl command contains an example event that Paxos will send you when an identity is approved. We do not send
the whole event payload to you in the webhook message, to get the whole payload you will need to integrate with the [Events API](/api-reference/events)
to call [Get Event](/api-reference/endpoints/events/get-event) using the event ID (`id`) provided in the above payload.
```shell
curl -X POST http://localhost:8080/webhook/paxos \
-H "Content-Type: application/json" \
-d '{
"id": "bd019f1c-89a7-4372-9d21-eaad9280dc41",
"type": "identity.approved",
"source": "com.paxos",
"time": "2025-01-07T14:30:02Z",
"object": "event"
}'
```
When running the above, your consumer should receive the event, printing to standard output the below message:
received documents required event: \{bd019f1c-89a7-4372-9d21-eaad9280dc41 identity.approved com.paxos 2025-01-07 14:30:02 +0000 UTC event}
### Webhook Payload Format
| Parameter | Description | Example |
| --------- | ---------------------------------------------------------------------------------------------------------------------------------------------------------------- | -------------------------------------- |
| `id` | The unique identifier of the event. This `id` can be used to fetch the full details of the event from the [Events API](/api-reference/events). | `bd019f1c-89a7-4372-9d21-eaad9280dc41` |
| `type` | The type of the event. More details about available event types can be found on the corresponding events page, such as [Identity Events](/api-reference/events). | `identity.disabled` |
| `source` | The source of the event. This will always be `com.paxos`. | `com.paxos` |
| `time` | The time the event was created. Formatted according to RFC3339 date-time. | `2025-01-01T14:30:02Z` |
| `object` | The object type of the event. This will always be `event`. | `event` |
## ➌ Secure the Consumer
You must secure your consumer's endpoint by authenticating using either:
* **API Key**, a secret key we will include in the header when calling your webhook consumer endpoint. You will need to let us know the API Key Header and the API Key.
* **OAuth**, we will call your OAuth client using the provided client id / key to receive credentials to call your endpoint. You will need to provide us with the OAuth endpoint URL and the Client ID and the Client Secret.
We do not currently support consumer-side signature-verification on our webhook event messages. To keep things secure,
we therefore do not include the full event object in the webhook payload and require you to make an authenticated
request to [Get Event](/api-reference/endpoints/events/get-event) in order to fetch the full event object.
## ➍ Register the Consumer
We're working on supporting self-service registration in [Dashboard](https://dashboard.paxos.com/login), in the meantime please contact [Support](https://support.paxos.com) to initiate webhook registration.
You'll need to let us know:
* Which [event types](/api-reference/events) you would like to receive and process
* Your webhook consumer endpoint URL
* The [authentication method](#secure-the-consumer) of your webhook consumer
* The environment (Sandbox or Prod) you would like to integrate with
# Retries and Limits
Source: https://docs.sandbox.paxos.com/guides/webhooks/retries-and-limits
Learn about webhook delivery retries, retry policies, and rate limits for Paxos webhooks.
## Retry Policy
If your webhook consumer endpoint fails to accept a delivery or returns a retriable error status (anything other than a 2xx response), Paxos will automatically attempt to retry the webhook delivery.
### Retry Schedule
We use an exponential backoff policy with jitter (randomization to avoid retry storms) with the following schedule:
* Initial retry delay: \~5 seconds after initial failure
* Subsequent retries: Increasing intervals with exponential backoff
* Maximum retry duration: 24 hours from the time the event was first invoked
Paxos will continue retry attempts for up to **24 hours** from the initial attempt, unless delivery succeeds. After this period, no additional retry attempts will be made.
### Handling Failed Deliveries
After the 24-hour retry window has elapsed, undelivered events will not be automatically retried. To recover these undelivered events, you can:
1. Use the [List Events](/api-reference/endpoints/events/list-events) API to query for events that may have failed delivery
2. Use the event IDs to fetch the full event details via the [Events API](/api-reference/events)
3. Process these events through your regular webhook handling logic
## Rate Limits
To ensure optimal performance and stability, Paxos implements rate limits on webhook deliveries:
* **Default delivery rate**: Maximum 10 webhook invocations per second per consumer endpoint
If you need higher throughput for your webhook consumer endpoint, please contact [Support](https://support.paxos.com) to discuss increasing your rate limits.
## Best Practices
For optimal webhook processing, we recommend:
1. **Respond quickly**: Your webhook endpoint should acknowledge receipt with a 2xx status code as quickly as possible (ideally \< 500ms)
2. **Process asynchronously**: Acknowledge the webhook immediately, then process the event asynchronously in your application
3. **Implement idempotency**: Design your webhook handlers to be idempotent in case the same event is delivered multiple times
4. **Monitor delivery failures**: Implement monitoring for webhook delivery failures to detect issues early
5. **Implement backup polling**: Establish a periodic job that polls the [Events API](/api-reference/events) as a fallback mechanism for missed webhook events
# Build with Paxos
Source: https://docs.sandbox.paxos.com/welcome
Learn how to get started with the Paxos API and Platform.
Build with{' '}Paxos
Build and integrate with our APIs. Get started with authentication, onboarding, and platform features.
Learn how to use the Paxos Dashboard to manage your platform and users.
Integrate and scale using our API and SDKs.
Learn about changes and new features in the Paxos API and Platform.
Learn about changes and new features in the Paxos API and Platform.
Get contextual help with Paxos APIs using AI assistance built into our documentation.
 4. Enter one or more emails and select a role from the dropdown.
5. Click **Invite Users**
Users are marked as **Active** once they log into the Dashboard.
Entity Managers can also modify User Roles as needed:
1. Go to [**Admin > Team Management>Users**](https://dashboard.paxos.com/admin/team-management/users)
2. Click on the **Edit Role** icon next to a user.
3. Select one or more roles from the dropdown.
4. Click the **Save** icon next to the dropdown.
## SSO-Based Login
4. Enter one or more emails and select a role from the dropdown.
5. Click **Invite Users**
Users are marked as **Active** once they log into the Dashboard.
Entity Managers can also modify User Roles as needed:
1. Go to [**Admin > Team Management>Users**](https://dashboard.paxos.com/admin/team-management/users)
2. Click on the **Edit Role** icon next to a user.
3. Select one or more roles from the dropdown.
4. Click the **Save** icon next to the dropdown.
## SSO-Based Login
 Global Dollar (USDG) is a single-currency stablecoin (SCS) pegged to the US dollar, issued by Paxos Digital Singapore Pte. Ltd. (PDS) and is compliant with the Monetary Authority of Singapore's (MAS) forthcoming stablecoin framework.
Built for payments, settlements and treasury, USDG can be used as an interoperable building block for open-source smart contracts, enabling developers to create new use-cases, products and services with USDG.
All cash and cash equivalent reserve assets are held in segregated accounts to protect user assets.
USDG is available for purchase and fully redeemable from Paxos on a one-to-one basis for US dollars (1 USDG = 1 USD).
> See the [Paxos Developer Guides](/) to [mint](/guides/developer/mint), [redeem](/guides/developer/redeem) and [convert](/guides/developer/convert) USDG on the Paxos platform.
Global Dollar (USDG) is a single-currency stablecoin (SCS) pegged to the US dollar, issued by Paxos Digital Singapore Pte. Ltd. (PDS) and is compliant with the Monetary Authority of Singapore's (MAS) forthcoming stablecoin framework.
Built for payments, settlements and treasury, USDG can be used as an interoperable building block for open-source smart contracts, enabling developers to create new use-cases, products and services with USDG.
All cash and cash equivalent reserve assets are held in segregated accounts to protect user assets.
USDG is available for purchase and fully redeemable from Paxos on a one-to-one basis for US dollars (1 USDG = 1 USD).
> See the [Paxos Developer Guides](/) to [mint](/guides/developer/mint), [redeem](/guides/developer/redeem) and [convert](/guides/developer/convert) USDG on the Paxos platform. [USDL](https://liftdollar.com) is a US dollar-backed stablecoin that distributes yield to its holders every day.
USDL reserves are held in short-term, highly liquid assets.
USDL can always be redeemed at a rate of **1 USDL = 1 US dollar**.
The token is issued by Paxos Issuance MENA Ltd. (Paxos International), which is regulated by the Financial Services Regulatory Authority ([FSRA](https://www.adgm.com/financial-services-regulatory-authority)) of the Abu Dhabi Global Market ([ADGM](https://www.adgm.com/)).
[USDL](https://liftdollar.com) is a US dollar-backed stablecoin that distributes yield to its holders every day.
USDL reserves are held in short-term, highly liquid assets.
USDL can always be redeemed at a rate of **1 USDL = 1 US dollar**.
The token is issued by Paxos Issuance MENA Ltd. (Paxos International), which is regulated by the Financial Services Regulatory Authority ([FSRA](https://www.adgm.com/financial-services-regulatory-authority)) of the Abu Dhabi Global Market ([ADGM](https://www.adgm.com/)).
 Pax Dollar (USDP), issued by Paxos Trust Company, LLC (Paxos), is an open, U.S. dollar-denominated stablecoin.
USDP reserves are held 100% in cash and cash equivalents.
Available on multiple blockchains, USDP offers near-instant global settlements, low to no-cost transactions, and can be integrated with the most widely used exchanges, wallets, and dApps.
USDP is always fully redeemable from Paxos on a one-to-one basis for US dollars (1 USDP = 1 USD).
> See the [Paxos Developer Guides](/) to [mint](/guides/developer/mint), [redeem](/guides/developer/redeem) and [convert](/guides/developer/convert) USDP on the Paxos platform.
Pax Dollar (USDP), issued by Paxos Trust Company, LLC (Paxos), is an open, U.S. dollar-denominated stablecoin.
USDP reserves are held 100% in cash and cash equivalents.
Available on multiple blockchains, USDP offers near-instant global settlements, low to no-cost transactions, and can be integrated with the most widely used exchanges, wallets, and dApps.
USDP is always fully redeemable from Paxos on a one-to-one basis for US dollars (1 USDP = 1 USD).
> See the [Paxos Developer Guides](/) to [mint](/guides/developer/mint), [redeem](/guides/developer/redeem) and [convert](/guides/developer/convert) USDP on the Paxos platform.